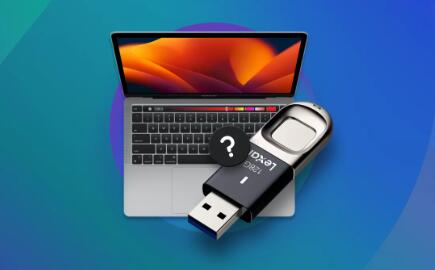
If your USB drive is not recognized by your Mac, it can be frustrating, especially if you need to access important files. There are several potential reasons for this issue, ranging from simple connection problems to more complex hardware or software issues.
1. Basic Checks
1.1. Check the USB Port and Connection
Try Different Ports: Plug your USB drive into a different USB port on your Mac. Sometimes, a specific port might be malfunctioning.
Inspect the USB Drive: Look for any visible damage to the USB connector. If it’s damaged, the drive may need to be repaired or replaced.
Test Another Device: Connect a different USB device to the same port to determine if the port is working properly.

1.2. Restart Your Mac
Simple Restart: Sometimes, a simple restart can resolve recognition issues. Click the Apple logo in the upper-left corner of the screen and select “Restart.”
2. Check System Preferences and Settings
2.1. Check Finder Preferences
Finder Preferences: Open Finder, go to the “Finder” menu, and select “Preferences.”
Sidebar Tab: Under the “Sidebar” tab, make sure “External disks” is checked. This setting controls whether external drives appear in the Finder sidebar.
2.2. Check Disk Utility
Open Disk Utility: Go to Applications > Utilities > Disk Utility.
Check for Drive: Look for your USB drive in the list on the left. If it appears but isn’t mounted, select it and click “Mount.”
Repair Disk: If the drive appears but isn’t mounting, try using the “First Aid” feature to repair the disk.
3. Check for Software Issues
3.1. Update macOS
System Update: Go to Apple menu > System Preferences > Software Update. Install any available updates for macOS, as updates can fix bugs and compatibility issues.
3.2. Check for Driver Issues
Compatibility: While macOS generally doesn’t require additional drivers for USB drives, some external drives might. Check the manufacturer’s website for any available drivers or software updates.
4. Format and Partition Issues
4.1. Check the File System
Compatibility: macOS supports FAT32. exFAT, and APFS (Apple File System). If your USB drive is formatted with a different file system (like NTFS), macOS may not recognize it.
Reformat if Necessary: If you don’t need to recover data, you can reformat the drive using Disk Utility. Be aware that formatting will erase all data on the drive.
4.2. Partition Issues
Check Partitions: Sometimes, the USB drive might be partitioned in a way that macOS doesn’t recognize. Use Disk Utility to view and manage partitions.
5. Hardware Issues
5.1. Test on Another Computer
Check Compatibility: Connect the USB drive to a different computer to see if it’s recognized. This can help determine if the issue is with the drive or your Mac.
5.2. Check for Physical Damage
Inspect the Drive: Look for signs of physical damage to the USB drive or its connector. If the drive is damaged, you may need to replace it or consult a data recovery specialist.
6. Advanced Troubleshooting
6.1. Reset NVRAM/PRAM
Reset NVRAM/PRAM: Sometimes, resetting the NVRAM/PRAM (non-volatile random-access memory/parameter RAM) can resolve recognition issues. To do this, restart your Mac and hold down Option + Command + P + R until you hear the startup chime twice.
6.2. Reset SMC
Reset SMC: The System Management Controller (SMC) can affect hardware functionality. Resetting it might resolve recognition issues. Instructions vary based on your Mac model, so check Apple’s support site for details.
7. Data Recovery
7.1. Use Data Recovery Software
Recovery Tools: If your USB drive is recognized but you can’t access the data, you may need data recovery software. Tools like Disk Drill, Data Rescue, or EaseUS Data Recovery Wizard can help recover lost files.
7.2. Consult a Professional
Data Recovery Services: If the drive is not recognized at all or is physically damaged, consult a professional data recovery service. They have specialized equipment and expertise to recover data from damaged drives.
8. Preventive Measures
8.1. Regular Backups
Backup Strategy: Regularly back up important data to prevent data loss. Use Time Machine, cloud storage, or an external hard drive for backups.
8.2. Safe Ejection
Eject Properly: Always eject USB drives properly before removing them. Right-click the drive in Finder and select “Eject,” or drag the drive icon to the Trash.
A USB drive not being recognized on a Mac can be caused by various factors, from simple connection issues to more complex hardware or software problems. By systematically checking connections, settings, and potential software or hardware issues, you can often resolve the problem. If all else fails, data recovery solutions or professional help might be necessary. Regular backups and proper ejection practices can help prevent similar issues in the future.
About us and this blog
Panda Assistant is built on the latest data recovery algorithms, ensuring that no file is too damaged, too lost, or too corrupted to be recovered.
Request a free quote
We believe that data recovery shouldn’t be a daunting task. That’s why we’ve designed Panda Assistant to be as easy to use as it is powerful. With a few clicks, you can initiate a scan, preview recoverable files, and restore your data all within a matter of minutes.
Subscribe to our newsletter!
More from our blog
See all postsRecent Posts
- How to recover a deleted slide in powerpoint? 2025-02-27
- How to recover deleted capcut videos? 2025-02-27
- How to recover a file deleted from a shared drive? 2025-02-27


