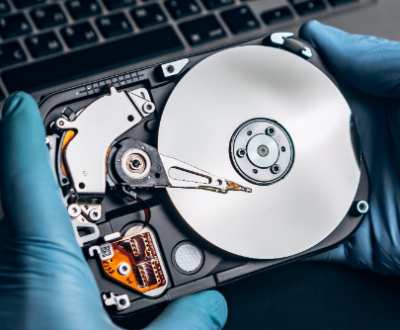
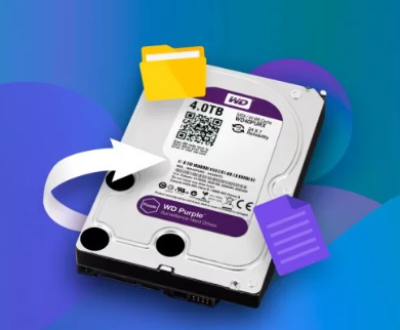
Retrieving permanently deleted files on Windows 10 can seem like a daunting task, but with the right tools and techniques, it is often possible to recover lost data. Whether files have been deleted from the Recycle Bin or removed using Shift + Delete, there are several methods to try, ranging from built-in utilities to specialized third-party software.
1. Permanently Deleted Files
Permanently deleted files are files that have been removed from your computer and cannot be found in the Recycle Bin or any other easily accessible location. This can happen due to several reasons, such as using Shift + Delete to remove files, formatting a disk, or the Recycle Bin being emptied. Despite this, it doesn’t mean that the data is truly gone forever. When a file is deleted, Windows marks the space it occupied as available for new data, but the actual content may still reside on your drive until it is overwritten by new data.

Understanding this is key to improving your chances of successful recovery. In this guide, we’ll examine multiple ways to restore deleted files, depending on your situation.
2. How Data Deletion Works in Windows 10
In Windows 10. when you delete a file, it’s typically moved to the Recycle Bin. This is a temporary storage area where the file remains until the Bin is emptied. However, if you use Shift + Delete to bypass the Recycle Bin or empty the Bin, Windows doesn’t remove the file immediately. Instead, it removes the file’s entry from the file system and marks the space as free for new data. This means that the actual data remains on the disk, and as long as it hasn’t been overwritten by new files, it can still be recovered.
This understanding of how file deletion works lays the foundation for why data recovery is possible, even if files seem to be gone. If no new data has overwritten the space occupied by the deleted files, you can retrieve them using various methods.
3. Why Files Are Not Immediately Gone After Deletion
When files are deleted, the space they occupied on the hard drive is marked as available for new data. However, until new data is written to that space, the original file data remains intact. Windows 10 does not immediately overwrite this data because doing so would reduce the lifespan of your storage drive. This is why it’s possible to recover deleted files if you act quickly before the data gets overwritten.
It’s important to note that the sooner you attempt recovery, the higher your chances of success. If you continue using the computer after deletion, the chances of overwriting the deleted files increase.
4. Method 1: Check the Recycle Bin
The first thing to do when attempting to recover deleted files is to check the Recycle Bin. Often, deleted files end up in the Bin and can be easily restored.
How to Restore Files from the Recycle Bin:
Open the Recycle Bin: Double-click on the Recycle Bin icon on your desktop.
Search for the Deleted Files: Look for the files or folders you want to restore. You can use the search bar if you have a lot of files in the Recycle Bin.
Restore the Files: Right-click on the file and select “Restore.” The file will be restored to its original location on your computer.
If you don’t find the files in the Recycle Bin, it’s likely they were permanently deleted using Shift + Delete or the Recycle Bin was emptied.
5. Method 2: Use File History for Recovery
File History is a backup feature built into Windows 10 that can automatically back up your files, allowing you to restore previous versions if needed. If you’ve set up File History before your files were deleted, you can recover them from a backup.
How to Restore Files Using File History:
Open Settings: Click on the Start menu and select Settings.
Go to Update & Security: Select Update & Security and then click Backup.
Restore Files: Click on More options, and then select Restore files from a current backup. From here, you can browse through older versions of files that were backed up and restore them to their original locations.
If you didn’t have File History enabled, you can move on to the next method.
6. Method 3: Restore from Backup
If you regularly back up your files to an external hard drive or cloud service, you can restore deleted files from your backups.
How to Restore Files from Backup:
Open Settings: Click on Start and select Settings.
Go to Update & Security: Click Update & Security and choose Backup.
Restore Files: If you’re using an external drive, connect it to your computer. You can also restore files from cloud services if they support backup and restore functionality.
7. Method 4: Using Windows 10’s Previous Versions Feature
Windows 10 includes a feature called Previous Versions that allows you to restore earlier versions of files and folders. If System Protection is enabled on your computer, you can recover files even if they were permanently deleted.
How to Use Previous Versions to Recover Files:
Navigate to the Folder: Go to the folder where the deleted file was originally stored.
Right-Click and Choose Properties: Right-click on the folder and select Properties.
Go to the Previous Versions Tab: In the Properties window, click on the Previous Versions tab. This will show you all available restore points for that folder.
Restore the Files: Select the version you want to restore and click Restore.
This method works well if you have previous system restore points set up on your computer.
8. Method 5: Employing Data Recovery Software
Panda Assistant is a comprehensive data recovery and file management tool designed to help users recover lost or deleted files with ease. Whether you’ve accidentally deleted important files, experienced a system crash, or need to recover data from a formatted drive, Panda Assistant offers a user-friendly solution for retrieving lost data across various devices and storage types.
One of the key features of Panda Assistant is its ability to recover files from a wide range of storage media, including hard drives, SSDs, USB drives, memory cards, and external devices. The software supports multiple file systems such as NTFS, FAT32, and exFAT, ensuring that it can handle recovery tasks for both Windows and Mac systems.
The recovery process with Panda Assistant is simple and straightforward. After installation, the software guides you through scanning your device for deleted or lost files. It supports multiple scanning modes, including deep scans for more thorough recovery, making it highly effective even when dealing with complex data loss scenarios. The tool also provides a preview feature, allowing users to view recoverable files before committing to the restoration process.
9. Method 6: Using the Command Prompt
If you are comfortable using command-line tools, the Command Prompt in Windows 10 offers a powerful utility called chkdsk that may help you recover lost files from a damaged disk.
How to Use chkdsk for Recovery:
Open Command Prompt: Type cmd in the search bar, right-click on Command Prompt, and select Run as administrator.
Run chkdsk: In the Command Prompt window, type the following command and press Enter:
bash
chkdsk X: /f
Replace X with the letter of the drive you want to check.
Follow the On-Screen Instructions: The system will check and repair any disk errors. If any files are recoverable, it will try to restore them.
This method works best if your files were deleted due to disk corruption.
10. Method 7: Professional Data Recovery Services
If all else fails and your files are critical, professional data recovery services might be your last resort. These services are expensive but have a high success rate for recovering data from damaged or overwritten disks.
How to Choose a Data Recovery Service:
Look for a service with positive reviews and expertise in recovering data from your specific type of drive (HDD, SSD, USB).
Ask about the success rate, pricing, and whether they offer a “no recovery, no fee” guarantee.
11. Precautions to Take After Data Loss
After losing files, it’s essential to minimize further risk to your data. Here are some best practices:
Stop Using the Computer: Once you realize that files are missing, stop using the computer to avoid overwriting the deleted data.
Use a Separate Drive for Recovery: Always save recovered files to a different drive to prevent overwriting.
Set Up Backups: Once you recover your files, establish a regular backup routine to prevent future data loss.
About us and this blog
Panda Assistant is built on the latest data recovery algorithms, ensuring that no file is too damaged, too lost, or too corrupted to be recovered.
Request a free quote
We believe that data recovery shouldn’t be a daunting task. That’s why we’ve designed Panda Assistant to be as easy to use as it is powerful. With a few clicks, you can initiate a scan, preview recoverable files, and restore your data all within a matter of minutes.
Subscribe to our newsletter!
More from our blog
See all postsRecent Posts
- How to recover deleted files in sd memory card 2025-07-15
- How to recover lost photos from sd card 2025-07-15
- How do you recover deleted files from sd card 2025-07-15

 Try lt Free
 Recovery success rate of up to


