 Try lt Free
 Recovery success rate of up to
How to Retrieve Files from a USB Drive
USB flash drives, also known as thumb drives or memory sticks, are small, portable devices that we rely on for transferring files, backing up documents, storing presentations, and saving important photos or videos. Their compact size and plug-and-play functionality make them ideal for quick data access across multiple computers.
Files disappear. A drive suddenly shows as empty. You get error messages like “Please insert a disk into USB drive,” or you accidentally delete everything. In that moment, it feels like everything stored on the device has vanished. Thankfully, there are reliable and effective ways to retrieve files from a USB drive even if they appear deleted, hidden, or inaccessible.
Common Reasons Files Disappear from USB Drives
Before beginning recovery, it’s helpful to understand what might have caused your files to go missing. This can help determine the best recovery method.
Here are the most common causes:
Accidental deletion: Files were manually deleted or dragged to the Recycle Bin and removed.
Formatting the USB drive: A quick or full format wipes visible data but often leaves recoverable traces behind.
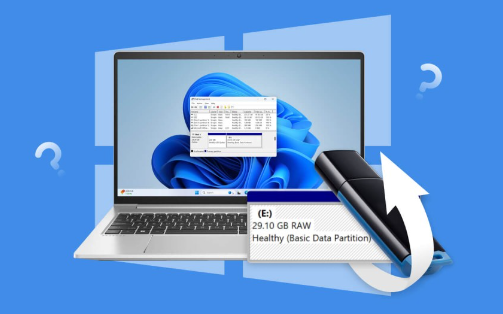
File system corruption: Improper ejection, malware, or file writing errors can damage the file system.
Hidden files: Files are present but hidden due to incorrect settings or malware.
Virus or malware infection: Malicious software can make files invisible or remove them.
Physical damage: If the USB drive is damaged physically, it may not be recognized properly by the system.
Each scenario offers a unique path toward recovery, and most of them allow for full or partial restoration if action is taken promptly.
Step 1: Stop Using the USB Drive Immediately
The most important rule of data recovery is this: Stop using the USB drive as soon as you notice files are missing. Every time you use the device, there’s a chance new data will overwrite the old files, reducing your chances of successful recovery.
Remove the drive safely from your computer. Avoid copying new files to it, formatting it, or running unnecessary software on it. This helps preserve the remaining data in its current state for recovery.
Step 2: Check for Hidden Files
Sometimes, the files aren’t deleted—they’re just hidden. This is especially common after using the drive in a device with different file management systems (like a smart TV or car stereo) or after a malware attack.
To check for hidden files on Windows:
Insert the USB drive into your PC.
Open File Explorer and go to the USB drive.
Click the View tab and check Hidden items.
On Mac:
Open Finder.
Select the USB drive.
Press Command + Shift + Period (.) to toggle hidden files.
If files reappear, copy them to a safe location immediately.
Step 3: Check the Recycle Bin (if Deleted via Computer)
If files were deleted while using the USB drive on a Windows PC, they might have gone to the Recycle Bin.
Open the Recycle Bin on your desktop.
Look for the deleted files.
Right-click and select Restore if found.
Note: Files deleted from USB drives often bypass the Recycle Bin entirely. If they’re not there, deeper recovery methods are needed.
Step 4: Use the CHKDSK Command to Fix Minor Corruption
Sometimes the drive’s file system is damaged but the data is still intact. You can try repairing the drive using the built-in Windows CHKDSK utility.
Here’s how:
Plug the USB drive into your computer.
Open the Command Prompt as administrator.
Type:
bash
CopyEdit
chkdsk E: /f
Replace E: with the correct drive letter of your USB.
This command checks and attempts to fix file system errors. If the corruption was minor, your files may become accessible again once the process completes.
Step 5: Use File Recovery Software
Panda Assistant
Losing files from a USB drive can be stressful, especially when it holds important documents, photos, or work materials. Whether files were accidentally deleted, the USB was formatted, or data became corrupted, Panda Assistant offers a reliable and user-friendly solution to help you recover what’s lost.
Panda Assistant is designed to scan USB drives thoroughly, detecting deleted, hidden, or lost files that may no longer appear in File Explorer. Once the USB drive is connected to your computer, the software automatically recognizes it and allows you to begin a quick or deep scan based on the severity of the data loss.
During the scanning process, Panda Assistant searches through the drive’s file system, identifying recoverable files across various formats such as documents, images, videos, and more. You can preview each file before recovery, making it easy to select only what you need. Once selected, recovered files can be safely saved to your computer or an external location never directly back to the USB, to prevent overwriting data.
Step 6: Recover Data from a Formatted USB Drive
Formatting a USB drive doesn’t always erase all the data especially if it was a quick format. Most file recovery software tools can scan a formatted USB and retrieve files as long as they haven’t been overwritten.
Follow the same steps using recovery software but ensure you run a deep scan rather than a quick one. Formatted drives often have damaged file structures, but the underlying data remains intact for a while.
Once recovered, save your files to a new location and avoid using the formatted drive until you’re certain your data is safe.
Step 7: Scan for Viruses or Malware
In some cases, malware may hide your files or make them appear deleted. If you suspect infection, it’s important to scan the USB drive with trusted antivirus software.
Use tools like:
Windows Defender (built-in)
Malwarebytes
Bitdefender
After removing malware, recheck the drive for hidden or previously missing files. If files reappear, copy them immediately to a secure location.
Step 8: Restore Files from a Backup (If Available)
If you have a backup strategy in place—such as Windows File History, cloud storage, or an external drive—you may be able to retrieve the files that were on your USB.
Check OneDrive, Dropbox, or Google Drive for synced versions.
Explore backup folders on your system.
Use any third-party backup tool you’ve configured.
Even if the backup is slightly outdated, recovering most of the lost data is better than starting from scratch.
Step 9: Try the USB Drive on a Different Computer
Sometimes the issue isn’t the USB drive—it’s the computer. Try connecting the USB to another PC or Mac to see if it behaves differently. You might discover that the files are accessible elsewhere or that the issue lies with a driver or hardware fault on the original computer.
If the drive works on another device, immediately copy the contents to another secure location.
Step 10: Use Disk Management to Reassign Drive Letters
If the USB drive doesn’t appear in File Explorer but does show up in Device Manager or Disk Management, the issue could be a conflicting or missing drive letter.
Here’s how to assign one:
Right-click on the Start menu and choose Disk Management.
Locate your USB drive in the list.
Right-click and choose Change Drive Letter and Paths.
Click Add or Change, and assign a new letter.
This may resolve issues where the USB was functioning but inaccessible.
Step 11: Seek Professional Data Recovery Help
If your USB drive has physical damage—such as a broken connector, internal chip failure, or signs of overheating—then software won’t be able to help. In these cases, professional data recovery services are your best bet.
These companies use cleanroom environments and specialized tools to extract data directly from the memory chips. They can be costly, but are often worth it for irreplaceable files like wedding photos, legal documents, or proprietary business data.
Look for reputable services with good reviews and clear pricing models. Many offer “no data, no fee” guarantees.
Preventing Future USB File Loss
Once you’ve retrieved your files—or even if you weren’t able to—now’s the time to set up safeguards to prevent this situation from repeating.
Here are smart habits to adopt:
Always eject USB drives safely: Use “Safely Remove Hardware” to avoid file system corruption.
Back up important files regularly: Use both local and cloud storage solutions.
Avoid using one USB drive for multiple purposes: Reusing a drive between cameras, TVs, and computers can increase the chance of corruption.
Keep antivirus software updated: Prevent malware from tampering with your USB.
Buy high-quality USB drives: Avoid cheap, no-name brands that have higher failure rates.
Use file versioning tools: Services like Dropbox and OneDrive let you recover older versions of files.
By implementing these practices, you greatly reduce the risk of future data loss.
Losing files from a USB drive can feel overwhelming, especially when the data holds personal or professional importance. But in many cases, those files aren’t truly gone they’re just hidden, misplaced, or recoverable with the right tools.
About us and this blog
Panda Assistant is built on the latest data recovery algorithms, ensuring that no file is too damaged, too lost, or too corrupted to be recovered.
Request a free quote
We believe that data recovery shouldn’t be a daunting task. That’s why we’ve designed Panda Assistant to be as easy to use as it is powerful. With a few clicks, you can initiate a scan, preview recoverable files, and restore your data all within a matter of minutes.
Subscribe to our newsletter!
More from our blog
See all posts


