 Try lt Free
 Recovery success rate of up to
Write protection on a hard disk can be a frustrating issue, especially when you’re trying to add or delete files, or perform other tasks such as formatting. Write protection is a safeguard, preventing any modifications to the data on the drive. This feature can be useful for preserving important files, but it can also get in the way when you need to manage your files or clear out space.
What is Write Protection?
Write protection is a feature that prevents data from being written to or altered on a disk. It can occur due to physical write protection on the disk (a switch on the external device) or due to settings in your computer’s operating system. Write protection can also be set at the software level, especially if you are working with file systems like NTFS or FAT32.
Common Causes of Write Protection
Before we dive into the methods of removal, it’s essential to understand the potential causes of write protection:
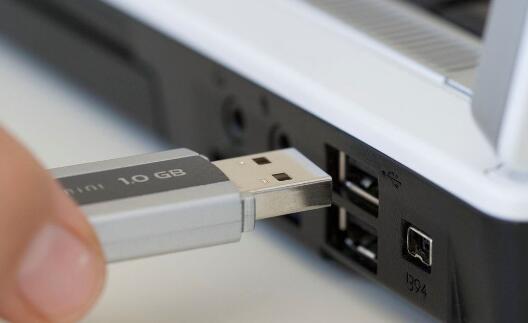
Physical Switch: Some external hard drives or USB flash drives have a physical switch that enables or disables write protection. If the switch is set to “lock” or “read-only,” the device cannot be written to.
Registry or Group Policy Settings (Windows): Windows operating systems can have registry settings or group policies that enforce write protection on storage devices.
Drive Errors: Some hard drives or partitions can become write-protected due to errors in the file system, making them inaccessible for file modification.
Drive is Full or Incompatible: Sometimes, a drive may be marked as write-protected if it has reached its storage capacity or if there’s an incompatibility between the drive and the operating system.
Corrupted Drive: A damaged or corrupted file system can trigger write protection. This often happens when you attempt to modify a drive that is in a “read-only” state due to errors.
Methods for Removing Write Protection on Hard Disks
Method 1: Check the Physical Write Protection Switch
For external hard drives or USB flash drives, some devices come with a physical switch that enables or disables write protection.
Locate the Physical Switch: Check the edges or the sides of the drive for a small switch.
Toggle the Switch: If the switch is in the “lock” or “read-only” position, slide it to the “unlocked” position to disable write protection.
Reconnect the Device: After changing the switch position, safely eject the device and reconnect it to your computer.
If your device doesn’t have a physical switch, you can proceed with the next methods.
Method 2: Use Windows Registry to Remove Write Protection
Windows allows you to modify write protection settings via the registry editor. This method is helpful when a software-based write protection is causing the issue.
Open the Registry Editor: Press Windows + R to open the Run dialog, type regedit, and press Enter. This will open the Windows Registry Editor.
Navigate to the Write Protection Key:
Go to: HKEY_LOCAL_MACHINE\SYSTEM\CurrentControlSet\Control
Look for a key named StorageDevicePolicies. If this key does not exist, you may need to create it.
Modify the Write Protection Setting:
If StorageDevicePolicies exists, double-click on WriteProtect in the right pane. Set the value to 0 to disable write protection. If the WriteProtect key doesn’t exist, create it by right-clicking the StorageDevicePolicies folder, selecting New, and choosing DWORD (32-bit) Value. Name it WriteProtect and set the value to 0.
Close the Registry Editor: After making the change, close the Registry Editor.
Restart Your Computer: For the changes to take effect, restart your computer.
This method removes write protection on external devices connected to your computer.
Method 3: Use Diskpart Command (Windows)
Windows users can use the Diskpart utility to remove write protection from a disk. This tool allows for more control over storage devices, especially when the Registry method does not work.
Open Command Prompt as Administrator: Press Windows + X and choose “Command Prompt (Admin)” or “Windows PowerShell (Admin)” from the menu.
Run Diskpart:
Type diskpart and press Enter. You should see a “Diskpart” prompt.
List All Disks:
Type list disk and press Enter. This will display a list of all disks connected to your computer.
Select the Write-Protected Disk:
Identify the disk number of the device you want to remove write protection from (e.g., Disk 1).
Type select disk X (replace X with the disk number) and press Enter.
Remove Write Protection:
Type attributes disk clear readonly and press Enter. This will remove the write protection from the selected disk.
Exit Diskpart:
Type exit and press Enter to close the Diskpart utility.
Restart Your Computer: Once the process is complete, restart your computer to see if the write protection has been removed.
Method 4: Use Group Policy (Windows Pro and Enterprise)
In Windows Pro and Enterprise versions, you can use the Group Policy Editor to disable write protection. This method may not be available in Windows Home editions.
Open the Group Policy Editor: Press Windows + R to open the Run dialog, type gpedit.msc, and press Enter.
Navigate to the USB Device Policies:
Go to: Computer Configuration > Administrative Templates > System > Removable Storage Access.
Disable Write Protection:
In the right pane, look for “Removable Disks: Deny write access.”
Double-click on this policy and set it to “Not Configured” or “Disabled.”
Apply the Changes: Click OK and exit the Group Policy Editor.
Restart the Computer: For the settings to take effect, restart your computer.
Method 5: Reformat the Drive
If the above methods don’t work and you’re still facing write protection issues, you may need to reformat the drive. This process erases all data on the drive, so ensure that you have a backup before proceeding.
Open Disk Management: Press Windows + X and select “Disk Management.”
Select the Write-Protected Disk: Right-click on the disk you want to format.
Choose Format: Select “Format” and follow the on-screen instructions to format the disk. Choose the file system you want (e.g., NTFS or exFAT) and make sure “Quick Format” is checked.
Complete the Process: Wait for the format to finish, and then the write protection should be removed.
Method 6: Use MacOS to Remove Write Protection
If you’re using a Mac, write protection can be managed via Disk Utility.
Open Disk Utility: Go to Applications > Utilities > Disk Utility.
Select the Drive: In the Disk Utility window, select the hard drive or USB drive with write protection.
Check for Write Protection: If the drive is locked or write-protected, the “First Aid” tool can be used to repair the disk.
Run First Aid: Click on “First Aid” and allow the tool to run. This may fix file system errors causing the write protection.
Reformat the Drive: If the issue persists, you can reformat the drive by selecting the “Erase” option in Disk Utility. Choose the appropriate file format (Mac OS Extended or exFAT) and erase the drive.
Follow the Program’s Instructions: Most partition tools have a simple user interface that will guide you through the process of disabling write protection.
Start by checking for physical switches on the device, then proceed with software-based methods using Diskpart, the Registry Editor, or Group Policy. In more complex cases, reformatting the disk or using third-party tools may be necessary. Always ensure that your data is backed up before making any significant changes to your disk.
About us and this blog
Panda Assistant is built on the latest data recovery algorithms, ensuring that no file is too damaged, too lost, or too corrupted to be recovered.
Request a free quote
We believe that data recovery shouldn’t be a daunting task. That’s why we’ve designed Panda Assistant to be as easy to use as it is powerful. With a few clicks, you can initiate a scan, preview recoverable files, and restore your data all within a matter of minutes.

