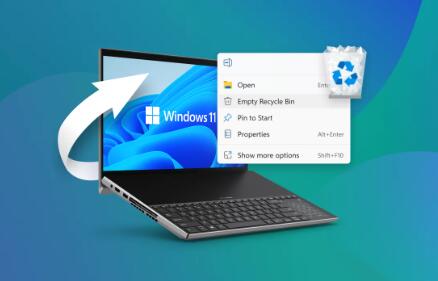
Recovering files that have been deleted using the Shift + Delete command in Windows 11 can be a daunting task. Unlike regular deletion, which sends files to the Recycle Bin, Shift + Delete permanently removes files from the system.
1. Shift + Delete
When you delete a file using Shift + Delete in Windows, it bypasses the Recycle Bin and is marked as deleted in the file system. The data remains on the hard drive until it is overwritten by new data. Understanding this mechanism is crucial for successful recovery.
Key Points:
Bypassing Recycle Bin: Files deleted this way do not get temporarily stored.
File System Marking: The operating system marks the space occupied by the file as available but does not erase the actual data immediately.

2. How Windows 11 Handles Deleted Files
In Windows 11. the file system (usually NTFS) plays a significant role in data management. When files are deleted, the system updates the Master File Table (MFT) to indicate that space is available. This is why it’s possible to recover files until the space is overwritten.
NTFS File System:
Cluster and Sector: Files are stored in clusters; deleting a file marks the clusters as free.
MFT Updates: The MFT keeps track of file locations; when a file is deleted, its entry is marked as unused.
3. Signs That Files Can Be Recovered
Before attempting recovery, assess whether the deleted files are recoverable. Signs include:
No New Data Written: If no new data has been written to the disk since deletion, recovery is more likely.
File Location Known: Knowing the original location of the file can help in targeted recovery.
4. Immediate Steps After Deletion
Taking immediate action after deletion can significantly increase the chances of recovery. Follow these steps:
Steps to Follow:
Stop Using the Drive: Avoid writing any new data to the drive where the files were deleted.
Avoid Rebooting: Rebooting can potentially overwrite the deleted files.
Disconnect the Drive: If it’s an external drive, disconnect it to prevent any accidental overwriting.
5. Using File History for Recovery
If you had File History enabled before the deletion, you could easily restore previous versions of your files.
How to Use File History:
Open Settings: Press Windows + I.
Go to Update & Security: Select the Backup tab.
Select “More options” under File History.
Browse for Backups: Click Restore files from a current backup.
Select Files: Choose the files you want to restore and click the green Restore button.
6. Restoring Previous Versions
Windows 11 has a feature that allows you to restore previous versions of files and folders.
Steps to Restore Previous Versions:
Navigate to the Folder: Open File Explorer and find the folder where the file was located.
Right-click on the Folder: Select Properties.
Go to the Previous Versions Tab: Windows will show previous versions of the folder based on restore points.
Select Version to Restore: Choose a version that includes your deleted file and click Restore.
7. Third-Party Recovery Software
Panda Assistant is a leading data recovery software designed to help users effortlessly recover lost or deleted files from various storage devices, including hard drives, SSDs, USB flash drives, and memory cards. With its user-friendly interface and powerful recovery capabilities, Panda Assistant is ideal for both novice and experienced users.
The software employs advanced algorithms to scan for deleted files, even those lost due to accidental deletion, formatting, or system crashes. Panda Assistant supports various file formats, ensuring that photos, videos, documents, and other essential files can be recovered quickly and efficiently.
Key features of Panda Assistant include:
Deep Scan Technology: This robust scanning process uncovers files that traditional recovery tools might miss, maximizing recovery potential.
Preview Functionality: Users can preview recoverable files before restoring them, ensuring the right files are retrieved.
Multi-Device Compatibility: Panda Assistant works seamlessly with Windows and Mac operating systems, making it versatile for different users.
Regular Updates: The software receives frequent updates to improve performance and compatibility with the latest devices.
8. Using Command Prompt for Recovery
For tech-savvy users, the Command Prompt can be a powerful tool for file recovery.
Steps to Recover Using Command Prompt:
Open Command Prompt: Press Windows + R, type cmd, and hit Enter.
Use the ATTRIB Command: Type the command below and hit Enter, replacing X with the drive letter:
cmd
attrib -h -r -s /s /d X:\*.*
Check for Recovered Files: Navigate to the drive using File Explorer to see if your files are visible.
9. Professional Data Recovery Services
If all else fails, consider professional data recovery services. These experts can recover data from drives with severe damage or corruption.
When to Seek Professional Help:
Severe Drive Failure: If your drive is making unusual sounds or is not recognized.
Critical Data Loss: If the lost data is essential and other methods have failed.
10. Preventive Measures to Avoid Future Data Loss
To safeguard against future data loss, consider implementing the following strategies:
Prevention Tips:
Regular Backups: Use Windows Backup, File History, or third-party solutions to back up data regularly.
Cloud Storage: Consider using cloud services for important files.
Be Cautious with Deletions: Always double-check before using Shift + Delete.
About us and this blog
Panda Assistant is built on the latest data recovery algorithms, ensuring that no file is too damaged, too lost, or too corrupted to be recovered.
Request a free quote
We believe that data recovery shouldn’t be a daunting task. That’s why we’ve designed Panda Assistant to be as easy to use as it is powerful. With a few clicks, you can initiate a scan, preview recoverable files, and restore your data all within a matter of minutes.
Subscribe to our newsletter!
More from our blog
See all postsRecent Posts
- Retrieve files from usb 2025-07-04
- How to retrieve overwritten excel file 2025-07-04
- How to retrieve lost files on sd card 2025-07-04

 Try lt Free
 Recovery success rate of up to


