 Try lt Free
 Recovery success rate of up to
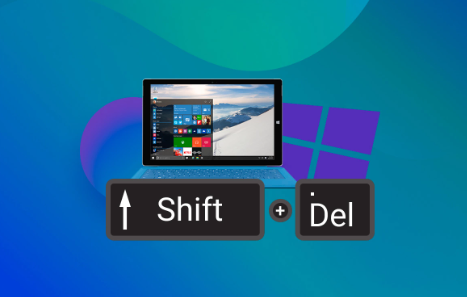
Accidentally using Shift + Delete to remove a file can be a nerve-wracking experience. Unlike regular deletions that send files to the Recycle Bin, Shift + Delete removes files permanently from your immediate access, skipping the trash entirely. Many users assume this means the file is gone forever, but that’s not always the case. With the right tools, timing, and knowledge, you can often retrieve files even after such a deletion.
When you delete a file using Shift + Delete, the file is not immediately destroyed. Instead, the operating system removes its reference in the file system. Think of it like removing a book’s listing from a library catalog. The book is still on the shelf, but unless you know where to look, you can’t find it. Over time, the space the file occupied may be overwritten by new data, and once that happens, recovery becomes much harder or impossible.
The key to successful recovery is speed and precision. The sooner you act, the greater your chances are of getting your file back intact.
Step 1: Stop Using the Drive Immediately
As soon as you realize you’ve permanently deleted a file with Shift + Delete, stop writing new data to that drive. That means avoiding software installations, file downloads, or even browsing the web if your downloads folder is on the same drive. Overwriting the space where the deleted file resides will reduce your chances of recovery dramatically.
If the file was on your system drive (usually C:), it’s best to limit activity or, if possible, shut down the computer and use another device to create a recovery plan.
Step 2: Check for Backups
Before diving into recovery tools, take a moment to check if the file exists somewhere else:
Windows File History: If you’ve enabled File History, go to the folder where the file used to be, right-click, and select “Restore previous versions.”
OneDrive or Google Drive Sync: If you’re using cloud backup or sync services, your file might be in your cloud trash or still available online.
System Restore Points: While this doesn’t always recover personal files, in some cases, it can help recover certain deleted system or application files.
Network Backups: If your device is part of an office network or server, IT may have backups you can request.
If none of these apply or the file isn’t available through these channels, you’ll need to use recovery software.
Step 3: Use Built-in Windows Features
Although Shift + Delete bypasses the Recycle Bin, Windows does have features that might help, particularly if you have System Protection or File History turned on.
File History (if enabled)
Go to the folder where the file was stored.
Right-click inside the folder or on the empty space and choose “Properties.”
Click on the Previous Versions tab.
Select a version that might contain your deleted file.
Click Restore or open the folder to manually copy the file.
This only works if File History was turned on before the deletion occurred.
Step 4: Use Data Recovery Software
Panda Assistant
Accidentally deleting important files with Shift + Delete can be a stressful experience. Unlike standard deletions, this method bypasses the Recycle Bin, making recovery seem impossible. However, with Panda Assistant, you still have a strong chance to get those files back quickly and safely.
When a file is deleted using Shift + Delete, it isn’t immediately erased—it’s just marked as free space by the operating system. Until new data overwrites that space, the deleted files remain recoverable. That’s where Panda Assistant comes in. Designed for both beginners and advanced users, this tool offers a streamlined recovery process that scans deep into your system to locate and retrieve permanently deleted files.
To begin recovery, install Panda Assistant on a different drive than the one where the files were deleted. Launch the program and select the drive that contained the missing files. Use the deep scan option for the most thorough results. Once scanning is complete, browse through the list of recoverable files, preview the ones you need, and restore them to a safe location.
Step 5: Manual Recovery with Windows PowerShell (Advanced)
For tech-savvy users, certain data recovery operations can be performed using scripts or commands, though this is rarely effective for files deleted using Shift + Delete without third-party tools. However, PowerShell might be able to show hidden files or help script a recovery process in conjunction with other tools.
Here’s an example of checking hidden or system files:
powershell
CopyEdit
Get-ChildItem -Path C:\Users\YourUsername\Documents -Force
This command lists all items, including hidden and system files, in the specified directory.
Step 6: Recovering Files from External Drives
Shift + Delete doesn’t just apply to local hard drives. It works on USB flash drives, SD cards, and external hard drives as well. The recovery process for these devices is very similar:
Plug the external drive into your computer.
Use one of the data recovery programs mentioned above.
Select the external drive instead of the internal C: drive.
Perform the scan and restore the files.
These devices are often simpler to recover from, especially if no new data has been added after deletion.
Step 7: What to Do If Recovery Software Fails
Sometimes recovery software can’t retrieve files, especially if:
The file has been overwritten.
The drive has suffered hardware failure.
The file system is corrupted.
In such cases, consider the following options:
Professional Data Recovery Services
Data recovery labs can often retrieve data that software can’t. These services aren’t cheap, but they’re ideal when the data is valuable—such as client files, research, or irreplaceable photos.
Recovery companies like DriveSavers, Ontrack, and Gillware offer diagnostic evaluations and no-recovery-no-fee guarantees. If the deleted files were on a mechanical hard drive or SSD with failure issues, this might be your best option.
Contacting IT Support
If the computer is managed by an organization or company, contact your IT department. They may have daily or weekly backups or snapshots that include the file you need.
Step 8: Preventing Future Data Loss
Once you’ve successfully recovered your file—or even if you weren’t able to—take steps to ensure this doesn’t happen again.
1. Enable File History
Go to Settings > Update & Security > Backup and add a drive to store backups. Windows will automatically create versions of your files.
2. Use Cloud Sync
Tools like OneDrive, Google Drive, Dropbox, or iCloud automatically back up your documents to the cloud, allowing you to restore deleted files from their trash bins.
3. Create Regular System Images
Use Windows’ built-in Backup and Restore (Windows 7) tool or third-party imaging software like Macrium Reflect to create periodic images of your entire drive.
4. Use Third-party Recycle Bin for External Drives
Programs like iBin or USB Recycle Bin help simulate a Recycle Bin for flash drives or SD cards, giving you a second chance before permanent deletion.
5. Be Cautious with Shift + Delete
Avoid using Shift + Delete unless you’re absolutely sure. Letting files go to the Recycle Bin gives you an extra layer of safety. If you need to permanently delete sensitive files, consider using file shredding tools that securely overwrite data, such as Eraser or CCleaner.
Losing a file through Shift + Delete can be distressing, but with the right approach, it’s often possible to recover it. The most critical factor is time acting quickly and methodically can make the difference between success and permanent loss.
Start with checking backup options and move on to reliable recovery software if needed. If software fails and the file is valuable, don’t hesitate to consult a professional recovery service. Once you’ve regained access or accepted the loss take proactive steps to avoid similar situations in the future by backing up regularly, enabling versioning, and avoiding risky deletion habits.
About us and this blog
Panda Assistant is built on the latest data recovery algorithms, ensuring that no file is too damaged, too lost, or too corrupted to be recovered.
Request a free quote
We believe that data recovery shouldn’t be a daunting task. That’s why we’ve designed Panda Assistant to be as easy to use as it is powerful. With a few clicks, you can initiate a scan, preview recoverable files, and restore your data all within a matter of minutes.
Subscribe to our newsletter!
More from our blog
See all posts


