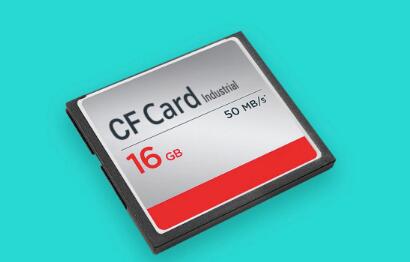
These memory cards are commonly used in professional cameras, camcorders, and industrial equipment, storing irreplaceable photos, videos, and essential operational files. Fortunately, tools like TestDisk offer a powerful solution for recovering data from corrupted or accidentally formatted CF cards.
TestDisk is a robust, open-source data recovery software developed by Christophe Grenier. Originally designed to recover lost partitions, it also helps retrieve files from non-bootable or corrupted drives including CF cards. Compatible with Windows, macOS, and Linux, TestDisk supports file systems such as FAT, exFAT, NTFS, and ext2/3/4. all of which are relevant for CF cards.

Key Features:
Recover lost partitions
Repair partition tables
Rebuild boot sectors
Recover deleted files
Copy files from damaged file systems
Why CF Cards Fail and When to Use TestDisk
Common reasons for CF card data loss include:
Accidental Formatting – Especially when switching between different devices.
File System Corruption – Often caused by power loss during write operations.
Physical Damage – Dropping or exposing the card to moisture.
Logical Errors – Partition table corruption, unrecognized file systems.
Virus or Malware Attacks – Infecting and hiding or deleting files.
If your CF card shows as “RAW” or unallocated, or files suddenly vanish, TestDisk may help recover them.
Preparing for Recovery
Step 1: Stop Using the CF Card
Remove the CF card and do not write new data to it. Continued use may overwrite recoverable files.
Step 2: Create a Disk Image (Optional but Recommended)
Use tools like dd (Linux/macOS) or Win32DiskImager (Windows) to clone the CF card:
dd if=/dev/sdX of=cfcard_backup.img bs=4M
Replace /dev/sdX with your actual device.
This step prevents further damage during recovery attempts.
Installing TestDisk
Windows: Download from cgsecurity.org and extract the ZIP. Run testdisk_win.exe.
macOS: Use Homebrew (brew install testdisk) or download the binary.
Linux: Install via package manager:
sudo apt install testdisk
No full installation is needed—it’s portable software.
Using TestDisk to Recover CF Card Data: Step-by-Step
Step 1: Insert CF Card and Launch TestDisk
Use a reliable CF card reader and plug it into your computer. Launch TestDisk:
sudo testdisk
Step 2: Log File Option
Choose:
Create – Start a new log
Append – Continue an old log
No Log – Skip logging (not recommended)
Step 3: Select the CF Card Device
Use the arrow keys to select the CF card (e.g., /dev/sdb) and press Enter.
Step 4: Partition Table Type
TestDisk usually detects this automatically:
Intel/PC for most CF cards
EFI GPT if formatted for modern systems
Step 5: Analyze Disk
Choose Analyze to scan the card’s structure. TestDisk will search for lost or deleted partitions.
Step 6: Quick Search
The quick scan locates partitions. Select any found partitions and press P to list files.
Step 7: Deeper Search (if necessary)
If nothing useful appears, choose Deeper Search for a more thorough scan.
Step 8: Browse and Recover Files
After TestDisk finds a readable partition:
Use arrow keys to navigate
Press C to copy files/folders
Choose a safe directory on another drive for saving files
Step 9: Restore Partition Table (Optional)
To fix the CF card itself:
Highlight the valid partition
Choose Write to save the structure
Reboot or re-insert card to check results
File Recovery vs. Partition Recovery
If the partition table is too damaged, you may use PhotoRec, bundled with TestDisk, to scan and recover individual files based on file signatures. PhotoRec supports a wide range of file formats commonly stored on CF cards, such as:
JPEG, NEF, CR2. DNG (images)
MOV, AVI, MP4 (videos)
DOC, XLS, PDF (documents)
Post-Recovery Tips
Back Up Immediately: Transfer recovered data to multiple storage options.
Check for Corruption: Open image and video files to verify integrity.
Format CF Card Properly: Use the camera or device itself for formatting, not the computer.
Avoid Cheap Card Readers: Use high-quality, branded readers for recovery work.
TestDisk Interface Overview
Even though it’s text-based, TestDisk is easy to navigate:
Arrow Keys – Navigate
Enter – Confirm
P – Preview files
C – Copy selected
Q – Quit/Back
This lean interface keeps TestDisk efficient and powerful.
When to Seek Professional Help
If:
The CF card has physical damage
The controller chip is faulty
There are no partitions found after deep scan
Recovery tools can’t access the device at all
Then it’s time to contact a data recovery lab. These services can perform chip-off recovery, advanced read retries, and forensic-level extraction.
Example: Recovering Wedding Photos from a CF Card
Scenario: A wedding photographer accidentally formats a 64GB CF card after a shoot.
Solution:
Insert CF card and launch TestDisk
Analyze disk – no partition found
Use Deeper Search – detects lost FAT32 partition
Browse recovered folders, preview JPEG images
Copy files to external SSD
All images restored successfully
Outcome: Full recovery of client photos, no need for paid service.
Final Thoughts: Is TestDisk Right for CF Card Recovery?
If you’ve lost data on a CF card, TestDisk provides an excellent free alternative to costly recovery software. While its command-line interface may seem technical at first, its results are undeniable especially when data loss involves file system or partition issues.
Whether you’re a photographer, industrial technician, or casual user, knowing how to use TestDisk can save you time, money, and irreplaceable memories.
About us and this blog
Panda Assistant is built on the latest data recovery algorithms, ensuring that no file is too damaged, too lost, or too corrupted to be recovered.
Request a free quote
We believe that data recovery shouldn’t be a daunting task. That’s why we’ve designed Panda Assistant to be as easy to use as it is powerful. With a few clicks, you can initiate a scan, preview recoverable files, and restore your data all within a matter of minutes.

 Try lt Free
 Recovery success rate of up to


