 Try lt Free
 Recovery success rate of up to
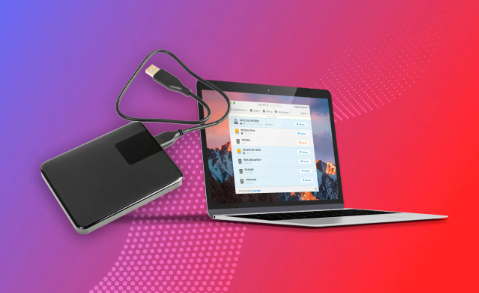
When an external hard drive fails, disappears from your system, or starts acting strangely, it can be a heart-stopping moment especially if it contains vital documents, irreplaceable family photos, work files, or years of memories. Despite the panic, the good news is that in many cases, your data is not actually gone it’s just inaccessible. And the right software program can help you recover it.
Accidental deletion or formatting
File system corruption
Virus or malware attacks
Physical damage
Improper ejection or power loss during data transfer
Drive aging and wear
Understanding the cause can help you choose the right recovery approach. If your drive shows no sign of power or emits clicking noises, you may be dealing with a hardware failure something software alone may not fix. However, for most logical or software-based failures, data recovery programs can help restore lost files.
Choosing the Right Recovery Program
There are numerous data recovery programs available. Some are free with limited functionality, while others are premium tools offering deep scans and advanced recovery options. The best program for you depends on your needs, technical skill level, and budget.
Look for the following features when selecting a recovery program:
Compatibility with your operating system (Windows, macOS, Linux)
Support for external drives including USB, HDDs, SSDs, and more
Preview capability, allowing you to view recoverable files before saving them
Raw scan and deep scan modes to detect files on damaged or formatted drives
User-friendly interface suitable for both beginners and tech-savvy users
Preparing for Recovery
Once you’ve chosen your recovery tool, take the following steps before beginning:
Stop using the drive immediately – Don’t copy or save anything new to the external hard drive. Doing so risks overwriting the very data you want to recover.
Safely eject and reconnect – Unplug the drive properly, wait a moment, and then reconnect it. Sometimes a simple reset can make the drive reappear.
Try a different USB port or cable – Faulty cables or ports can cause connection issues. Eliminate these variables first.
Avoid writing to the drive – Recovery software works best when the drive is left untouched. Install the recovery program on a different drive (e.g., your computer’s internal storage), not the one you’re recovering from.
Installing and Setting Up the Program
With the drive connected and the recovery software selected, install the program on your computer. Follow the installation instructions carefully and ensure that you do not install the software on the drive you want to recover from.
Once installed:
Launch the program
Select the external drive from the list of devices
Choose quick scan if you’re recovering recently deleted files
Choose deep scan for formatted drives, corrupted file systems, or missing partitions
Deep scans take longer, but they’re more thorough and increase your chances of successful recovery.
Running the Recovery Scan
Begin by selecting the external hard drive you want to scan. The software will start analyzing the disk structure, locating recoverable files, and categorizing them by type, such as documents, images, videos, archives, and system files.
Some programs let you pause or stop the scan at any time and preview the results. Others may take longer and require the entire scan to complete before you can review files.
Expect the process to take anywhere from a few minutes to several hours, depending on the drive’s size and level of corruption.
Previewing and Selecting Files
Once the scan is complete, the software will present a list of recoverable files. Many tools allow you to preview the file’s contents—especially useful for photos, documents, and videos—before deciding whether to restore them.
To narrow down your search:
Use the filtering feature to sort by file type, size, date, or location
Use the search bar to look for specific file names or extensions
Examine the folder structure to locate files in their original directories
Select all the files you want to recover. Be thorough, but keep in mind that recovering everything at once may slow down the process. If needed, you can run additional scans later.
Recovering the Data
Once you’ve selected the files you wish to recover, click the recovery button (often labeled “Recover” or “Restore”). The software will prompt you to select a location to save the recovered files. Never save recovered files back onto the same external drive. This prevents potential overwriting of other lost files and protects the integrity of your recovery attempt.
Instead, save them to your computer’s internal hard drive or another external drive with sufficient space.
The program will then restore your files to the designated folder. Depending on the size and number of files, this process may take some time.
Verifying the Recovered Files
Once recovery is complete, take the time to check your files:
Open recovered documents to ensure they’re readable and not corrupted
Preview photos and videos for clarity and completeness
Test application files or project files to ensure they open in their respective software
In some cases, a file might be partially recovered or unusable. This is often due to overwriting or deep corruption. If this happens, consider running a deeper scan, trying a different program, or consulting a professional.
When to Use Raw Recovery
If your external drive’s file system is severely damaged or unreadable, and the software cannot find the folder structure, raw recovery may be your only option. This type of scan doesn’t rely on the file system to locate files—it scans the disk sector by sector to identify file signatures.
While this method can locate deeply buried files, it comes with limitations:
Files may be unnamed or have generic names
Folder structures are usually lost
Metadata like creation date or original path may not be preserved
Still, raw recovery is incredibly powerful for salvaging files from a corrupted or unformatted drive.
Common Issues and Solutions
Drive Not Recognized:
If your software doesn’t detect the external hard drive, try connecting it to a different computer. Check for it in Disk Management (Windows) or Disk Utility (Mac). If it appears there but not in the file explorer, it may have a damaged file system that software can still scan.
Recovered Files Won’t Open:
Files that won’t open may be partially overwritten or corrupted. Try using file repair tools (some recovery software includes this) or restore older versions if available.
Scan Freezes or Crashes:
Make sure your system meets the software’s minimum requirements. Avoid multitasking during the scan, and ensure there is adequate storage space for temporary files created during recovery.
Drive Physically Damaged:
If your drive is making unusual sounds, not spinning up, or not powering on, do not attempt software recovery. These are signs of mechanical failure. Contact a data recovery specialist who can perform physical repairs in a clean lab environment.
Preventing Future Data Loss
After recovering your data, it’s crucial to take steps to prevent future data loss:
Create regular backups using external drives, cloud services, or network-attached storage
Safely eject external drives before unplugging them
Use surge protectors to prevent power spikes during data transfer
Install antivirus software and keep it updated
Run disk checks periodically to detect early signs of corruption
Consider setting up automated backups. Both Windows and macOS offer built-in solutions like File History and Time Machine, which can back up your data regularly without manual intervention.
When to Seek Professional Help
Although recovery software can handle many scenarios, it has limits. If:
Your external hard drive is not spinning
It emits clicking, grinding, or beeping sounds
It isn’t detected in Disk Management or Disk Utility
You’ve tried multiple programs with no success
You’re dealing with RAID or encrypted drive structures
…it’s time to call a data recovery specialist. Professionals can disassemble the drive in controlled environments, replace failed components, and extract raw data directly from the platters or chips.
Professional services can be expensive, but they’re often the best (and sometimes only) way to recover critical data from severely damaged drives.
Losing access to your external hard drive can feel like a catastrophe—but in many cases, your data is still intact and recoverable. Data recovery programs offer an effective, user-friendly, and affordable way to retrieve lost files caused by deletion, formatting, corruption, or minor system failures. By choosing the right software, carefully preparing your system, and following recovery best practices, you can successfully reclaim your data and protect it better in the future.
About us and this blog
Panda Assistant is built on the latest data recovery algorithms, ensuring that no file is too damaged, too lost, or too corrupted to be recovered.
Request a free quote
We believe that data recovery shouldn’t be a daunting task. That’s why we’ve designed Panda Assistant to be as easy to use as it is powerful. With a few clicks, you can initiate a scan, preview recoverable files, and restore your data all within a matter of minutes.
Subscribe to our newsletter!
More from our blog
See all posts


