 Try lt Free
 Recovery success rate of up to
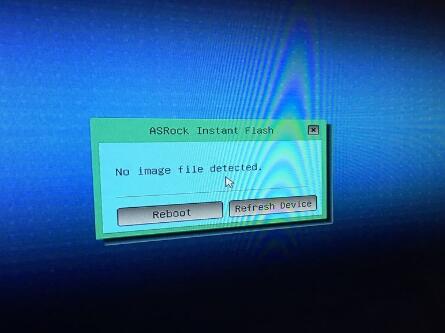
Booting up your system only to encounter a black screen and a cryptic message like “No image file detected” on your ASRock motherboard can be a frustrating experience. For many users, especially those building or upgrading their PCs, this message halts everything leaving them confused about what’s actually gone wrong. But don’t worry.
The message “No image file detected” typically appears during a BIOS update or instant flash procedure on ASRock motherboards. It means the system is unable to locate a valid BIOS update file on the connected USB drive or other storage device.
Unlike other errors that hint at broader system or OS-level issues, this one is usually isolated to firmware updating. But despite its narrow scope, several variables can trigger it—ranging from a poorly formatted flash drive to using the wrong file altogether.
1. BIOS Update Using Instant Flash
ASRock motherboards support a utility called Instant Flash. You can access this from within the BIOS interface, allowing you to update the firmware using a USB stick. However, if the flash drive isn’t correctly prepared, or the BIOS file is missing or incorrect, the system shows “No image file detected.”
2. BIOS Flashback Button Process
Some ASRock boards offer a BIOS Flashback feature, allowing you to update BIOS without needing a CPU or RAM. In this scenario, the system may check the USB drive for the BIOS file upon powering on. If nothing is found, the LED might blink erratically or nothing happens at all.
3. USB Detection or Compatibility Issues
Not all USB drives are compatible with BIOS flashing. The motherboard might not recognize newer drives or larger-capacity sticks. Additionally, improper formatting or using an unsupported file system can lead to this error.
Causes of the Error
Understanding what triggers this message is key to fixing it. Here are the primary causes:
Incorrect File Name: BIOS files often need to be renamed exactly as required by your specific ASRock motherboard.
Wrong BIOS Version: Using a file intended for a different motherboard model.
Improper File Format: File not extracted, or zipped incorrectly.
USB Format Issues: USB not formatted to FAT32.
USB Port Problems: Inserting the USB into an incompatible or faulty port.
Corrupted File: The BIOS file is damaged or improperly downloaded.
Bad USB Drive: Drive may be faulty or incompatible with UEFI.
Preparing the USB Drive Correctly
This step alone resolves a majority of flashing problems, including the “No image file detected” error. Follow this checklist meticulously:
Step 1: Use a USB 2.0 Drive
While USB 3.0 might work, USB 2.0 is often more reliable for BIOS flashing. Drives should be 8GB or smaller for maximum compatibility.
Step 2: Format to FAT32
BIOS utilities generally don’t recognize NTFS or exFAT. To format your USB:
Insert the USB drive.
Right-click it in File Explorer.
Choose Format.
Select FAT32 as the file system.
Uncheck “Quick Format” if you’d like a clean slate.
Click Start.
Step 3: Download and Extract the Correct BIOS File
Visit the official ASRock support page for your motherboard model. Carefully match the BIOS version to your exact board revision. Download the .zip file, then extract it.
Important:
Do not place the zipped file directly on the USB.
Extract the contents and ensure only the BIOS .ROM or .BIN file is on the root of the USB.
Step 4: Rename the File (if Required)
Some ASRock boards require the BIOS file to be renamed to a specific identifier. For example:
creative.rom
ASRROM.ROM
Check your motherboard manual for exact instructions.
Using Instant Flash Utility Correctly
Plug your prepared USB stick into a rear USB 2.0 port.
Reboot the system and enter BIOS by pressing Del or F2.
Navigate to the Tools tab.
Select Instant Flash.
The utility should now detect the image file.
If you still see “No image file detected”:
Double-check the USB format.
Ensure only the BIOS file is on the USB.
Try a different USB port or flash drive.
Using BIOS Flashback
Some high-end ASRock motherboards offer BIOS Flashback, allowing a BIOS update without CPU/RAM.
How to Use It:
Plug the USB drive with the BIOS file into the designated Flashback USB port (check your manual).
Hold down the BIOS Flashback button for 3 seconds.
A light should begin blinking. If it doesn’t:
The file isn’t recognized.
The drive isn’t formatted properly.
You may be using the wrong USB port.
The file is named incorrectly.
Troubleshooting Methods
If you’ve prepared the USB properly and still see the message, try these next steps.
Method 1: Test Multiple USB Drives
Try different models and sizes. Some drives just won’t work with your motherboard’s UEFI firmware.
Method 2: Use a USB Port on the Rear I/O
Some ASRock motherboards only recognize drives connected to the back panel—not front panel or headers.
Method 3: Reset the CMOS
Sometimes, motherboard BIOS settings become unstable, causing file detection issues.
To reset CMOS:
Power off the system.
Remove the CMOS battery for a few minutes.
Reinsert it and power on.
Try the Instant Flash process again.
Method 4: Re-download BIOS File
A corrupted or incomplete file download is common. Always download the BIOS file using a wired connection and extract it again from scratch.
Method 5: Rename BIOS File
Some ASRock boards are extremely picky about the filename. Check your manual or ASRock’s FAQ to confirm the expected name.
Advanced Fixes
If none of the standard fixes work, consider these more advanced techniques.
Use Rufus to Format the Drive
Rufus is a specialized formatting tool that offers more control:
Download and open Rufus.
Select your USB drive.
Set the file system to FAT32.
Choose MBR as the partition scheme.
Click Start.
This process can fix USB drives that seem formatted but have internal partitioning issues.
Use a Different Computer
Sometimes, the USB drive works fine, but your current system won’t recognize it due to existing hardware quirks. Use a different PC to prepare the USB drive.
What Not to Do
Don’t interrupt the flashing process once started. This can brick your motherboard.
Don’t rename files arbitrarily unless instructed.
Don’t flash from Windows unless the manufacturer explicitly supports it. Always use UEFI tools or Flashback.
Motherboard-Specific Considerations
ASRock produces a wide range of boards with differing requirements. Here are examples of slight variations in BIOS behavior.
Entry-Level Models
No BIOS Flashback support.
Require working CPU/RAM for flashing.
Use standard Instant Flash via BIOS.
Mid-Tier Models (e.g., B-series)
May support USB BIOS Flashback.
Specific USB port requirements.
LED indicators show progress.
High-End Models (e.g., X670E, Z790)
Include dual BIOS or backup.
Custom file name often needed.
Can flash with power supply alone.
Signs of a Successful Flash
Once the motherboard detects the BIOS image, you’ll typically see:
A confirmation prompt to proceed.
A progress bar for the flash process.
A successful completion message.
Your system may then reboot and optimize defaults automatically. Be patient—this can take a few minutes.
When to Seek Help
If nothing works after trying the above:
Contact ASRock Support: They can offer model-specific steps and custom file names.
Consider RMA: If the BIOS is corrupted beyond software repair, physical replacement or reprogramming may be needed.
Visit Forums: Tech forums often have solutions for rare bugs, including hidden BIOS switches or beta versions.
Preventing the Error in the Future
Always verify your motherboard model before downloading firmware.
Use USB 2.0 drives with simple names (avoid special characters or spaces).
Keep the USB drive dedicated for BIOS use—avoid cluttering it with other files.
Never interrupt power during a BIOS update—use a UPS if needed.
About us and this blog
Panda Assistant is built on the latest data recovery algorithms, ensuring that no file is too damaged, too lost, or too corrupted to be recovered.
Request a free quote
We believe that data recovery shouldn’t be a daunting task. That’s why we’ve designed Panda Assistant to be as easy to use as it is powerful. With a few clicks, you can initiate a scan, preview recoverable files, and restore your data all within a matter of minutes.
Subscribe to our newsletter!
More from our blog
See all posts


