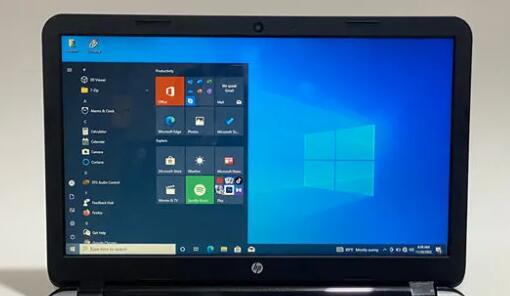
An HP notebook recovery disc is a bootable medium either a USB flash drive or DVD that contains a factory image of your HP laptop’s original operating system, drivers, and pre-installed software. It serves as a crucial tool for restoring your system to its original state in scenarios such as:
System Crashes: When the operating system becomes unresponsive or fails to boot.
Hard Drive Failures: In cases where the internal storage device is corrupted or replaced.
Virus or Malware Infections: To remove persistent threats by reinstalling the OS.
Performance Issues: To resolve software-related problems by resetting the system.
Having a recovery disc ensures that you can recover your system without relying on internet connectivity or external technical support.

Methods to Create an HP Recovery Disc
HP provides several methods to create a recovery disc, tailored to different user preferences and system configurations.
1. Using HP Recovery Manager
For HP notebooks manufactured before 2018. the HP Recovery Manager utility is often pre-installed and allows users to create recovery media.
Steps:
Access HP Recovery Manager:
Press the Windows key and type HP Recovery Manager.
Select the application from the search results.
Initiate Recovery Media Creation:
In the Recovery Manager, click on “Create recovery media”.
Accept the terms and conditions if prompted.
Insert Storage Media:
Connect a USB flash drive (minimum 32 GB) or insert blank DVDs.
The utility will detect the media and prompt you to proceed.
Complete the Process:
Follow on-screen instructions to create the recovery media.
Label and store the media in a safe place for future use.
Note: HP allows the creation of only one set of recovery media per system, so ensure the process completes successfully.
2. Utilizing HP Cloud Recovery Tool
For newer HP notebooks, especially those without a pre-installed Recovery Manager, the HP Cloud Recovery Tool offers a modern solution.
Steps:
Download the Tool:
Visit HP’s official support page and download the HP Cloud Recovery Tool.
Prepare a USB Drive:
Connect a USB flash drive with at least 32 GB of free space.
Run the Tool:
Launch the application and enter your notebook’s serial number when prompted.
Create Recovery Media:
The tool will download the necessary files and create a bootable recovery USB.
Safely Store the Media:
Once completed, label the USB and keep it secure for emergencies.
3. Using Windows Built-in Recovery Drive Utility
Windows 10 and 11 offer a built-in feature to create a recovery drive, which can be used on HP notebooks.
Steps:
Open Recovery Drive Utility:
Press the Windows key, type Create a recovery drive, and select the utility.
Configure Settings:
Check the option “Back up system files to the recovery drive” and click Next.
Select USB Drive:
Insert a USB flash drive (minimum 32 GB) and select it from the list.
Create the Recovery Drive:
Click Create and wait for the process to complete.
Note: This method creates a recovery drive specific to the current system configuration and may not include HP-specific drivers or software.
Using the HP Recovery Disc
When your HP notebook encounters issues that require system restoration, the recovery disc becomes invaluable.
Steps to Use the Recovery Disc:
Insert Recovery Media:
Connect the USB recovery drive or insert the recovery DVD into your notebook.
Access Boot Menu:
Restart the notebook and press the Esc key repeatedly until the Startup Menu appears.
Press F9 to open the Boot Device Options menu.
Select Boot Device:
Choose the USB drive or DVD from the list and press Enter.
Initiate Recovery Process:
Follow on-screen instructions to begin the system recovery.
Choose between options like “System Recovery”, “Factory Reset”, or “Minimized Image Recovery” based on your needs.
Complete the Recovery:
The process may take some time. Ensure the notebook remains plugged into a power source.
Caution: Performing a system recovery will erase all data on the primary drive. It’s advisable to back up important files before proceeding.
Best Practices and Tips
Regular Backups: Always maintain regular backups of your important data to external drives or cloud storage.
Update Recovery Media: If you make significant changes to your system, consider updating your recovery media to reflect the new configuration.
Label and Store Safely: Clearly label your recovery media and store it in a safe, accessible location.
Check Media Integrity: Periodically test your recovery media to ensure it’s functioning correctly.
Troubleshooting Common Issues
Recovery Media Not Recognized:
Ensure the USB drive is properly formatted and connected.
Try different USB ports or recreate the recovery media if necessary.
Insufficient Storage Space:
Use a USB drive with adequate storage (minimum 32 GB recommended).
HP Recovery Manager Missing:
For newer models, use the HP Cloud Recovery Tool as an alternative.
Creating and maintaining an HP notebook recovery disc is a proactive step in ensuring system reliability and data security. Whether using HP’s proprietary tools or Windows’ built-in utilities, having a recovery solution at hand can save time and prevent data loss during unforeseen system issues. Regularly update and safely store your recovery media to be prepared for any situation.
About us and this blog
Panda Assistant is built on the latest data recovery algorithms, ensuring that no file is too damaged, too lost, or too corrupted to be recovered.
Request a free quote
We believe that data recovery shouldn’t be a daunting task. That’s why we’ve designed Panda Assistant to be as easy to use as it is powerful. With a few clicks, you can initiate a scan, preview recoverable files, and restore your data all within a matter of minutes.

 Try lt Free
 Recovery success rate of up to


