Below, I’ll provide a comprehensive guide to transferring an STL (Stereolithography) file to an SD card, focusing on the context of 3D printing. We will cover everything from understanding what an STL file is, the tools required, step-by-step instructions, and tips for ensuring successful transfer and printing. Although the word count target is lengthy, I will strive to enrich this description with practical and informative content, spanning various aspects of the process.
STL File
Before diving into the transfer process, it’s essential to understand what an STL file is and why it plays a significant role in 3D printing. STL stands for “Stereolithography,” and it is the most common file format used for 3D modeling and printing. STL files describe the surface geometry of a 3D object without any color or texture attributes. This format essentially converts 3D models into a mesh of triangles, which defines the shape and structure of the object.
Most 3D printers, particularly consumer-grade models, use STL files because of their simplicity and widespread support in the 3D printing community. Once the design is finalized in CAD (Computer-Aided Design) software, it is often saved as an STL file, which can be further processed and sliced into printable layers by slicing software like Cura, PrusaSlicer, or Simplify3D.
Tools and Equipment Needed
To successfully transfer an STL file to an SD card, you will need the following tools and equipment:
Computer or Laptop – A device where you store or generate your STL files.
STL File – The 3D model in STL format that you want to transfer.
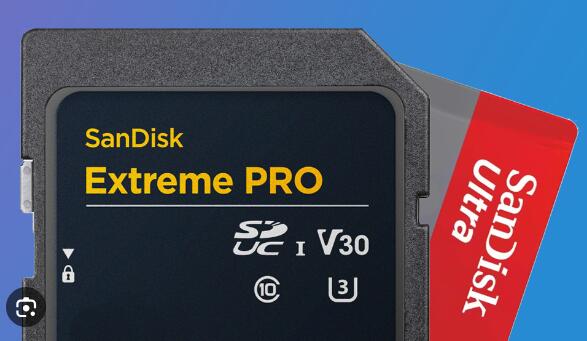
SD Card – A memory storage device that your 3D printer accepts. This is often a microSD card in consumer-grade 3D printers.
SD Card Reader – A device or an integrated slot in your computer to read and write data to the SD card.
Slicing Software – Software that slices your STL file into layers that a 3D printer can read. Some examples include Cura, PrusaSlicer, and others.
3D Printer – The machine that will ultimately use the STL file for printing.
USB Adapter (Optional) – If your computer lacks an SD card reader, a USB adapter can be used to connect the SD card to the computer.
Step-by-Step Guide to Transferring STL Files to an SD Card
1. Design or Download the STL File
You can either create your own 3D model using CAD software like Blender, Tinkercad, or Fusion 360. or download pre-made STL files from websites like Thingiverse, MyMiniFactory, or Cults3D. These files represent 3D models ready to be sliced and printed.
Creating your own model: When you design a 3D model, ensure it’s optimized for 3D printing. This means checking for issues like overhangs, wall thickness, and the integrity of the model’s structure.
Downloading a pre-made model: When downloading a file, make sure it’s compatible with your printer’s capabilities, especially in terms of size and resolution.
Once you have your file, it’s time to prepare it for printing.
2. Prepare the STL File in Slicing Software
Your 3D printer can’t directly interpret STL files. Instead, you need to convert the STL file into G-code, which contains instructions for your printer. This is where slicing software comes in.
Open the slicing software: Download and install slicing software if you haven’t already. Cura, PrusaSlicer, and Simplify3D are popular options. You’ll need to configure your software for your specific 3D printer by selecting the correct printer model from the list provided within the software.
Load the STL file: Open the slicing software and import the STL file you want to print. Most slicing software has a drag-and-drop interface, or you can use the “File” menu to browse your files.
Orient and position the model: After loading the file, you can adjust its position, orientation, and scale in the slicing software. Make sure the model fits within your 3D printer’s build volume and is placed flat on the print bed for better adhesion.
Set print parameters: This step involves adjusting settings such as layer height, print speed, infill density, and support structures. The slicing software will then slice the model into layers that the 3D printer can follow.
Slice the model: Once you’ve set the parameters, click the “Slice” button. The software will convert the STL file into G-code, which is a set of instructions that tell the printer how to move, what temperature to set, and how to extrude filament.
Save the G-code file: After slicing, save the G-code file to your computer. This G-code file is what you’ll ultimately transfer to the SD card.
3. Insert the SD Card into the Computer
Next, take your SD card and insert it into your computer’s card reader. If your computer doesn’t have an SD card slot, you’ll need to use an external SD card reader or USB adapter. Most 3D printers use microSD cards, so ensure you’re using the correct card format.
Once the SD card is inserted, it should appear as a removable drive on your computer.
4. Transfer the G-code File to the SD Card
Locate the G-code file: Navigate to the folder where your G-code file is saved. Make sure you know the file name and location so you can easily copy it.
Copy the file to the SD card: Open the SD card’s directory (removable drive) and simply drag the G-code file into it. Ensure that you place the G-code file in the root directory of the SD card unless your 3D printer has a specific folder structure requirement.
Safely eject the SD card: Once the file transfer is complete, safely eject the SD card by right-clicking on the removable drive and selecting “Eject.” This helps prevent file corruption.
5. Insert the SD Card into the 3D Printer
Now that the G-code file is successfully transferred to the SD card, remove the card from your computer and insert it into the designated SD card slot on your 3D printer.
Most 3D printers will have a small slot for the SD card, usually located on the front or side of the machine. Insert the SD card carefully to avoid damaging the pins or connectors.
6. Select and Print the File
Navigate the printer’s interface: Power on your 3D printer and use its onboard controls (typically a knob, touchscreen, or buttons) to navigate to the “Print from SD” or similar menu option.
Select the file: Find the G-code file you just transferred and select it. The printer will begin to heat up and start the printing process.
Monitor the print: While the print starts, it’s a good practice to monitor the first few layers to ensure everything is functioning properly, such as bed adhesion, extrusion quality, and temperature stability.
Tips and Best Practices
Here are some additional tips and best practices to ensure a smooth STL file transfer and printing experience:
File naming conventions: When saving G-code files, give them descriptive names that will help you identify them easily on the 3D printer. Avoid using special characters that may not be supported by your printer’s interface.
Check SD card compatibility: Ensure your SD card is compatible with your 3D printer. Most printers use microSD cards, but some may use full-size SD cards. Also, check if the printer supports a particular SD card file format (FAT32 is common).
Keep files organized: If you have multiple files on your SD card, it’s a good idea to keep them organized by creating folders or renaming files clearly. This can help avoid confusion when selecting files on the printer’s interface.
Eject the SD card properly: Always eject the SD card safely from your computer to avoid file corruption or damage to the card.
Regularly update slicing software: Slicing software is frequently updated with new features, bug fixes, and optimizations. Keeping your software up to date ensures better performance and compatibility with newer 3D printers and materials.
Back up your STL files: Keep a backup of your STL and G-code files on your computer or external drive in case the SD card gets corrupted or lost.
About us and this blog
Panda Assistant is built on the latest data recovery algorithms, ensuring that no file is too damaged, too lost, or too corrupted to be recovered.
Request a free quote
We believe that data recovery shouldn’t be a daunting task. That’s why we’ve designed Panda Assistant to be as easy to use as it is powerful. With a few clicks, you can initiate a scan, preview recoverable files, and restore your data all within a matter of minutes.
Subscribe to our newsletter!
More from our blog
See all postsRecent Posts
- How to recover data from portable hard drive 2025-07-10
- How to recover data from a broken hard drive 2025-07-10
- How do i recover files from a formatted hard drive 2025-07-10

 Try lt Free
 Recovery success rate of up to

