USB flash drives are portable storage devices that allow you to transfer files between computers easily. They connect via the USB port and typically come in various storage capacities, ranging from a few gigabytes (GB) to hundreds of gigabytes. Flash drives are compatible with most operating systems, including Windows 10. and can store various file types, such as documents, music, videos, and software.
Step by Step Guide: Saving Files to a USB Flash Drive on Windows 10
1. Insert the USB Flash Drive
Before transferring files, ensure your USB flash drive is properly connected to your computer.
Locate the USB port: USB ports are usually located on the side of laptops or on the front/back of desktops. Most flash drives are compatible with USB 2.0 or USB 3.0. which are common on modern systems.
Insert the flash drive: Insert the USB flash drive into one of the available USB ports. You should hear a sound indicating that Windows 10 has recognized the device.
2. Open File Explorer
Once the USB flash drive is inserted, open File Explorer to access your computer’s files and locate the flash drive.
How to open File Explorer:
Press Windows + E on your keyboard, or
Click on the File Explorer icon (yellow folder) in the taskbar, or
Right-click the Start Menu and select File Explorer from the list.
3. Locate the USB Flash Drive
Within File Explorer, you’ll see a list of available drives, including your internal hard drive(s) and external devices like your USB flash drive.
Under This PC or Devices and Drives, look for your USB flash drive. It will usually appear with a drive letter (such as D:, E:, or F:) and may have a name (e.g., USB Drive, MyFlash, etc.).
Double-click on the USB drive to open it. If it’s the first time you’re using this drive, it may be empty, showing no files or folders.
4. Prepare Files for Transfer
Before transferring files, ensure you know where they are stored on your computer. This could be documents, photos, videos, or any other type of file.
Navigate to the file’s location: Using File Explorer, browse to the folder containing the files you want to save to your USB drive. Common locations include Documents, Downloads, Pictures, or custom folders you’ve created.
5. Copy Files to the USB Flash Drive
There are multiple ways to copy files to a USB drive in Windows 10. Below are a few common methods:
Drag and drop:
Open two File Explorer windows: one showing your files and the other showing the USB drive.
Drag the desired file(s) from their original location to the USB drive window. This will copy the files.
Right-click and copy/paste:
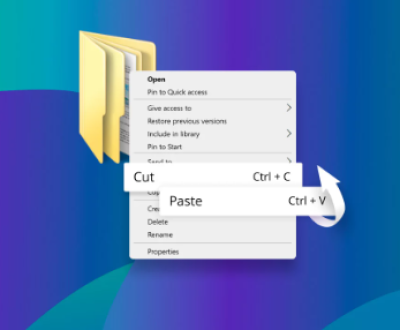
Right-click on the file you want to save, select Copy.
Go to the USB drive window, right-click anywhere inside, and select Paste.
Using the “Send to” option:
Right-click the file you wish to transfer.
Choose Send to from the context menu.
Select your USB flash drive from the list of destinations.
6. Verify File Transfer
After copying files to the USB flash drive, it’s a good practice to verify that the transfer was successful.
Open the USB drive and check that all your files are there.
Double-click on a few files to ensure they open correctly.
7. Eject the USB Flash Drive Safely
Once you’ve finished transferring files, always safely eject the USB flash drive before physically removing it. This prevents data corruption.
How to safely eject the USB drive:
In the taskbar, click on the Safely Remove Hardware and Eject Media icon (it looks like a USB plug with a checkmark).
Select your USB flash drive from the list.
Wait for a notification that it’s safe to remove the device, then unplug the flash drive from the USB port.
Formatting Your USB Flash Drive (Optional)
Before using your USB drive for the first time, or if you want to erase all the data, you may need to format it. Formatting prepares the USB for file storage and ensures compatibility with the file system used by Windows.
How to Format a USB Drive:
Insert the USB drive.
Open File Explorer and locate your USB drive.
Right-click the drive and select Format.
In the Format window, select a File System:
FAT32: Compatible with most devices but has a 4 GB file size limit.
exFAT: Better for larger files and works across multiple platforms.
NTFS: Windows-specific, useful for large files and more robust features.
Select Quick Format (if you want a faster format) and click Start.
Once formatting is complete, the drive will be empty and ready for use.
Troubleshooting Common USB Issues
1. USB Flash Drive Not Recognized
If your USB drive isn’t showing up in File Explorer, try the following steps:
Try a different port: The port might be malfunctioning.
Check Device Manager: Press Windows + X and select Device Manager. Under Disk Drives, check if your USB is listed. If it has a yellow triangle, it might need a driver update.
Update drivers: Right-click on the USB drive in Device Manager and select Update Driver.
Restart your computer: Sometimes a restart can help resolve recognition issues.
2. USB Drive is Write-Protected
If you’re unable to copy files to the USB drive, it may be write-protected. Here are some solutions:
Check the physical switch: Some USB drives have a write-protect switch. Ensure it’s turned off.
Disable write protection in Windows:
Press Windows + R, type regedit, and hit Enter.
Navigate to HKEY_LOCAL_MACHINE\SYSTEM\CurrentControlSet\Control\StorageDevicePolicies.
If the WriteProtect key exists, set its value to 0.
3. File Transfer is Slow
If file transfers are taking a long time, the following tips can help:
Use a USB 3.0 port: Ensure your USB flash drive and computer support USB 3.0 for faster transfers.
Check for background processes: Too many programs running can slow down the process.
Fragmentation: Flash drives don’t typically fragment like hard drives, but excessive use without formatting can sometimes cause slowdowns. Formatting the drive might help.
Best Practices for Using USB Flash Drives
1. Regularly Backup Data
USB flash drives are portable, but they can also be easily lost or damaged. Always keep a backup of important files elsewhere.
2. Avoid Removing the Drive Abruptly
Always use the Safely Remove Hardware feature to eject the drive before unplugging it. Sudden removal can corrupt files.
3. Organize Files
To make your data management more efficient, create folders on the USB drive. For instance:
Create separate folders for Documents, Pictures, Videos, and so on.
This will help you locate files more quickly, especially if the drive has a large storage capacity.
4. Use Encryption for Sensitive Data
If you’re storing sensitive or personal data on a USB flash drive, consider encrypting it. Windows 10 includes BitLocker, which you can use to encrypt the entire drive.
How to enable BitLocker:
Right-click the USB drive in File Explorer.
Select Turn on BitLocker.
Follow the instructions to encrypt the drive and set a password.
Saving files to a USB flash drive on Windows 10 is a simple task that can be completed in just a few steps. Whether you’re transferring documents, pictures, or videos, USB flash drives offer an efficient way to store and transport data. Always remember to safely eject the drive after use and organize your files to make it easier to locate them later. If you encounter any issues with your USB flash drive, such as slow transfer speeds or recognition problems, there are various troubleshooting steps you can take to resolve these issues.
About us and this blog
Panda Assistant is built on the latest data recovery algorithms, ensuring that no file is too damaged, too lost, or too corrupted to be recovered.
Request a free quote
We believe that data recovery shouldn’t be a daunting task. That’s why we’ve designed Panda Assistant to be as easy to use as it is powerful. With a few clicks, you can initiate a scan, preview recoverable files, and restore your data all within a matter of minutes.
Subscribe to our newsletter!
More from our blog
See all postsRecent Posts
- Retrieve files from usb 2025-07-04
- How to retrieve overwritten excel file 2025-07-04
- How to retrieve lost files on sd card 2025-07-04

 Try lt Free
 Recovery success rate of up to

