Retrieving files from an external hard drive is a common task that many people need to do, whether it’s due to accidental deletion, hardware failure, or other issues. The process of retrieving files from an external hard drive can range from simple file recovery to more complex scenarios, such as recovering files from a damaged or corrupted drive.
1. External Hard Drive File Retrieval
External hard drives are commonly used for storing data, backups, and media files. They are convenient because they offer large storage capacities and are portable, allowing you to take your files with you wherever you go. However, like any storage medium, external hard drives are susceptible to failure, corruption, or accidental deletion of files.

Whether you’re dealing with lost files due to accidental deletion, hardware failure, or corruption, the process of file retrieval requires careful steps to ensure data integrity and avoid causing further damage to the drive.
2. Common Causes of Data Loss on External Hard Drives
Before diving into how to retrieve your files, it’s essential to understand the common causes of data loss on external hard drives:
Accidental Deletion: One of the most common reasons for data loss is accidentally deleting files or folders.
Corruption: External drives can become corrupted due to improper disconnection, power failure, or file system errors.
Hardware Failure: If the external drive suffers from physical damage, such as a failed disk, it can lead to complete data loss.
File System Damage: If the drive’s file system is damaged (e.g., NTFS, FAT32), your operating system may be unable to read or access the drive.
Understanding the cause of data loss is important because it determines the recovery approach and whether data recovery software or professional services are needed.
3. How to Retrieve Files from External Hard Drive
Depending on the cause of data loss, you can try different methods to retrieve files. Let’s explore various methods, starting from the simplest to the more complex.
3.1. Check the Recycle Bin (for Deleted Files)
One of the easiest ways to recover files is to check if they have been deleted but still remain in the Recycle Bin (for Windows users) or Trash (for Mac users). If your external hard drive was connected to the computer when files were deleted, they may be moved to the Recycle Bin.
Open the Recycle Bin (Windows) or Trash (Mac).
Look for the deleted files.
Right-click on the files and select Restore (Windows) or Put Back (Mac).
The files will be restored to their original location on the external hard drive.
This method only works for files that were deleted normally and not permanently erased.
3.2. Use File History (Windows)
If you’re using Windows and have enabled the File History feature, you can restore previous versions of files that may have been accidentally deleted or modified.
Connect your external hard drive to your computer.
Right-click on the folder or file where the lost data was stored.
Click on Restore previous versions.
A list of available versions will appear. Select the version you want to restore and click Restore.
File History works best if it was configured beforehand, so you need to have set it up to back up your files on the external drive.
3.3. Use Time Machine (Mac)
For Mac users, Time Machine can help retrieve lost files if it has been set up to back up your external hard drive.
Open Time Machine from the Applications folder.
Navigate to the folder or file that you wish to recover.
Scroll through the timeline to find the point in time before the data was lost.
Select the file or folder and click Restore.
This will restore the file to its original location on the external drive.
3.4. Run a Disk Check (for Corrupted Drives)
If your external hard drive is not accessible or showing errors, you may need to run a disk check to fix file system issues.
For Windows:
Connect the external drive to your computer.
Open This PC or My Computer and locate the external hard drive.
Right-click on the external drive and select Properties.
Go to the Tools tab and click Check under Error Checking.
Follow the on-screen instructions to allow Windows to scan and repair the drive.
For Mac:
Open Disk Utility (Applications > Utilities).
Select the external drive from the sidebar.
Click First Aid and then Run to check and repair the disk.
If the file system is repaired, you may be able to access the files again.
3.5. Recover Files Using Data Recovery Software
Panda Assistant is a versatile and user-friendly software designed to help users efficiently manage and recover their data. Whether you’re dealing with accidentally deleted files, corrupted storage devices, or complex data loss scenarios, Panda Assistant provides a comprehensive solution. It offers tools for easy data recovery, file management, and system optimization, ensuring that users can restore lost information and maintain the health of their devices.
Key Features of Panda Assistant:
Data Recovery: Panda Assistant excels in retrieving lost, deleted, or corrupted files from a variety of storage media, including hard drives, external drives, SD cards, and USB flash drives. Whether you’ve accidentally deleted files or experienced system errors that resulted in data loss, Panda Assistant provides a simple and effective way to recover important documents, photos, videos, and more.
File Management: The software helps organize and manage files efficiently, offering tools for sorting, searching, and categorizing data. This makes it easy to locate specific files across your system or storage devices and keeps everything well-organized.
System Optimization: Panda Assistant includes built-in tools for optimizing your system’s performance. It helps users clean up unnecessary files, manage disk space, and enhance the speed of their devices by removing redundant data that can slow down performance.
Data Backup: The software provides backup solutions to prevent future data loss. Users can set up automated backups of their important files, ensuring that they are protected in case of unexpected system failure or other issues.
Cross-Platform Support: Panda Assistant is compatible with a wide range of operating systems, including Windows and macOS. This makes it accessible to a broad user base and ensures that it works across different devices.
Ease of Use: Panda Assistant is designed with an intuitive interface, making it suitable for both beginners and advanced users. The step-by-step recovery process is easy to follow, even for those with limited technical knowledge.
3.6. Use Command Prompt (for Advanced Users)
If you’re comfortable with using the command line, Windows offers some powerful built-in tools that may help retrieve lost files, such as the CHKDSK command.
How to Use CHKDSK:
Press Windows Key + X and select Command Prompt (Admin).
Type the following command and press Enter:
bash
chkdsk E: /f
Replace E: with the letter of your external drive.
Wait for the system to scan and attempt to fix any file system errors. If it finds issues, CHKDSK will try to recover any readable information.
4. Recovering Data from Physically Damaged Drives
In cases where the external hard drive is physically damaged (e.g., due to a fall, water damage, or hardware failure), the methods described above may not work. In such cases, data recovery becomes more complex.
4.1. DIY Repairs (Not Recommended for Beginners)
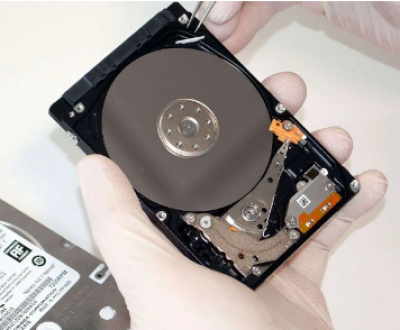
If you’re technically inclined, some users try DIY repairs to recover data from a physically damaged drive. This could include:
Opening the drive and inspecting for any obvious issues (e.g., loose parts).
Replacing the external hard drive enclosure if the issue is with the enclosure rather than the drive itself.
However, DIY repairs often risk causing further damage, especially if you lack the necessary expertise. In most cases, it’s better to seek professional help rather than attempt repairs on your own.
4.2. Professional Data Recovery Services
If DIY methods aren’t working, or if your external hard drive is severely damaged, it’s time to contact a professional data recovery service. These services have specialized tools and techniques to recover data from physically damaged or severely corrupted drives.
Professional services typically involve:
Sending the damaged drive to a lab.
Technicians use clean rooms and specialized tools to repair the hardware and retrieve data.
Depending on the damage, this process can take several days or even weeks.
Although professional recovery services can be expensive, they are often the last resort for recovering critical data.
5. Preventing Data Loss in the Future
While recovering files from an external hard drive is possible, it’s always best to prevent data loss in the first place. Here are some preventive measures you can take:
Backup Regularly: Use cloud storage or a second external drive to back up your files regularly.
Use Reliable Hardware: Invest in high-quality external hard drives from reputable brands.
Safely Eject Drives: Always safely eject your external hard drive before disconnecting it from the computer to avoid data corruption.
Enable File History or Time Machine: Set up File History (Windows) or Time Machine (Mac) to ensure your files are backed up automatically.
About us and this blog
Panda Assistant is built on the latest data recovery algorithms, ensuring that no file is too damaged, too lost, or too corrupted to be recovered.
Request a free quote
We believe that data recovery shouldn’t be a daunting task. That’s why we’ve designed Panda Assistant to be as easy to use as it is powerful. With a few clicks, you can initiate a scan, preview recoverable files, and restore your data all within a matter of minutes.
Subscribe to our newsletter!
More from our blog
See all postsRecent Posts
- How to recover data from portable hard drive 2025-07-10
- How to recover data from a broken hard drive 2025-07-10
- How do i recover files from a formatted hard drive 2025-07-10

 Try lt Free
 Recovery success rate of up to

