 Try lt Free
 Recovery success rate of up to
When a hard drive crashes, panic often sets in quickly especially if the drive contained irreplaceable files like family photos, business documents, or critical project data. Fortunately, a hard drive crash does not necessarily mean your data is gone forever. Many crashes can be diagnosed and repaired, and in most cases, data can be retrieved using the right approach.
A hard drive crash refers to a condition where the drive becomes inaccessible or fails to function properly. Crashes can be categorized into two main types:
Logical crashes – The drive is physically intact but data cannot be accessed due to file system corruption, accidental formatting, software errors, or virus attacks.
Physical crashes – The drive suffers from hardware failure. Common causes include head crashes, motor issues, PCB (Printed Circuit Board) damage, or exposure to water or fire.
Correctly identifying which type of crash has occurred is crucial for choosing the correct recovery strategy.
Signs of a Crashed Hard Drive
Recognizing early signs of hard drive failure can sometimes prevent total data loss. Watch for the following indicators:
Clicking, grinding, or buzzing noises from the drive
The drive is not recognized by the operating system
The system freezes or crashes frequently
Extremely slow file access or boot times
Missing files or folders
Blue screen errors when the drive is accessed
If you notice these signs, stop using the drive immediately to avoid further damage and maximize the chance of successful data recovery.
Initial Steps: Do’s and Don’ts
Do:
Stop using the drive to prevent overwriting or worsening the damage.
Disconnect the drive if it is external, or power off the computer if internal.
Use a different computer or bootable operating system to attempt diagnostics.
Label and safely store the drive in an anti-static bag if you intend to send it to a recovery service.
Don’t:
Attempt to open the drive casing; this can cause irreversible damage.
Format or reinstall the operating system.
Use unreliable recovery tools without understanding the risks.
Continue rebooting the system if the drive is making strange noises.
Diagnosing the Problem
Step 1: Check the BIOS/UEFI
Enter your system’s BIOS or UEFI to see if the drive is detected. If the BIOS does not recognize the drive, it might indicate a hardware issue.
Step 2: Test on Another Computer
If the drive is external or can be removed safely, connect it to another machine to see if it is recognized. If it’s not recognized on any computer, it’s likely a physical failure.
Step 3: Use SMART Tools
Use S.M.A.R.T. (Self-Monitoring, Analysis and Reporting Technology) utilities like CrystalDiskInfo to check drive health if the drive is still accessible. These tools can report signs of imminent failure.
Retrieving Data from a Logically Crashed Drive
If your drive has suffered a logical crash, there’s a good chance your data is recoverable using software methods.
Option 1: Use File Recovery Software
Panda Assistant
For logically crashed drives where files are lost due to deletion, corruption, or formatting—Panda Assistant scans the disk at a deep sector level to detect recoverable files. Its intuitive interface makes it easy to select specific file types like documents, photos, videos, or archives, and recover them with just a few clicks. You can preview files before restoration, ensuring you’re retrieving exactly what you need.
If your hard drive is physically damaged such as from a drop, power surge, or mechanical malfunction Panda Assistant offers diagnostic assistance to help identify the issue. It may recommend safe cloning or prompt you to contact a trusted professional recovery partner, depending on the severity. For drives that are still semi-accessible, Panda Assistant can attempt a non-invasive read to recover files without putting extra stress on failing components.
Security is a priority: Panda Assistant protects your data privacy with built-in encryption and ensures that recovered files are not overwritten during the process. Whether you’re using Windows or macOS, Panda Assistant provides cross-platform compatibility and step-by-step guidance to walk you through even the most challenging recoveries.
Option 2: Use Command Prompt (Windows Users)
For minimal file system issues, the built-in CHKDSK tool can help.
bash
CopyEdit
chkdsk X: /f /r
Replace X: with the drive letter. This scans for bad sectors and attempts recovery, but it’s not a complete data recovery solution and can sometimes make things worse if the drive is severely damaged.
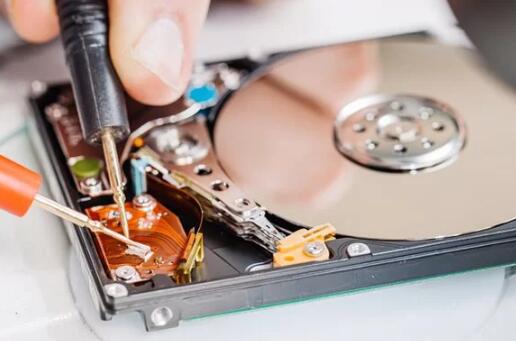
Retrieving Data from a Physically Damaged Drive
If your drive is making unusual noises or is not recognized at all, it’s likely physically damaged. DIY recovery is extremely risky for physical failures, so approach with caution.
Option 1: Use a Professional Data Recovery Service
Professional labs have clean rooms and specialized tools to open drives, replace damaged parts, and extract data.
Common steps professionals follow:
Diagnose the issue and determine the extent of damage
Clone the drive to prevent further degradation
Work from the clone to recover accessible data
These services are expensive, often ranging from $300 to $2000+, but they are your best bet for retrieving data from a severely damaged drive.
Option 2: Freezing the Drive (Myth Alert)
One old and mostly debunked trick is placing the drive in a sealed plastic bag in the freezer to “fix” motor or head issues temporarily. While this has worked for a few people in very rare situations, it’s highly discouraged as condensation and rapid temperature changes can permanently destroy the drive.
Cloning the Crashed Drive
If the drive is accessible but acting erratically, clone it before proceeding with recovery. Cloning captures an exact replica of the failing drive for safe analysis.
Tools to clone a drive:
Clonezilla
Macrium Reflect
ddrescue (Linux)
Acronis True Image
Cloning allows you to avoid additional wear and tear on the failing drive by working with a copy instead.
Using a Live Operating System
If your primary computer won’t boot due to a drive crash, a live Linux distribution like Ubuntu can help.
Steps:
Create a bootable USB with Ubuntu or another distro.
Boot into the live OS.
Mount the crashed drive if it’s detected.
Copy accessible files to another USB drive or external storage.
This method bypasses Windows entirely, making it useful for retrieving data from a system disk that won’t boot.
Recovering Data from External Hard Drives
External drives are subject to both physical damage (drops, spills) and logical corruption (accidental deletion, unplugging during data transfer).
To recover data from an external hard drive:
Check the USB cable and ports to rule out connection issues.
Use Disk Management (Windows) or Disk Utility (Mac) to check if the drive appears.
Use file recovery software if the file system is corrupted.
Take it to a professional if the drive is completely dead or making noises.
Preventing Future Data Loss
After recovering your data—or even if you couldn’t—you’ll want to take preventative steps to avoid future catastrophes.
Best practices:
Back up regularly using cloud storage or physical backup drives.
Use RAID systems or NAS for redundancy if your data is critical.
Enable S.M.A.R.T. monitoring and check it regularly.
Avoid overheating by ensuring your computer has adequate ventilation.
Use surge protectors to avoid electrical damage.
Safely eject drives to prevent file system corruption.
Tips for Handling Different File Types
Some file types recover more easily than others, depending on how fragmented they are and how they’re stored.
Documents (Word, Excel, PDFs) – Generally recoverable unless overwritten.
Images (JPG, PNG, RAW) – Recoverable but thumbnails may be corrupted.
Videos (MP4. AVI) – Often recoverable, but files may be incomplete or corrupt.
Databases and proprietary files – May require specialized tools or services.
Use software that supports file preview so you can assess recovery success before saving.
When Recovery Fails
Sometimes, despite all efforts, the data cannot be recovered. This could happen if:
The platters are scratched or shattered.
The firmware is severely corrupted.
The drive has experienced a head crash or electrical short circuit.
The data was overwritten multiple times.
At this point, it’s usually only possible to recover data through high-end clean room recovery, and even then, success is not guaranteed.
Choosing a Professional Recovery Service
If you opt for professional help, consider the following when choosing a recovery provider:
Reputation – Look for customer reviews and success stories.
Security – Ensure your data will be handled confidentially.
Pricing – Ask for an estimate. Avoid companies that charge for diagnostics.
Clean Room Facilities – Ensure they use proper clean rooms for physical repairs.
Return Policy – Check if they offer a “no data, no charge” guarantee.
Some of the most recognized names in the industry include Ontrack, DriveSavers, and Secure Data Recovery.
DIY vs. Professional Recovery: Which Is Right for You?
Go DIY if:
The drive is still readable and doesn’t show physical failure signs.
The files were accidentally deleted or the file system is corrupted.
You’re comfortable using recovery software and understand the risks.
Go Professional if:
The drive is clicking, beeping, or making grinding noises.
The system doesn’t recognize the drive at all.
The drive was exposed to water, fire, or physical impact.
You need critical data (legal, financial, medical) retrieved securely.
Choosing the right path could mean the difference between total recovery and permanent loss.
A crashed hard drive is never a pleasant experience, but it doesn’t have to be the end of the road. By remaining calm, properly diagnosing the problem, and applying the correct recovery method, you can often retrieve your data safely. Logical issues can frequently be resolved using data recovery software, while physical damage usually requires expert intervention. Either way, the key is to act promptly and wisely stop using the drive, clone if possible, and choose the best path based on the symptoms.
About us and this blog
Panda Assistant is built on the latest data recovery algorithms, ensuring that no file is too damaged, too lost, or too corrupted to be recovered.
Request a free quote
We believe that data recovery shouldn’t be a daunting task. That’s why we’ve designed Panda Assistant to be as easy to use as it is powerful. With a few clicks, you can initiate a scan, preview recoverable files, and restore your data all within a matter of minutes.
Subscribe to our newsletter!
More from our blog
See all posts


