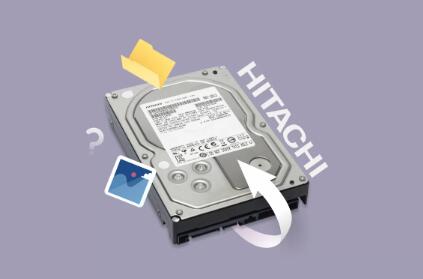
Losing this data whether due to accidental deletion, formatting errors, or system crashes can feel catastrophic. However, the good news is that deleted files from a hard disk can often be restored with the right approach and tools.
Chapter 1: How File Deletion Works
When you delete a file, it doesn’t vanish from the hard disk instantly. Instead, the operating system marks its space as available for reuse. Until that space is overwritten, the deleted file remains recoverable. This behavior opens a window of opportunity to recover lost data—if you act fast and use the right methods.

Types of File Deletion:
Soft Deletion: Moving files to the Recycle Bin or Trash.
Permanent Deletion: Emptying the Recycle Bin or using Shift + Delete.
Formatting: Quick formatting erases the file table, but data may still be intact.
Corruption or OS Errors: Can cause files to become inaccessible but not truly deleted.
Chapter 2: Preliminary Checks Before Using Software
1. Check the Recycle Bin/Trash
Windows: Open the Recycle Bin and restore files by right-clicking.
macOS: Open the Trash, drag files back to your desktop or preferred folder.
2. Use File History or Time Machine
Windows File History:
Go to Control Panel > File History > Restore personal files.
macOS Time Machine:
Connect your backup disk, open Time Machine, and restore previous versions of files.
3. Recent Files in Cloud Storage
If you use OneDrive, Google Drive, or Dropbox, check the cloud trash or deleted file history.
4. Stop Using the Drive Immediately
Avoid writing new data to the hard disk to prevent overwriting the deleted files.
Chapter 3: Using Built-in Recovery Tools (Windows & macOS)
Windows
Windows File Recovery Tool (Command-Line)
Download from Microsoft Store.
Usage: winfr C: D: /n \Users\YourName\Documents\file.txt
macOS
Terminal-Based Recovery (for advanced users)
Use diskutil and fsck tools cautiously.
macOS Recovery Mode: Reinstall OS without wiping data.
Chapter 4: Best Third-Party Software for File Recovery
Panda Assistant is an intuitive data recovery solution designed to help users quickly and safely restore deleted files from hard disks. Whether you’ve accidentally deleted an important document, lost files due to formatting, or encountered a corrupted drive, Panda Assistant provides a streamlined recovery experience for both beginners and advanced users.
Key Features of Panda Assistant:
User-Friendly Interface: The software guides you through each recovery step with easy-to-follow instructions.
Deep & Quick Scan Modes: Choose between a fast scan for recently deleted files and a deep scan to locate long-lost or deeply buried data.
Wide File Type Support: Panda Assistant supports the recovery of documents, photos, videos, music files, and more.
Preview Functionality: Before restoring, you can preview files to ensure you’re recovering exactly what you need.
Safe Recovery: Files are restored to a separate location to prevent overwriting, preserving data integrity.
How to Use Panda Assistant:
Launch the Panda Assistant application.
Select the affected hard disk.
Choose the scan mode (Quick or Deep).
Preview and select the files you want to restore.
Click “Recover” and choose a different location for restored files.
Chapter 5: Step-by-Step Guide to Recovering Deleted Files
Download and Install Recovery Software
Install the tool on a different drive than the one you’re recovering from.
Scan the Affected Drive
Choose between quick scan and deep scan.
Preview Files (if supported)
Check file names, thumbnails, or metadata.
Select Files to Recover
Use filters to find specific file types (documents, videos, etc.).
Recover to a New Location
Save files to a different disk to avoid overwriting data.
Chapter 6: Manual Recovery via CMD or Terminal (Advanced Users)
Windows
Open CMD as administrator.
Use chkdsk X: /f to fix errors.
Use attrib -h -r -s /s /d X:*.* to recover hidden files.
macOS
Use Terminal to navigate volumes and list directories.
ls -la to show hidden files.
cp to copy files from disk to external storage.
Chapter 7: When to Call a Professional
If:
The drive is physically damaged.
Recovery software fails repeatedly.
You hear clicking or grinding noises from the disk.
Then seek help from a certified data recovery lab. Professionals can disassemble drives in clean rooms and retrieve data even from severely damaged platters.
Chapter 8: Preventing Future Data Loss
Set Up Automated Backups
Use Windows File History or macOS Time Machine.
Cloud Syncing
Enable OneDrive, Google Drive, or Dropbox syncing.
Install Antivirus Software
Prevent malware-related file deletions.
Use Surge Protectors and UPS
Avoid power-related damage.
Avoid Overfilling Drives
Maintain 15–20% free space for optimal performance.
Restoring deleted files from a hard disk is often possible with the right approach. From using built-in OS tools and file history to deploying advanced third-party recovery software, users have several effective options. Acting quickly, avoiding overwriting, and selecting the right tools can greatly improve recovery success. For irreparable cases, professional services provide a last line of defense. As technology continues to evolve, so do the tools available to recover our most important digital assets—ensuring that lost files don’t have to be lost forever.
About us and this blog
Panda Assistant is built on the latest data recovery algorithms, ensuring that no file is too damaged, too lost, or too corrupted to be recovered.
Request a free quote
We believe that data recovery shouldn’t be a daunting task. That’s why we’ve designed Panda Assistant to be as easy to use as it is powerful. With a few clicks, you can initiate a scan, preview recoverable files, and restore your data all within a matter of minutes.

 Try lt Free
 Recovery success rate of up to


