 Try lt Free
 Recovery success rate of up to
I. Restoring Deleted Files from the Recycle Bin
The recycle bin is a safety net that Windows and many other operating systems provide to users. When you delete a file or folder, it’s usually not immediately erased from your storage device. Instead, it’s moved to the recycle bin, allowing you to potentially retrieve it if you realize you made a mistake.
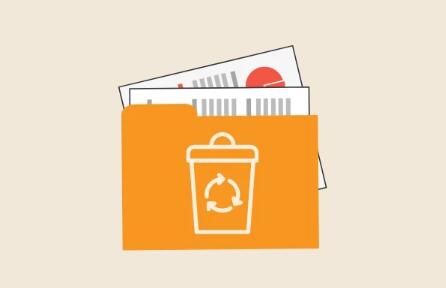
II. Recycle Bin
What is the Recycle Bin?
The recycle bin is a system – managed folder that stores deleted files and folders. It acts as a buffer between the user’s deletion action and the actual permanent deletion of data from the storage medium. In Windows, for example, it’s a visible icon on the desktop. When you delete a file, it’s sent to the recycle bin, and the space that the file occupied on the hard drive is marked as available for new data to be written over, but the file’s content remains in the recycle bin until it’s emptied or the file is overwritten.
How the Recycle Bin Works
The recycle bin keeps track of the original location of the deleted files. When you view the contents of the recycle bin, you can see information such as the file name, original location, size, and date of deletion. This information is crucial for understanding where the file came from and for restoring it to its correct location.
III. Restoring Files in Windows
Using the Recycle Bin Interface
Open the Recycle Bin: You can do this by double – clicking the recycle bin icon on the desktop. Once opened, you’ll see a list of all the deleted files and folders.
Locate the File to Restore: You can use the search bar within the recycle bin if you know part of the file name or other details. Files are usually listed in a table – like format with columns showing the name, original location, size, and deletion date.
Restore the File: Right – click on the file you want to restore and select “Restore.” The file will then be moved back to its original location. If the original folder no longer exists, Windows will attempt to recreate the folder structure to place the file back in its proper place.
Command – Line Restoration (for Advanced Users)
Open the Command Prompt: You can search for “Command Prompt” in the Start menu and open it as an administrator.
Use the “Recover” Command (not to be confused with other recovery software commands): The basic syntax for restoring a file from the recycle bin using the command prompt is a bit complex. The recycle bin in Windows stores files in a hidden system folder structure. Each user has a unique recycle bin folder, and the path usually looks like “C:$Recycle.Bin\ [User SID]”. The SID (Security Identifier) is a unique identifier for each user account. You need to know the exact file name and its location within the recycle bin to use commands like “copy” to move the file back to its original location. For example, if the file you want to restore is named “document.txt” and it’s located in the recycle bin folder of a particular user with SID “S – 1 – 5 – 21 – [long number]”, you might use a command like “copy C:$Recycle.Bin\S – 1 – 5 – 21 – [long number]\document.txt [original location]”. This method requires a good understanding of the file system and command – line operations and is usually used by advanced users or in situations where the graphical interface of the recycle bin is not working properly.
IV. Restoring Files in macOS
Using the Trash Can
Open the Trash Can: The trash can icon is located at the end of the Dock. Click on it to open the contents of the trash.
Locate the File to Restore: Similar to Windows, you can scroll through the list of deleted files or use the search function (Command + F) to find the specific file you want to restore.
Restore the File: Drag the file from the trash can back to its original location. If you’re not sure where the original location was, you can right – click on the file in the trash and select “Put Back.” macOS will attempt to restore the file to its original location based on its metadata and the history of where it was stored.
Time Machine Backups (an Alternative Method)
Connect the Time Machine Backup Drive: If you have been using Time Machine to back up your Mac, and the file you want to restore was backed up, you need to connect the external hard drive or other storage device that contains the Time Machine backups.
Open Time Machine: You can do this by clicking on the Time Machine icon in the menu bar and selecting “Enter Time Machine.”
Navigate to the Point in Time When the File Existed: Time Machine presents a graphical interface that allows you to “travel back in time” to different backup points. Use the timeline on the right side of the screen to select a backup point when the file you want to restore was still present.
Restore the File: Once you’ve located the file in the backup, you can select it and click “Restore.” Time Machine will copy the file back to its original location or a location you specify.
V. Restoring Files in Linux (Using Popular Desktop Environments)
GNOME and Nautilus
Open the Trash Folder: In GNOME, the trash folder can be accessed through the file manager (Nautilus). It’s usually located in the sidebar or can be found by navigating to the home directory and looking for a folder named “.local/share/Trash.”
Locate the File to Restore: Use the search function within the trash folder or simply browse through the list of deleted files.
Restore the File: Right – click on the file and select “Restore.” The file will be moved back to its original location.
KDE and Dolphin
Open the Trash Can: In KDE, the trash can is accessible through the Dolphin file manager. It’s usually located in the panel or can be found by looking for a folder named “trash – [user name]” in the home directory.
Locate the File to Restore: Similar to GNOME, you can use the search function or browse through the list of deleted files.
Restore the File: Drag the file from the trash can back to its original location or right – click on the file and select “Restore.”
VI. Special Considerations
File Overwriting
If your computer has been actively writing new data to the storage device after the file was deleted and sent to the recycle bin, there’s a risk that the file’s data may have been overwritten. The recycle bin only protects the file from immediate deletion, but if the storage space that the file occupied is needed for new data, the operating system may overwrite the file’s content. This is more likely to happen if your hard drive is nearly full or if you’ve been performing tasks such as downloading large files, installing software, or running disk – intensive applications.
External Drives and Network Drives
The behavior of the recycle bin can be different when dealing with external drives and network drives. In some cases, files deleted from an external drive may not go to the recycle bin at all, depending on the settings of the operating system and the device. For network drives, the recycle bin functionality may be limited or non – existent, and it’s important to check the backup and recovery options provided by the network storage system.
Corrupted Files in the Recycle Bin
Files in the recycle bin can become corrupted due to various reasons such as disk errors, power outages during the deletion process, or software glitches. If a file in the recycle bin is corrupted, attempting to restore it may result in an unusable file. In such cases, you may need to use data recovery software that can attempt to repair or extract the data from the corrupted file.
About us and this blog
Panda Assistant is built on the latest data recovery algorithms, ensuring that no file is too damaged, too lost, or too corrupted to be recovered.
Request a free quote
We believe that data recovery shouldn’t be a daunting task. That’s why we’ve designed Panda Assistant to be as easy to use as it is powerful. With a few clicks, you can initiate a scan, preview recoverable files, and restore your data all within a matter of minutes.
Subscribe to our newsletter!
More from our blog
See all posts


