Resizing a USB flash drive can be a task that requires an understanding of partition management, file systems, and the purpose of modifying the storage space. Whether you’re expanding or shrinking the usable capacity, resizing a USB drive serves different functions, from optimizing storage space to preparing the device for specific applications.
USB Flash Drive Resizing and Its Practical Uses
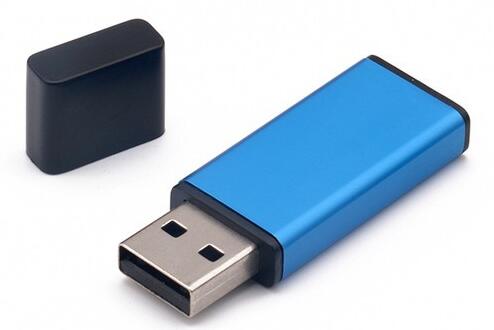
The USB flash drive has evolved from being a simple data storage device into a multi-functional tool that can support various modern-day applications. Since the first flash drives appeared in the late 1990s, they have become ubiquitous in the worlds of both casual and professional computing. The flash drive is celebrated for its portability, reliability, and ease of use. It enables people to carry large amounts of data in their pocket and can be employed in a wide range of applications, such as booting operating systems, backing up sensitive data, and transferring important files between devices.
However, users often find themselves in situations where they need to adjust the size of the storage partitions on a USB drive. This could be to create multiple partitions for different purposes, reclaim unused space, or reformat a drive for compatibility with a new device or operating system. Resizing a USB flash drive is not always intuitive, and it often involves tools and software that are not immediately familiar to the average user. Despite its technical nature, resizing a USB drive can bring multiple benefits, including better use of the available space and improved performance for specific tasks.
1. Why Resize a USB Flash Drive?
Before diving into the specifics of how to resize a USB flash drive, it’s important to understand why someone might want to undertake this task. Flash drives are generally used to store files, but there are several scenarios where partition management and resizing might be required:
a. Optimizing Usable Space
If a USB flash drive contains multiple partitions, you may find that one of them has extra space that could be more effectively utilized by another partition. For instance, a flash drive used to store both documents and multimedia files might have a partition allocated for the latter that remains half-empty. Resizing the partitions will allow you to reclaim unused space and allocate it for more pressing needs.
b. Multi-Boot Configurations
USB flash drives are often used as bootable devices, especially by IT professionals. You can install multiple operating systems, recovery tools, or even full-fledged applications on a single flash drive. In such cases, it’s crucial to allocate the right amount of storage to each operating system or application. By resizing partitions, you can ensure that each component of the multi-boot system has the space it needs to function efficiently.
c. File System Compatibility
Different operating systems use different file systems. For example, a USB flash drive formatted for Windows (NTFS) may not be compatible with certain devices that require the FAT32 or exFAT file system. Resizing the partitions and reformatting sections of the drive can allow for seamless use across multiple platforms, such as Linux, Windows, macOS, and even gaming consoles.
d. Security and Privacy Concerns
USB flash drives are commonly used to store sensitive data, which may require encryption for security purposes. Some encryption software requires a specific file system, or partition sizes, to work correctly. In such cases, resizing a flash drive to create a dedicated encrypted partition ensures that the sensitive data remains isolated from other less critical data.
2. Tools Needed for Resizing a USB Flash Drive
To resize a USB flash drive, you’ll need specialized software tools. These tools provide users with graphical interfaces or command-line utilities to adjust partition sizes, format drives, and manage storage. Here are some of the most commonly used tools:
a. Disk Management (Windows)
The built-in Disk Management tool in Windows allows users to manage partitions on a USB drive. It can be used to shrink, expand, delete, or create partitions. Disk Management is simple and efficient for users who are already familiar with Windows environments.
b. GParted (Linux)
GParted is an open-source partition editor available for Linux systems. It allows users to resize, move, and format partitions on a USB flash drive. One of the main advantages of GParted is its wide compatibility with various file systems, including NTFS, FAT32. and ext4.
c. MacOS Disk Utility
On macOS, Disk Utility provides users with an easy-to-use interface for managing partitions on both internal and external drives. Disk Utility supports resizing, formatting, and partitioning USB flash drives with various file systems, including APFS and HFS+.
d. Third-Party Partition Managers
There are various third-party partition managers available for users who want more advanced options. Examples include AOMEI Partition Assistant, EaseUS Partition Master, and MiniTool Partition Wizard. These programs often provide additional features, such as file system conversion, data recovery, and partition cloning, which can be beneficial for more complex tasks.
3. Steps to Resize a USB Flash Drive
Now that we’ve discussed why and when you might want to resize a USB flash drive, let’s go through the process step-by-step using some of the tools mentioned above.
a. Using Windows Disk Management
Insert the USB Flash Drive into your computer’s USB port.
Open Disk Management by right-clicking on the Start button and selecting Disk Management.
In the Disk Management window, locate the USB drive. It should appear as a Removable disk.
Right-click on the partition you want to resize and select either Shrink Volume or Extend Volume.
Follow the on-screen instructions to specify the new size for the partition. For example, to shrink the partition, specify how much space you want to reduce.
Once completed, the resized partition will appear in Disk Management.
b. Using GParted on Linux
Download and install GParted if it is not already available on your system.
Insert the USB drive and open GParted.
Select the USB drive from the dropdown list in the upper-right corner.
Right-click on the partition you want to resize and select Resize/Move.
Adjust the partition size by dragging the slider or manually entering the new size in the dialogue box.
Click Apply to confirm the changes. The partition will be resized based on your specifications.
c. Using macOS Disk Utility
Insert the USB flash drive into your Mac.
Open Disk Utility from Applications > Utilities.
In the left-hand panel, select the USB drive.
Click on Partition at the top of the window.
In the partition editor, you can click and drag to resize existing partitions or create new ones.
After resizing the partitions, click Apply to confirm the changes.
4. Considerations and Precautions When Resizing
Resizing a USB flash drive can be a straightforward task, but it is important to take certain precautions before proceeding:
Backup Data: Before resizing any partitions, always back up the data on the USB drive. This is especially important if you are shrinking or moving partitions, as there is always a slight risk of data loss during the process.
Check Compatibility: Ensure that the file system of the resized partitions is compatible with the devices or operating systems you plan to use. For example, many gaming consoles require a FAT32 file system, while modern Windows installations prefer NTFS.
Be Mindful of Partition Limits: Some USB flash drives have limitations on how many partitions they can support, especially in certain operating systems. For instance, Windows may only recognize the first partition on a USB drive formatted with certain file systems.
Use the Right Tool for the Job: Different partitioning tools have different strengths. For instance, GParted offers more advanced functionality than Windows Disk Management but might be more complicated for novice users.
5. Conclusion: Making the Most of Your USB Flash Drive
Resizing a USB flash drive offers various benefits, from optimizing storage space to enabling multi-boot systems and improving compatibility across platforms. By utilizing the appropriate tools and taking the necessary precautions, users can effectively manage their USB drives to fit their specific needs.
Understanding the process of resizing USB drives empowers users to maximize the potential of these versatile devices. Whether for personal use, professional IT applications, or specific niche uses like encrypted partitions or gaming system compatibility, resizing opens up a world of possibilities for efficient data management.
About us and this blog
Panda Assistant is built on the latest data recovery algorithms, ensuring that no file is too damaged, too lost, or too corrupted to be recovered.
Request a free quote
We believe that data recovery shouldn’t be a daunting task. That’s why we’ve designed Panda Assistant to be as easy to use as it is powerful. With a few clicks, you can initiate a scan, preview recoverable files, and restore your data all within a matter of minutes.
Subscribe to our newsletter!
More from our blog
See all postsRecent Posts
- How to recover deleted word document 2025-07-09
- How to recover deleted photos on sd memory card 2025-07-09
- How to recover completely deleted files 2025-07-09

 Try lt Free
 Recovery success rate of up to

