Micro SD cards are essential for storing data in smartphones, tablets, cameras, and various other devices. However, you might find yourself needing to reset your micro SD card for various reasons, such as fixing errors, improving performance, or preparing the card for a new device.
1. Micro SD Cards
Before diving into the resetting process, it’s essential to understand what a micro SD card is and how it works.
1.1 What is a Micro SD Card?
A micro SD card is a small, portable storage device used in mobile devices, cameras, and other electronics. It is a type of flash memory card that allows for quick access and storage of data.
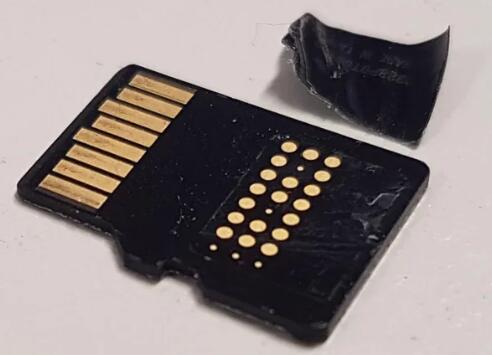
1.2 Types of Micro SD Cards
Micro SD cards come in several types:
Standard Capacity (SDSC): Up to 2GB
High Capacity (SDHC): 2GB to 32GB
Extended Capacity (SDXC): 32GB to 2TB
2. Reasons to Reset a Micro SD Card
Resetting a micro SD card can help with various issues:
Corrupted Files: If your SD card shows errors or is unreadable.
Performance Issues: Sluggish performance or slow read/write speeds.
Preparation for New Use: Erasing all data before selling or transferring the card.
3. Backup Your Data
Before resetting your micro SD card, it’s crucial to back up any important data you have stored on it. Here’s how to do it:
3.1 Using a Computer
Insert the micro SD card into your computer using an adapter.
Open File Explorer (Windows) or Finder (Mac).
Locate the micro SD card and copy its contents to a safe location on your computer.
3.2 Using a Smartphone
Use a file management app to access your micro SD card.
Select and copy the files you want to back up to internal storage or a cloud service.
4. Methods to Reset a Micro SD Card
There are several methods to reset a micro SD card, including formatting and using specialized software.
4.1 Method 1: Formatting via Computer
Formatting your micro SD card is one of the most effective ways to reset it.
For Windows:
Insert the micro SD card into your computer.
Open File Explorer and right-click on the micro SD card.
Select Format.
Choose the File System (FAT32 for cards up to 32GB, exFAT for larger cards).
Check the Quick Format option for faster formatting.
Click Start and confirm the action.
For Mac:
Insert the micro SD card.
Open Disk Utility (Applications > Utilities > Disk Utility).
Select the micro SD card from the list.
Click on Erase.
Choose a format (MS-DOS (FAT) for FAT32 or ExFAT for larger cards).
Click Erase to reset the card.
4.2 Method 2: Formatting via Smartphone
If you prefer using your smartphone, here’s how to do it.
For Android:
Insert the micro SD card into your Android device.
Go to Settings > Storage.
Tap on the micro SD card.
Select Format or Erase SD Card.
Confirm the action.
For iPhone: iPhones do not support micro SD cards directly, but if you use a compatible reader, you can access the card through an app and format it via a connected computer.
4.3 Method 3: Using Command Prompt (Windows)
For advanced users, you can reset the micro SD card using Command Prompt.
Insert the micro SD card into your computer.
Open Command Prompt as an administrator.
Type diskpart and press Enter.
Type list disk to see all drives.
Identify your micro SD card (e.g., Disk 1).
Type select disk X (replace X with your disk number).
Type clean to remove all partitions.
Type create partition primary.
Type format fs=fat32 quick (or exfat).
Type exit to close DiskPart.
4.4 Method 4: Using Data Recovery Software
If the micro SD card has errors, using specialized software can help. Here’s a popular option:
Download and install a reputable data recovery tool (e.g., Recuva, EaseUS Data Recovery Wizard).
Launch the software and select your micro SD card.
Choose the option to format or reset the card as prompted.
Follow the instructions provided by the software.
5. What to Do If the Micro SD Card Is Locked
Some micro SD cards have a physical lock switch. If your card isn’t writing or formatting:
Check the Lock Switch: Ensure the switch is in the “unlocked” position.
Check Permissions: If using a smartphone or computer, ensure you have the right permissions to format the card.
6. Post-Reset Considerations
After resetting your micro SD card, you might want to:
6.1 Test the Card
Once formatted, test the micro SD card to ensure it’s functioning correctly. Copy some files back to the card and verify that they are accessible.
6.2 Re-Organize Your Data
Consider how you want to organize your data on the micro SD card. Create folders for different types of files (e.g., photos, videos, documents) for easier access.
7. Troubleshooting Common Issues
Even after resetting your micro SD card, you may encounter issues. Here’s how to troubleshoot:
7.1 Micro SD Card Not Recognized
Try a different card reader.
Check for physical damage.
Ensure your device supports the card’s capacity.
7.2 Slow Performance
Check for malware or unnecessary files.
Reformat the card using the methods above.
7.3 Read/Write Errors
Use a data recovery tool to check for bad sectors.
If errors persist, consider replacing the micro SD card.
8. Preventive Measures
To avoid future issues with your micro SD card:
Safely Eject the Card: Always use the eject option when removing the card from devices.
Avoid Overloading: Don’t fill the card to its maximum capacity; leave some free space for optimal performance.
Use Reliable Devices: Only use the micro SD card with trusted devices to prevent corruption.
About us and this blog
Panda Assistant is built on the latest data recovery algorithms, ensuring that no file is too damaged, too lost, or too corrupted to be recovered.
Request a free quote
We believe that data recovery shouldn’t be a daunting task. That’s why we’ve designed Panda Assistant to be as easy to use as it is powerful. With a few clicks, you can initiate a scan, preview recoverable files, and restore your data all within a matter of minutes.
Subscribe to our newsletter!
More from our blog
See all postsRecent Posts
- How to recover accidentally deleted files 2025-07-01
- How do i recover a file i accidentally deleted 2025-07-01
- How to recover an accidentally deleted file 2025-07-01

 Try lt Free
 Recovery success rate of up to

