 Try lt Free
 Recovery success rate of up to
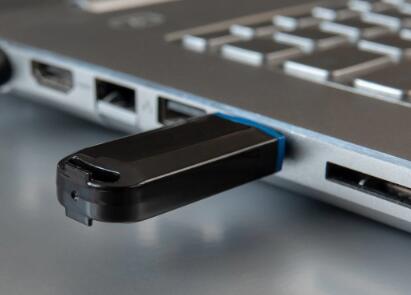
Universal Serial Bus (USB) ports are an essential part of modern computing, enabling users to connect a wide array of devices such as flash drives, external hard drives, keyboards, mice, printers, and even charging cables. Whether on a desktop PC, laptop, game console, or smart TV, USB ports are among the most frequently used components and that makes them highly prone to wear and damage.
A broken USB port can be incredibly frustrating. Maybe your device isn’t being detected, or the port feels loose, or perhaps it doesn’t provide power at all. Fortunately, not every USB port issue requires professional repair or replacement of the entire device. Some problems are minor and can be fixed with careful DIY techniques.
Chapter 1: USB Port Problems
Before diving into repairs, it’s crucial to understand what’s wrong. USB port issues generally fall into one of two categories:
1.1. Physical Damage
Bent or broken pins inside the port
Loose USB connection or wobbly port
Cracked solder joints on the motherboard
Burnt or blackened contacts (due to power surge or short)
1.2. Software or Firmware Issues
USB drivers not installed or corrupted
Power management settings disabling USB ports
BIOS/UEFI configuration errors
Outdated operating system
Understanding which type of problem you’re facing is the first step to an effective repair.
Chapter 2: Safety First – Precautions and Tools Needed
2.1. Safety Precautions
Unplug the device: Always disconnect the power source before working on any hardware.
Discharge static electricity: Use an anti-static wristband or touch grounded metal.
Work in a clean, well-lit area: Small components are easier to see and manage.
2.2. Tools You’ll Need
Screwdrivers (Phillips and flat-head)
Soldering iron and solder
Multimeter for testing voltage and continuity
Needle-nose pliers
Magnifying glass or headlamp
Replacement USB port (if needed)
Tweezers and small brush (for cleaning)
Thermal paste (optional for reassembly if laptop is opened)
Chapter 3: Diagnosing the Problem
3.1. Test with Different Devices
Plug several devices into the questionable USB port. If none work, the issue is likely with the port itself.
3.2. Try Different Ports
Check if other USB ports work. If they do, the problem is isolated to one port. If none work, it might be a software or power issue.
3.3. Inspect the Port Visually
Use a flashlight and magnifying glass to inspect for:
Dust or debris
Bent pins
Loose port
Burn marks
3.4. Device Manager (Windows)
Go to Device Manager > Universal Serial Bus controllers. Look for:
Yellow exclamation marks (driver problems)
Unrecognized devices
Disabled USB controllers
3.5. Terminal or System Report (Mac/Linux)
On Mac: Apple Menu > About This Mac > System Report > USB
On Linux: Use the command lsusb to list connected devices.
3.6. Check Power Supply
Use a multimeter to ensure power is reaching the USB port (usually 5V). No power could indicate a motherboard or fuse issue.
Chapter 4: Fixing Software and Firmware Issues
4.1. Update or Reinstall USB Drivers
Open Device Manager
Right-click your USB controller
Choose “Uninstall device”
Restart your computer and allow Windows to reinstall the driver
4.2. Power Management Settings
In Device Manager, double-click USB Root Hub
Go to Power Management
Uncheck “Allow the computer to turn off this device to save power”
4.3. BIOS/UEFI Settings
Enter BIOS/UEFI during startup
Make sure USB ports are enabled
Look for options like “Legacy USB Support” and ensure they’re on
4.4. Operating System Updates
Ensure your OS is up to date
Windows: Settings > Update & Security > Check for Updates
Mac: System Preferences > Software Update
Chapter 5: Cleaning the USB Port
Sometimes all your USB port needs is a thorough cleaning.
5.1. Power Down the Device
Turn off your device and unplug it from all power sources.
5.2. Use Compressed Air
Blow short bursts of compressed air into the port to remove loose debris.
5.3. Use a Soft Brush
Gently scrub inside the port with a small electronics brush or a toothbrush.
5.4. Isopropyl Alcohol
Dip a small brush or Q-tip in 90%+ isopropyl alcohol and clean the contacts. Allow it to dry fully before powering on.
Chapter 6: Repairing Physical Damage
6.1. Fixing Bent Pins
Use tweezers or a needle to gently straighten any bent pins.
Be careful not to break them.
6.2. Tightening a Loose Port
If the port wiggles, it may have come loose from the motherboard or chassis.
Disassemble the laptop or case to access the internal port.
Use epoxy or re-solder the joints to secure the port.
6.3. Replacing the USB Port
If the port is broken beyond repair, you may need to replace it entirely.
Step-by-Step:
Disassemble the device: Follow a repair guide specific to your model to avoid damage.
Locate the USB port on the motherboard.
Desolder the old port: Use a soldering iron and wick to remove the damaged port.
Clean the solder pads.
Insert and solder the new port.
Test for power and data.
Reassemble the device.
Warning: Soldering on a motherboard requires skill. If you’re unsure, consider taking it to a repair professional.
Chapter 7: When to Use a USB Hub or Adapter
If the damaged port is not critical (e.g., you have others available), you can use a USB hub to expand your working ports. Alternatively, for laptops with broken USB-A ports, consider using USB-C ports with an adapter.
Chapter 8: Professional Repair vs DIY
8.1. When to DIY
You have the tools and experience.
The device is out of warranty.
The repair cost exceeds device value.
8.2. When to Seek Professional Help
You’re not comfortable soldering.
It’s a high-value device like a gaming laptop or MacBook.
Multiple USB ports are failing (possible motherboard issue).
Most tech repair shops can replace a USB port for $50–$150 depending on the device.
Chapter 9: Preventing Future Damage
Don’t yank cables: Always pull from the plug, not the cord.
Avoid force: Never jam in connectors.
Keep ports clean: Use dust plugs when not in use.
Use a hub: Minimize wear on built-in ports.
About us and this blog
Panda Assistant is built on the latest data recovery algorithms, ensuring that no file is too damaged, too lost, or too corrupted to be recovered.
Request a free quote
We believe that data recovery shouldn’t be a daunting task. That’s why we’ve designed Panda Assistant to be as easy to use as it is powerful. With a few clicks, you can initiate a scan, preview recoverable files, and restore your data all within a matter of minutes.
Subscribe to our newsletter!
More from our blog
See all posts


