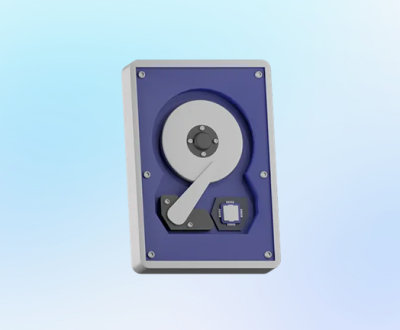
Removing data from a damaged hard drive can be a complex task, especially when the drive has physical or logical errors. There are various reasons why you might need to do this, such as when the hard drive is about to be discarded, sold, or recycled, and you want to ensure the security of your personal or sensitive information.
Physical Damage: This occurs when there is physical harm to the hard drive’s components. It could be due to a drop, impact, overheating, or mechanical failure. Symptoms may include strange noises like clicking or grinding, the drive not being recognized by the computer, or the system crashing frequently.
Logical Damage: This type of damage affects the file system or the data structures on the hard drive. It can be caused by viruses, software bugs, improper shutdowns, or file system corruption. Signs of logical damage might include error messages when trying to access files, missing files or folders, or the drive appearing to be empty even though it should have data.

Precautions Before Attempting Data Removal
Backup Important Data: If possible, try to back up any important data that is still accessible on the damaged hard drive before attempting to remove data. This can be done using data recovery software or by connecting the drive to a data recovery service.
Wear ESD-Protective Gear: When dealing with the internal components of a hard drive, it’s crucial to wear an electrostatic discharge (ESD) wrist strap to prevent static electricity from damaging the drive further.
Work in a Clean and Stable Environment: Choose a clean, dust-free area with a stable work surface to avoid any foreign particles from getting into the hard drive and causing more problems.
Methods to Remove Data from a Damaged Hard Drive
For Logically Damaged Hard Drives
Formatting the Drive
Using Operating System Tools: Most operating systems offer built-in formatting options. For Windows, you can right-click on the drive in “This PC” and select “Format”. In macOS, you can use Disk Utility to format the drive. This method erases the file system and all the data on the drive, but it may not work if the drive has severe logical damage.
Command-Line Formatting: In Windows, you can use the format command in the Command Prompt. In Linux, commands like mkfs can be used to format different file systems. Command-line formatting gives more control and options, such as specifying the file system type and allocation unit size.
Using Data Erasure Software
DBAN (Darik’s Boot and Nuke): DBAN is a popular and powerful data erasure tool that can be used to wipe hard drives. It can be booted from a CD, DVD, or USB drive and offers various wiping algorithms to ensure complete data removal. It works well on both Windows and Linux systems and can handle drives with logical damage to some extent.
CCleaner: This is a widely used software for cleaning up various types of data on a computer. In addition to clearing browser history and temporary files, it can also be used to wipe free space on a hard drive, which helps to remove deleted files that might still be recoverable.
Eraser: It is a Windows-based tool that allows you to securely delete files and folders, as well as wipe entire drives. It offers different levels of data erasure, from simple deletion to more advanced methods that overwrite the data multiple times to make it nearly impossible to recover.
For Physically Damaged Hard Drives
Replacing the Circuit Board
Identifying the Right Circuit Board: First, you need to determine the exact model and make of the hard drive. Then, find a compatible circuit board, which can usually be purchased from electronics parts suppliers or online marketplaces. Make sure to get a board with the same firmware version, as different versions may not work properly.
Replacing the Board: Open the hard drive enclosure carefully, following the manufacturer’s instructions. Disconnect the old circuit board and remove any screws or connectors holding it in place. Then, attach the new circuit board and reconnect all the cables and components. After reassembling the drive, connect it to the computer and see if it is recognized. If it is, you can then use the methods for logically damaged drives to remove the data.
Using a Data Recovery Service’s Cleanroom
When to Consider a Cleanroom Service: If the hard drive has severe physical damage, such as a head crash or platter damage, it’s best to leave the data removal process to professionals with cleanroom facilities. These are specialized environments with controlled temperature, humidity, and air cleanliness to prevent dust and other particles from contaminating the drive during the repair and data removal process.
How the Process Works: The data recovery service will first assess the extent of the damage. They may use specialized tools and equipment to access the data on the damaged drive. Once they have retrieved the data, they can then securely erase it using industry-standard methods, such as overwriting the data multiple times or using degaussing techniques.
Degaussing the Hard Drive
What is Degaussing: Degaussing is a process that uses a strong magnetic field to disrupt the magnetic domains on the hard drive’s platters, effectively erasing the data. This method is very effective for removing data from hard drives with physical damage, as it doesn’t rely on the drive’s mechanical or electrical components to be functional.
Using a Degausser: There are commercial degaussing devices available that can be used to degauss hard drives. These devices come in different sizes and strengths, depending on the type and capacity of the hard drives they are designed to handle. To use a degausser, simply place the hard drive inside the device and follow the manufacturer’s instructions to initiate the degaussing process.
Special Considerations for Solid State Drives (SSDs)
TRIM Command: The TRIM command is a feature in modern operating systems that helps to improve the performance and lifespan of SSDs. It also plays a role in data removal. When you delete a file on an SSD, the operating system can use the TRIM command to tell the SSD which blocks of data are no longer in use and can be erased. This makes it easier to securely erase data on an SSD.
Secure Erase: Many SSD manufacturers provide tools or utilities that allow you to perform a secure erase operation. These tools typically overwrite the entire SSD with zeros or random data, effectively erasing all the existing data. It’s important to check the manufacturer’s website for the specific secure erase software and instructions for your SSD model.
Encryption: If your SSD supports hardware encryption, you can use this feature to protect your data. By encrypting the data on the SSD, even if the drive is physically damaged or lost, the data will be unreadable without the correct encryption key. You can then simply delete the encryption key to render the data inaccessible.
Verifying Data Removal
Using Data Recovery Software to Check: After attempting to remove the data, you can use data recovery software to scan the drive and see if any recoverable data remains. If the software finds no significant data, it’s a good indication that the data removal was successful.
Visual Inspection: For drives that have been physically destroyed or degaussed, you can visually inspect the drive to ensure that the platters or storage media have been damaged or altered in a way that makes data recovery impossible.
About us and this blog
Panda Assistant is built on the latest data recovery algorithms, ensuring that no file is too damaged, too lost, or too corrupted to be recovered.
Request a free quote
We believe that data recovery shouldn’t be a daunting task. That’s why we’ve designed Panda Assistant to be as easy to use as it is powerful. With a few clicks, you can initiate a scan, preview recoverable files, and restore your data all within a matter of minutes.
Subscribe to our newsletter!
More from our blog
See all postsRecent Posts
- How to recover deleted word document 2025-07-09
- How to recover deleted photos on sd memory card 2025-07-09
- How to recover completely deleted files 2025-07-09

 Try lt Free
 Recovery success rate of up to


