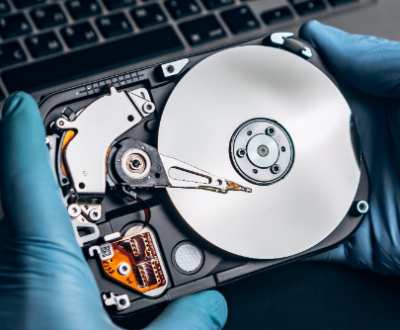
Reformatting an external hard drive is a crucial process that many users undertake for various reasons, such as clearing old data, changing file systems, or fixing performance issues. Toshiba external hard drives are popular choices for data storage due to their reliability and performance. However, users might encounter situations where reformatting becomes necessary whether to switch from FAT32 to NTFS for better file handling or to prepare the drive for use with different operating systems.
File Systems
When reformatting a hard drive, one of the key decisions you’ll face is choosing the right file system. The file system determines how data is stored and organized on the drive. The most common file systems include:
FAT32
Advantages: Highly compatible with various operating systems (Windows, macOS, Linux) and devices (cameras, game consoles).
Disadvantages: Limited to 4GB maximum file size and a total volume size limit of 2TB.
NTFS
Advantages: Supports larger files (over 4GB) and volumes (up to 16TB or more), and includes features like file permissions and encryption.
Disadvantages: Limited compatibility with non-Windows systems without additional software.
exFAT
Advantages: Designed for flash drives and external hard drives, it supports larger files and is compatible with both Windows and macOS.
Disadvantages: Lacks some advanced features of NTFS, such as file permissions.
Choosing the right file system depends on your specific needs. If you primarily use Windows and need to store large files, NTFS is the best choice. For cross-platform compatibility, exFAT is ideal. FAT32 may still be useful for compatibility with older devices but has significant limitations for file sizes.
Preparing for Reformatting
Before you begin the reformatting process, it’s crucial to back up any important data on your Toshiba external hard drive. Reformatting will erase all existing data, and once lost, it may be difficult or impossible to recover.
How to Back Up Your Data
Connect the Drive: Plug your Toshiba external hard drive into your computer.
Locate Your Files: Open the drive in File Explorer (Windows) or Finder (macOS) to identify the files you want to back up.
Select Files: Copy important files and folders to your computer’s internal storage or another external drive.
Use Backup Software: Consider using backup software to automate the process. Many tools allow you to back up data selectively or create complete disk images.
Tools for Backing Up
Windows Backup and Restore: Built-in tool for creating backups on Windows.
Time Machine: macOS’s backup feature that can back up data to an external drive.
Third-Party Software: Options like Acronis True Image or EaseUS Todo Backup can provide additional functionality.
Once your data is securely backed up, you can confidently proceed with reformatting your Toshiba external hard drive.
Step-by-Step Guide for Windows
Step 1: Connect the Drive
Begin by connecting your Toshiba external hard drive to your Windows computer using a USB cable. Ensure the drive is recognized by the system, indicated by a sound or notification.
Step 2: Open Disk Management
To access Disk Management:
Right-click the Start button (or press Windows + X).
Select Disk Management from the menu.
Step 3: Locate the Drive
In the Disk Management window, find your Toshiba external hard drive in the list. It will usually be labeled as “Removable” or “External” and will display its current file system and available space.
Step 4: Format the Drive
Right-click on the drive’s partition (ensure you select the correct drive).
Click Format from the context menu.
In the Format dialog:
Volume Label: Enter a name for your drive.
File System: Choose the desired file system (FAT32. NTFS, exFAT).
Allocation Unit Size: Leave it as default unless you have specific needs.
Quick Format: Check this option for a faster format. Uncheck it for a more thorough format that checks for errors.
Click OK to confirm the format.
Step 5: Completing the Format
After confirming, the formatting process will begin. Depending on the size of the drive and the chosen options, this could take anywhere from a few seconds to several minutes. Once complete, you’ll receive a notification that the format was successful.
Step-by-Step Guide for macOS
Step 1: Connect the Drive
Start by connecting your Toshiba external hard drive to your Mac via USB. The drive should appear on your desktop or in Finder.
Step 2: Open Disk Utility
To access Disk Utility:
Click on the Finder icon.
Navigate to Applications > Utilities and double-click on Disk Utility.
Step 3: Select the Drive
In Disk Utility, locate your Toshiba external hard drive in the left sidebar. Ensure you select the correct drive to avoid formatting the wrong one.
Step 4: Erase the Drive
Click on the Erase button in the toolbar.
In the Erase dialog:
Name: Enter a name for the drive.
Format: Choose the desired file system (FAT32. exFAT, APFS, etc.).
Scheme: Select GUID Partition Map if you plan to use the drive with newer systems.
Click Erase to start the formatting process.
Step 5: Completing the Format
The erasing process will begin, and you’ll see a progress bar. Once finished, a notification will appear indicating that the format was successful. Your drive is now ready for use.
Common Issues and Troubleshooting
While reformatting is usually a straightforward process, users may encounter several issues. Here are some common problems and their solutions:
Drive Not Recognized
Solution: Check the USB connection and try different ports or cables. Ensure the drive is powered if it has an external power source.
Format Errors
Solution: If you receive a format error, try running a disk check. In Windows, use the Command Prompt with the chkdsk command. On macOS, run First Aid in Disk Utility to repair the drive.
Slow Formatting Process
Solution: If formatting is taking too long, consider using a quick format option. If issues persist, the drive may be failing.
Insufficient Permissions
Solution: Ensure you have administrative rights on the computer. In some cases, you may need to adjust security settings or take ownership of the drive.
Tips for Maintaining Your External Hard Drive
Maintaining the health of your Toshiba external hard drive is essential for longevity and performance. Here are some best practices:
Regular Backups: Regularly back up important data to prevent loss in case of drive failure.
Safely Eject the Drive: Always use the “Safely Remove Hardware” option on Windows or “Eject” on macOS to prevent data corruption.
Keep the Drive Clean: Ensure the drive is physically clean and free from dust and moisture.
Avoid Overloading: Don’t fill the drive to capacity; leaving some space helps maintain performance.
Monitor Drive Health: Use software tools to check the drive’s health periodically.
About us and this blog
Panda Assistant is built on the latest data recovery algorithms, ensuring that no file is too damaged, too lost, or too corrupted to be recovered.
Request a free quote
We believe that data recovery shouldn’t be a daunting task. That’s why we’ve designed Panda Assistant to be as easy to use as it is powerful. With a few clicks, you can initiate a scan, preview recoverable files, and restore your data all within a matter of minutes.
Subscribe to our newsletter!
More from our blog
See all postsRecent Posts
- How to recover deleted files in sd memory card 2025-07-15
- How to recover lost photos from sd card 2025-07-15
- How do you recover deleted files from sd card 2025-07-15

 Try lt Free
 Recovery success rate of up to

