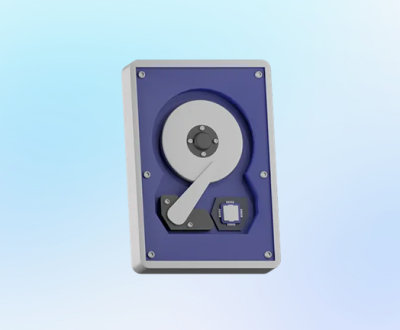
Recovering deleted files from a hard drive can be a daunting task, but with the right steps, it’s possible to retrieve lost data. The key to success is to act quickly and avoid overwriting the data, as the sooner you attempt recovery, the higher the chances of success.
Hard drives are essential components of any computer system, storing crucial files ranging from documents to videos, pictures, and software. But sometimes, whether due to accidental deletion, system crashes, or drive corruption, files can be lost or deleted. The good news is that unless the data has been overwritten by new files, it can often be recovered.
When you delete a file, it doesn’t immediately vanish from the hard drive. Instead, the operating system marks the space the file occupied as available for new data. Until that space is overwritten, the deleted files remain on the disk and can be retrieved.

1. Check the Recycle Bin (Windows) or Trash (Mac)
The first thing you should do when you realize you’ve deleted a file is to check the Recycle Bin (Windows) or Trash (Mac). These are temporary storage areas where deleted files go before being permanently erased.
For Windows:
Open the Recycle Bin by double-clicking the icon on the desktop.
Browse through the files to find the one you want to recover.
Right-click the file and select Restore. The file will be restored to its original location.
For Mac:
Open the Trash by clicking its icon in the Dock.
Find the deleted file, right-click it, and choose Put Back. The file will be restored to its original location.
If you can’t find the file in the Recycle Bin or Trash, it’s time to explore other recovery options.
2. Use File History (Windows) or Time Machine (Mac)
If the deleted file is not in the Recycle Bin, another option is to use the built-in backup feature on your system. Both Windows and Mac come with built-in tools that allow you to restore previous versions of files.
For Windows (File History):
File History is a backup tool that continuously saves copies of your files. If you’ve set it up, you can use it to restore deleted files.
Open Control Panel and select System and Security.
Click File History.
Select Restore Personal Files from the left-hand menu.
Browse for the file or folder you want to restore and click the green Restore button.
For Mac (Time Machine):
Time Machine is Apple’s backup tool, which automatically backs up files on your Mac to an external drive or network location.
Connect your Time Machine backup drive.
Click the Time Machine icon in the menu bar and select Enter Time Machine.
Use the timeline on the right side to go back to the date before the file was deleted.
Locate the file and click Restore.
If neither File History nor Time Machine is available or does not contain the desired files, third-party recovery software might be necessary.
3. Use Data Recovery Software
If the file is no longer in the Recycle Bin, Trash, or available through backups, data recovery software is the next best option. Several software tools are designed to help you recover deleted files from your hard drive, even after they have been removed from the Recycle Bin or Trash.
Popular Data Recovery Tools:
One of the standout features of Panda Assistant is its deep scan capability. It performs a thorough scan to recover files that may not be visible through standard methods. Additionally, Panda Assistant allows users to preview files before recovery, ensuring they are retrieving the correct data.
The software is compatible with both Windows and Mac operating systems, providing flexibility for users with different platforms. It also offers a free trial version, allowing users to test its features before committing to the full version.
With reliable performance and an easy-to-use interface, Panda Assistant is an excellent solution for anyone looking to recover lost data from their storage devices. Whether you’re facing accidental deletions or more complex data loss issues, Panda Assistant provides the tools needed to recover your important files.
Steps to Use Data Recovery Software:
Download and Install: Choose a data recovery tool and install it on a different drive or partition than the one you are trying to recover from to avoid overwriting lost data.
Scan the Hard Drive: Open the software and select the drive where the deleted file was located. Most programs will offer options for a quick or deep scan. A quick scan is faster, but a deep scan can find more files, especially those deleted a while ago.
Preview and Recover Files: Once the scan is complete, the software will display a list of recoverable files. Most tools allow you to preview files before recovery, so you can ensure you’re recovering the right ones. Select the files and click Recover.
Save the Files: When recovering files, make sure to save them to a different drive or partition to avoid overwriting the data on the original disk.
4. Recover Files from a Hard Drive That Has Been Formatted
If the drive has been formatted, the data is not completely lost. Formatting simply removes the file system structure, but the data is still there until it’s overwritten. You can recover files from a formatted hard drive using specialized recovery software.
How to Recover Files from a Formatted Hard Drive:
Select Data Recovery Software: Use the same tools mentioned earlier (Panda Assistant).
Choose Deep Scan: Perform a deep scan of the formatted drive. This type of scan will search for remnants of the deleted files even if the file system has been altered.
Recover the Files: Once the scan is complete, select the files you want to recover and save them to a different location.
Remember, the chances of successful recovery depend on how much new data has been written to the drive since it was formatted. The more the drive has been used after the format, the lower the chances of recovery.
5. Use Command Prompt (Windows)
For users comfortable with command-line tools, Windows offers a command-line utility called chkdsk that can sometimes help recover deleted files, especially if they were corrupted or lost due to system errors.
Steps to Run chkdsk:
Open the Command Prompt by typing cmd in the search bar and selecting Run as administrator.
Type the following command and press Enter:
bash
chkdsk X: /f
Replace X: with the letter of the drive you want to check.
Wait for the process to complete. If the tool finds any issues, it may be able to fix them and restore access to the deleted files.
6. Seek Professional Data Recovery Services
If the previous methods do not work, or if the hard drive has suffered physical damage (e.g., from a fall, water damage, or power surge), you may need to turn to professional data recovery services.
These services specialize in recovering data from damaged drives, offering tools and techniques that go far beyond what consumer-level software can achieve. Professional recovery services usually have clean room environments to deal with physically damaged drives.
When to Consider Professional Recovery:
The hard drive is making unusual noises (clicking, beeping).
The drive is not recognized by the system.
The drive has physical damage (e.g., water or fire damage).
You are unable to recover the data using software.
Professional recovery services can be costly, but they have a much higher success rate when it comes to dealing with severe damage.
7. Prevent Future Data Loss
After recovering your files, it’s essential to take steps to prevent future data loss. Here are some preventive measures:
Regular Backups: Set up regular backups using Windows File History, Mac Time Machine, or third-party cloud storage services.
Cloud Storage: Store important files on cloud services like Google Drive, Dropbox, or OneDrive.
External Drives: Use external hard drives or SSDs for additional backups.
Create System Images: A system image is a full backup of your system, including the operating system, installed programs, and settings. This can be helpful if your system crashes.
About us and this blog
Panda Assistant is built on the latest data recovery algorithms, ensuring that no file is too damaged, too lost, or too corrupted to be recovered.
Request a free quote
We believe that data recovery shouldn’t be a daunting task. That’s why we’ve designed Panda Assistant to be as easy to use as it is powerful. With a few clicks, you can initiate a scan, preview recoverable files, and restore your data all within a matter of minutes.
Subscribe to our newsletter!
More from our blog
See all postsRecent Posts
- How to recover deleted word document 2025-07-09
- How to recover deleted photos on sd memory card 2025-07-09
- How to recover completely deleted files 2025-07-09

 Try lt Free
 Recovery success rate of up to


