USB drives are a convenient and reliable way to store and transfer data. However, you might encounter a frustrating situation where your USB drive is not recognized by your computer. This can happen due to various reasons like physical damage, corrupted files, or driver issues. The good news is that, in many cases, you can recover your data without formatting the drive.
1. Problem
Before diving into the technical methods for recovering data, it’s important to understand why your USB drive is not recognized in the first place. Various factors can contribute to this issue, ranging from simple connection problems to more complex file system or hardware failures.
What Causes USB Drives to Become Unrecognized?
File system corruption: Sudden removal or improper ejection of the USB drive can corrupt the file system, making it unreadable by your computer.
Driver issues: Outdated or corrupt drivers can prevent your operating system from recognizing the USB drive.
Physical damage: Damage to the USB drive’s connectors, circuit board, or internal components may cause it to malfunction.
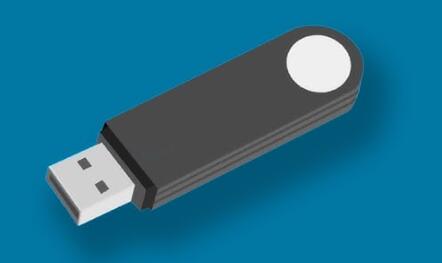
Power supply issues: Some USB ports may not provide enough power to read the drive properly.
Partition problems: If the partition of the USB drive becomes corrupted, it may appear unallocated in Disk Management, preventing access to the data.
Common Symptoms of a Non-Recognized USB Drive
The USB drive doesn’t show up in File Explorer or This PC.
Device not recognized or similar error messages appear when you connect the USB.
The USB drive is visible in Disk Management but listed as “RAW” or “Unallocated.”
The USB drive’s LED (if present) doesn’t light up when plugged in.
2. Precautions Before Attempting Recovery
To avoid making the situation worse, it’s crucial to take some precautions before proceeding with any recovery attempts.
Key Steps to Avoid Further Data Loss:
Do not format the drive: While the system might prompt you to format the USB drive, avoid doing this as it will erase all data on the drive.
Stop using the USB drive: Don’t add or remove files, as this could overwrite the data, making recovery more difficult.
Use a different port or computer: Before assuming the drive is faulty, try connecting it to a different USB port or another computer to rule out connectivity issues.
Things to Avoid:
Avoid using third-party disk management software at first: Some disk management tools can cause data loss if not used correctly.
Don’t force the USB drive into the port: If the USB drive doesn’t fit easily into the port, there may be physical damage that needs professional attention.
3. Method 1: Try Basic Troubleshooting
Sometimes, the solution can be simpler than it seems. Before diving into more complex recovery methods, try these basic troubleshooting techniques.
Reconnecting the USB Drive to Different Ports
Try a different USB port: Sometimes, the problem is with the port rather than the drive itself. Use another USB port on the same computer, preferably one on the back of a desktop PC for better power delivery.
Testing the USB Drive on Another Device
Try another computer: If the USB drive is still not recognized, connect it to another computer. If it works on another device, the issue may be with your computer rather than the drive.
Restarting Your Computer
Reboot the system: Sometimes, a simple restart can resolve recognition issues. Restart your computer and reconnect the USB drive after the system boots up.
4. Method 2: Check for Drive Recognition in Disk Management
If your USB drive does not show up in File Explorer, check if it appears in Disk Management. Disk Management provides a comprehensive view of all the storage devices connected to your computer, even those that are not accessible through normal means.
Accessing Disk Management:
Open Disk Management: Press Windows + X and select Disk Management.
Check for your USB drive: Look for your USB drive in the list. If it appears as “Unallocated” or “RAW,” the drive may have lost its file system or partition.
What to Do If the Drive Appears in Disk Management but Is Not Accessible:
Assign a Drive Letter: If your USB drive appears in Disk Management without a drive letter, right-click on it, choose Change Drive Letter and Paths, and assign it a new letter.
Check the file system: If the drive is listed as “RAW,” this means the file system is corrupted. You can attempt to recover data using a recovery tool (explained in Method 6).
5. Method 3: Update or Reinstall USB Drivers
Outdated or corrupted USB drivers can prevent your computer from recognizing the USB drive. Updating or reinstalling these drivers might resolve the issue.
How to Check for Outdated or Corrupt Drivers:
Open Device Manager: Press Windows + X and select Device Manager.
Locate your USB drive: Look under Universal Serial Bus controllers for your USB drive.
Check for errors: If there’s a yellow exclamation mark next to the USB drive, this indicates a driver issue.
Step-by-Step Guide to Updating or Reinstalling Drivers:
Update drivers: Right-click on the USB drive in Device Manager and select Update driver. Follow the prompts to search automatically for updated driver software.
Reinstall drivers: If updating doesn’t work, right-click on the USB drive and select Uninstall device. After uninstalling, remove and reinsert the USB drive to let Windows reinstall the correct drivers.
6. Method 4: Assign a New Drive Letter
Sometimes, your USB drive may be functioning properly, but it doesn’t appear in File Explorer due to a drive letter conflict.
How to Identify Conflicts with Drive Letters:
Open Disk Management: Press Windows + X and select Disk Management.
Look for your USB drive: If the USB drive is listed but lacks a drive letter, this could be the cause of the problem.
Step-by-Step Guide to Reassigning a New Letter to Your USB Drive:
Right-click on the drive: In Disk Management, right-click on the USB drive and select Change Drive Letter and Paths.
Assign a new letter: Click Add or Change and assign a new drive letter that isn’t already in use by another device.
Check if the drive is accessible: After assigning the new letter, check if your USB drive now appears in File Explorer.
7. Method 5: Using Command Prompt (CMD) to Repair the Drive
If your USB drive is recognized but inaccessible, you can use the Command Prompt to attempt repairs. The chkdsk and diskpart commands are powerful tools for fixing file system errors.
Using the chkdsk Command to Fix File System Errors:
Open Command Prompt as Administrator: Press Windows + X and select Command Prompt (Admin).
Run the chkdsk command: Type chkdsk X: /f (replace X with the drive letter of your USB) and press Enter. This will attempt to fix file system errors on the USB drive.
How to Use diskpart to Check the USB Drive’s Partition:
Open Command Prompt: Press Windows + X and select Command Prompt (Admin).
Run diskpart: Type diskpart and press Enter.
List connected drives: Type list disk and press Enter to see a list of connected drives. Identify your USB drive from the list and note its number.
Select the USB drive: Type select disk X (replace X with your drive number) and press Enter.
Check the partitions: Type list partition to view the drive’s partitions. If there are no partitions listed, the drive’s partition table may be corrupted.
8. Method 6: Recovering Data with Data Recovery Software
If none of the above methods work, using specialized data recovery software can help you recover data from an unrecognized USB drive.
Introduction to Data Recovery Software:
Panda Assistant is a versatile data recovery software designed to help users retrieve lost, deleted, or inaccessible files from a variety of storage devices. Whether it’s a formatted hard drive, a corrupted SD card, or an unrecognized USB drive, Panda Assistant provides a reliable solution with its intuitive interface and powerful recovery capabilities.
Supporting multiple file types, including documents, photos, videos, and more, the software caters to both casual users and professionals. One of its standout features is the ability to perform deep scans, ensuring that even the most hidden or fragmented files can be recovered. It also offers both free and premium versions, making it accessible to users with varying needs and budgets.
9. Method 7: Recovering Data via Linux
In some cases, your USB drive may not be recognized by Windows, but it could still be accessed via Linux. Using a Linux live CD/USB is an effective method for bypassing file system errors.
How to Use a Linux Live CD/USB to Recover Files from the Drive:
Create a bootable Linux USB: Download a Linux distribution (e.g., Ubuntu) and create a bootable USB.
Boot from the Linux USB: Insert the bootable USB into your computer, restart it, and boot into Linux.
Access the USB drive: In Linux, your USB drive may be recognized as an external device. If accessible, you can copy your files to another location.
10. Method 8: Physical Inspection and Repair of the USB Drive
If your USB drive is still not recognized after trying all software solutions, it could be due to physical damage.
Signs of Physical Damage:
The USB drive is bent or has visible cracks.
The connector is loose or damaged.
The drive heats up excessively when plugged in.
When to Consult a Professional for Physical Repairs:
If your USB drive shows signs of physical damage, do not attempt to repair it yourself. Contact a professional data recovery service that specializes in repairing and recovering data from physically damaged drives.
11. Preventing Future Issues
Best Practices for Using USB Drives Safely:
Always eject safely: Ensure you eject the USB drive properly before removing it from the computer.
Avoid sudden disconnections: Removing the drive while transferring files can lead to file corruption.
Keep backups: Regularly back up important data to prevent loss in case of hardware failure.
Tips for Regular Backups to Avoid Data Loss:
Use cloud services or external drives to maintain up-to-date backups of important files.
Consider automating your backups with software to ensure consistency.
About us and this blog
Panda Assistant is built on the latest data recovery algorithms, ensuring that no file is too damaged, too lost, or too corrupted to be recovered.
Request a free quote
We believe that data recovery shouldn’t be a daunting task. That’s why we’ve designed Panda Assistant to be as easy to use as it is powerful. With a few clicks, you can initiate a scan, preview recoverable files, and restore your data all within a matter of minutes.
Subscribe to our newsletter!
More from our blog
See all postsRecent Posts
- How to recover accidentally deleted files 2025-07-01
- How do i recover a file i accidentally deleted 2025-07-01
- How to recover an accidentally deleted file 2025-07-01

 Try lt Free
 Recovery success rate of up to

