 Try lt Free
 Recovery success rate of up to
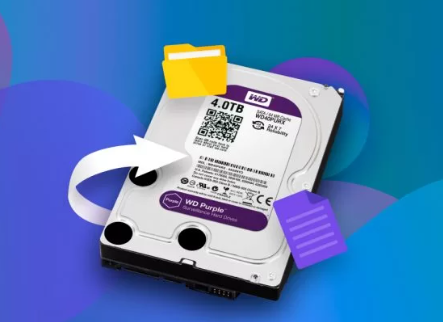
Recovering data from a formatted hard disk is a task that requires a thoughtful and systematic approach. While formatting typically removes the file system structure that tells the computer where files are stored, the underlying data often remains intact until new information overwrites it. Whether the formatting was accidental or intentional, this guide walks you through how to recover your data from a formatted hard disk using practical, non-technical language and clear steps.
When you format a hard disk, especially using quick format, the file system is reinitialized. Essentially:
The file allocation table or equivalent is cleared.
The disk is marked as empty.
The actual file contents remain on the drive until they’re overwritten by new data.
This is why formatted disk recovery is often possible. Deep scanning tools can find and reconstruct lost files by looking directly at the disk sectors.
There are two main types of formatting:
Quick Format: Only resets file system structures; data is still present.
Full Format: Overwrites every sector with zeros, making recovery much more difficult.
Most accidental formats are quick formats.
Step 1: Stop Using the Formatted Hard Disk Immediately
The first and most important rule:
Do not write any new files to the disk.
Avoid installing recovery software on the same disk.
Disconnect the drive from your system if necessary.
Every time new data is written, old data could be overwritten, reducing your chances of recovery.
Step 2: Assess the Formatting Scenario
Before proceeding, understand the context of your formatted hard disk:
Internal vs. External Disk: Is the disk inside your computer, or is it a portable/external drive?
Operating System Used: Windows, macOS, or Linux? Some tools are specific to each platform.
File System Format: NTFS, FAT32. exFAT, or others? Recovery software often requires this detail.
Drive Capacity: Larger drives take longer to scan.
Knowing these details helps you choose the best recovery method.
Step 3: Prepare a Recovery Environment
To recover data safely, set up a dedicated environment:
Use Another Computer or Bootable USB Drive: Especially if your system disk is the one that was formatted.
Have a Secondary Storage Device Ready: You’ll need a place to save recovered files—preferably a drive with at least the same capacity as the formatted one.
Gather Recovery Tools:
Recommended options include:
Panda Assistant
Panda Assistant is a practical and user-friendly tool designed to help recover data from a formatted hard disk. Whether you accidentally performed a quick format or lost files during a system reinstallation, Panda Assistant offers a reliable method to retrieve lost data with minimal effort and without requiring advanced technical skills.
When a hard disk is formatted, the file system is reset, but the actual data often remains on the disk until new files overwrite it. Panda Assistant uses advanced scanning algorithms to detect these hidden files by scanning the entire formatted disk, sector by sector. This ensures that even deeply buried or fragmented files can be located and recovered.
To recover data using Panda Assistant, simply connect your formatted hard disk to a computer where Panda Assistant is installed. Launch the software, select the formatted hard disk from the list of available drives, and choose the Deep Scan option. Deep Scan thoroughly searches the disk for files that were lost during formatting, though it may take longer than a Quick Scan.
Step 4: Create a Disk Image (Optional but Recommended)
Creating a disk image is like taking a snapshot of your formatted hard disk in its current state. This step is important if:
You want multiple recovery attempts.
The disk shows signs of instability.
Tools for creating disk images:
Clonezilla
Macrium Reflect
dd (Linux)
This way, you can attempt data recovery on the image instead of the live disk, reducing risk.
Step 5: Use Recovery Software to Recover Data
Example Using Panda Assistant:
Connect the Formatted Disk to Your Computer:
If it’s an external disk, use a USB connection. If internal, you may need a SATA-to-USB adapter.
Install Panda Assistant (or Your Chosen Tool):
Install it on a different disk—not the formatted one.
Launch Panda Assistant:
Select the formatted hard disk from the list of available drives.
Choose Deep Scan Mode:
Quick scans are usually insufficient for formatted disks. Deep scans thoroughly search the entire disk for recoverable files.
Let the Scan Complete:
This process may take several hours depending on the disk size and type.
Preview Recovered Files:
Panda Assistant allows file previews before recovery. Check for important file types such as documents, images, videos, and project files.
Select Files and Recover:
Choose only the files you need and save them to your secondary storage device.
Verify the Recovered Files:
Open a few files to confirm their integrity.
Step 6: Handle Special Cases and Formats
Recovering From NTFS Formatted Disks (Windows)
Most Windows systems use NTFS. Recovery software typically supports NTFS very well. Focus on tools like Panda Assistant, EaseUS, and TestDisk.
Recovering From exFAT or FAT32 Disks
Common for external drives and USB sticks. Make sure your software explicitly mentions support for these file systems.
Recovering From HFS+ or APFS (macOS)
If you formatted a Mac drive:
Use Mac-specific tools like Disk Drill or Stellar for Mac.
Ensure APFS support if using newer macOS versions.
Recovering From EXT4 or EXT3 (Linux)
For Linux systems:
Use tools like TestDisk or PhotoRec.
Panda Assistant may also support Linux file systems, depending on the version.
Step 7: Organize and Protect Recovered Data
After recovering your files:
Sort Recovered Files: They may be listed with generic names. Sort them by type, size, and content.
Create Multiple Backups: Store your recovered files in at least two separate places—an external drive and a cloud service, for instance.
Check File Integrity: Open and test critical files like databases, videos, and large documents.
Step 8: When to Seek Professional Help
If:
Recovery software doesn’t detect the disk.
Recovered files are corrupted or incomplete.
The disk has physical damage (clicking noises, no power, etc.).
Contact a professional data recovery service. These services have cleanroom facilities and specialized tools to recover data from severely damaged or complex scenarios.
Step 9: Preventing Future Data Loss
Learning from experience is key. Here’s how to avoid accidental formatting and other data loss events in the future:
1. Backup Strategies
Follow the 3-2-1 rule:
3 Copies: One primary and two backups.
2 Different Media: E.g., one on an external hard drive, one in the cloud.
1 Offsite Backup: To protect against theft, fire, or other disasters.
2. Label and Organize Drives
Clearly label external drives to avoid confusing them with drives you might format.
Use partition labels on internal drives.
3. Enable Drive Write Protection
Some external drives allow hardware write protection switches. Software tools can also enable write protection to avoid accidental formatting.
4. Educate Yourself and Others
If multiple people use your system, make sure everyone understands how to handle storage devices carefully.
5. Use Reliable Hardware
Invest in quality hard drives.
Avoid cheap USB cables and adapters.
6. Monitor Drive Health
Use monitoring tools like:
CrystalDiskInfo (Windows)
smartmontools (Linux/Mac)
These tools report early warnings of impending drive failure through SMART data.
Step 10: Understanding Limitations of Recovery
While formatted hard disk recovery is often successful, there are cases where it may not be possible:
Full Format: If the format involved overwriting data, recovery is unlikely.
TRIM on SSDs: Solid-state drives with TRIM enabled erase data blocks when files are deleted or drives are formatted, making recovery very difficult.
Extensive Overwrites: If large amounts of new data were written after formatting, recovery chances decrease.
File Fragmentation: Some files, especially large ones, may be split across the disk, complicating recovery.
About us and this blog
Panda Assistant is built on the latest data recovery algorithms, ensuring that no file is too damaged, too lost, or too corrupted to be recovered.
Request a free quote
We believe that data recovery shouldn’t be a daunting task. That’s why we’ve designed Panda Assistant to be as easy to use as it is powerful. With a few clicks, you can initiate a scan, preview recoverable files, and restore your data all within a matter of minutes.
Subscribe to our newsletter!
More from our blog
See all posts


