To recover data from a damaged external hard disk, it is essential to follow a structured approach, ensuring both the safety of the disk and your data.
1. Symptoms of a Damaged External Hard Drive
Before diving into the recovery process, it’s crucial to identify the specific symptoms of damage to your external hard disk. Some common indicators that your external hard drive may be damaged include:
Drive not being detected by the computer: When you plug in the external hard drive, it is not recognized by your computer, and no drive letter is assigned.
Strange noises: Clicking, grinding, or beeping sounds coming from the drive are signs of mechanical failure.

Slow performance: The drive becomes unresponsive or extremely slow to access or transfer files.
Corrupted or missing files: Files appear as corrupted, or you might experience errors when attempting to access them.
Blue screen or crash: The operating system crashes or freezes when the drive is connected.
2. Safety First: Avoid Further Damage
When an external hard drive becomes damaged, it is essential to minimize the risk of further damage to the device and your data. Here’s what you should avoid:
Do not attempt to open the hard drive: This can expose the delicate internal components to dust and debris, which may worsen the damage.
Avoid frequent plugging and unplugging: Repeated attempts to connect and disconnect the drive can cause additional harm to both the drive and the computer’s USB port.
Do not attempt quick fixes or force recovery: If you hear unusual noises or notice any signs of mechanical failure, forcing the drive to work might damage it permanently.
3. Initial Diagnostic Steps
Before performing any recovery operations, conduct the following checks:
Check the cables and port: Ensure the USB or power cable is not damaged and that the USB port is functioning properly. Sometimes, faulty cables or connections can lead to issues with the drive.
Try a different computer: Connect the external hard drive to another computer or laptop to see if the issue is with the original system.
Listen to the drive: Pay attention to the sounds the drive makes when powered on. Clicking, buzzing, or grinding sounds are typically signs of a mechanical failure, while no sound at all could indicate an issue with the drive’s motor or circuit board.
4. Use Built-In Operating System Tools
Many operating systems come with built-in tools to diagnose and repair external hard drive issues. Here are some options:
For Windows:
Disk Management: Open Disk Management by typing disk management in the Start menu. Check if your external hard drive appears here and whether it has a healthy status.
CHKDSK: Run the chkdsk (Check Disk) utility to attempt automatic repairs on the external drive. Open Command Prompt (CMD) as an administrator and type:
bash
chkdsk X: /f /r
Replace “X” with the drive letter of your external hard disk. This will check for file system errors and attempt to fix them.
For macOS:
Disk Utility: Open Disk Utility and check if your external drive is listed. If it appears but is unmountable, you can use the “First Aid” feature to attempt repairs.
Terminal: For more advanced users, Terminal commands such as fsck can be used to check and repair file systems manually.
5. Using Data Recovery Software
Panda Assistant is a powerful and user-friendly data recovery software designed to help users recover lost, deleted, or corrupted files from a variety of storage devices. Whether you’re dealing with accidental file deletion, a formatted drive, or even a malfunctioning external hard drive, Panda Assistant provides an effective solution to recover your valuable data.
Key Features of Panda Assistant
Comprehensive File Recovery
Panda Assistant supports the recovery of a wide range of file types, including documents, photos, videos, audio files, emails, and more. It works with a variety of storage devices such as external hard drives, USB flash drives, SD cards, memory cards, and even damaged or formatted disks.
Easy-to-Use Interface
One of the standout features of Panda Assistant is its intuitive and easy-to-navigate interface. Whether you are a tech-savvy user or someone with limited experience, Panda Assistant’s streamlined design ensures that even beginners can perform data recovery with ease.
Advanced Scanning Algorithms
Panda Assistant uses advanced scanning techniques to locate and recover lost files. The software offers two types of scanning: a quick scan for recently deleted files and a deep scan for recovering files from formatted, corrupted, or severely damaged storage devices. The deep scan feature ensures that even files lost long ago can be found and restored.
Preview Files Before Recovery
Before initiating the recovery process, Panda Assistant allows users to preview the files it has found during the scan. This feature helps ensure that users only recover the files they need, saving both time and storage space.
Supports Multiple File Systems
Panda Assistant supports a variety of file systems, including FAT, NTFS, HFS+, exFAT, and more. This broad compatibility makes it an excellent choice for users with different types of storage devices and operating systems.
Safe and Secure Recovery
Panda Assistant ensures that the recovery process is secure and safe, preventing overwriting or corruption of existing files during recovery. The software recovers files to a different location than the original storage device, which helps maintain the integrity of your recovered data.
Preview Lost Data
With Panda Assistant, users can preview the contents of their lost or deleted files before recovering them. This ensures users only recover the files they need, avoiding unnecessary storage usage.
Why Choose Panda Assistant?
Reliability: Panda Assistant is known for its high recovery success rates, even for severely damaged or formatted devices.
Affordable: Compared to other data recovery tools, Panda Assistant offers a cost-effective solution with a range of pricing plans to suit individual needs.
Efficiency: With its fast scanning speeds, Panda Assistant ensures that your data recovery process is as quick as possible, allowing you to get your files back without delay.
Comprehensive Support: Panda Assistant provides excellent customer support to help guide users through any issues or questions that may arise during the recovery process.
6. Performing Data Recovery: Step-by-Step Process
Here’s a general outline for using recovery software to restore your files:
Step 1: Download and Install Data Recovery Software
Choose a reputable data recovery program and install it on your computer. Make sure to install it on a different drive than the one you’re attempting to recover data from to avoid overwriting the data.
Step 2: Connect the External Hard Drive
Connect the damaged external hard drive to your computer via USB. If the drive is not detected, you might need to try a different USB port, cable, or computer.
Step 3: Launch the Software and Select the Damaged Drive
Open the recovery software, and select your external hard drive from the list of available drives. Some software may automatically detect and list the drive.
Step 4: Start the Scan
Most data recovery tools offer two types of scans:
Quick Scan: A faster, less thorough scan that looks for recently deleted files.
Deep Scan: A more thorough scan that examines the entire drive for lost or corrupted files. It may take longer but has a higher chance of recovering data from a damaged or corrupted drive.
Start the scan and wait for it to complete. Depending on the size of the drive and the extent of the damage, the scan may take some time.
Step 5: Preview and Select Files for Recovery
Once the scan is complete, the software will display a list of recoverable files. Most programs allow you to preview the files before recovering them. Carefully go through the files and select those you wish to recover.
Step 6: Recover Files to a Safe Location
It’s essential to recover the files to a different drive than the one you’re recovering from. This ensures you don’t overwrite any remaining data on the damaged drive. Choose a separate folder or location on your computer or another external device.
7. Handling Physical Damage
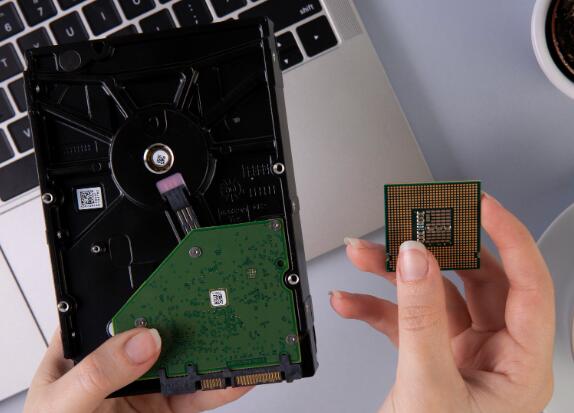
If your external hard drive has physical damage (e.g., a clicking sound, drive not spinning), the recovery process becomes more complex. In such cases, software solutions may not work, and professional data recovery services might be your best option.
Signs of Physical Damage:
Clicking, grinding, or whirring sounds: Indicate possible mechanical failure.
Drive not spinning up: The motor inside the drive may be damaged.
Burn marks or electrical smell: Indicates a problem with the drive’s circuit board.
8. When to Seek Professional Data Recovery Services
If your external hard drive has suffered physical damage, seeking help from professional data recovery services is recommended. These experts have specialized tools and cleanroom facilities that can recover data from severely damaged drives.
Some of the leading data recovery services include:
DriveSavers: Known for its expertise in recovering data from all types of storage devices, including physically damaged drives.
Ontrack: A well-established data recovery service with extensive experience in dealing with hard drive failures.
SalvageData: Offers high success rates for recovering data from damaged hard drives, including those with physical damage.
9. Preventing Future Data Loss
Once your data is recovered, it’s important to take steps to prevent future data loss:
Create regular backups: Use external drives, cloud services, or network-attached storage (NAS) to back up your important files regularly.
Check the health of your external drive: Use tools like CrystalDiskInfo to monitor the health of your external hard drive and check for any warning signs of failure.
Handle the drive with care: Avoid physical impacts, extreme temperatures, and excessive moisture to protect your external hard disk from damage.
About us and this blog
Panda Assistant is built on the latest data recovery algorithms, ensuring that no file is too damaged, too lost, or too corrupted to be recovered.
Request a free quote
We believe that data recovery shouldn’t be a daunting task. That’s why we’ve designed Panda Assistant to be as easy to use as it is powerful. With a few clicks, you can initiate a scan, preview recoverable files, and restore your data all within a matter of minutes.
Subscribe to our newsletter!
More from our blog
See all postsRecent Posts
- Retrieve files from usb 2025-07-04
- How to retrieve overwritten excel file 2025-07-04
- How to retrieve lost files on sd card 2025-07-04

 Try lt Free
 Recovery success rate of up to


