 Try lt Free
 Recovery success rate of up to
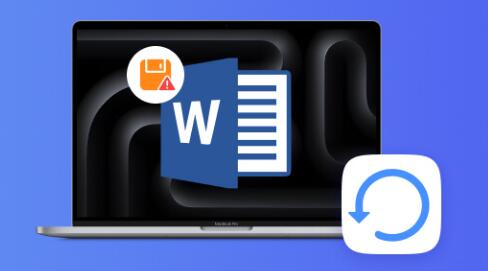
Accidentally replacing a Word document on your Mac can feel like a disaster especially if it contained critical information, unique insights, or hours of hard work. Whether you overwrote an existing file or mistakenly clicked “Save” instead of “Save As,” all is not necessarily lost. MacOS and Microsoft Word offer several ways to recover replaced Word files, and this guide will walk you through all the available options step by step.
Problem: What Does “Replaced” Mean?
When you “replace” a Word document on your Mac, you’re overwriting an existing file. This can happen in several ways:
Saving a new document with the same name and location as an older one.
Making changes and clicking “Save” instead of “Save As.”
Dragging and dropping files that overwrite others with the same name.
Unlike deleted files, replaced documents don’t go to the Trash. However, there are still hidden recovery options depending on your system configuration, backup practices, and software tools.
1. Check for Temporary Files
Microsoft Word on Mac creates AutoRecover and temporary files at regular intervals while you’re working. These files may remain intact even if the main file has been replaced.
Steps to Find AutoRecover Files:
Open Finder.
Press Command + Shift + G to open “Go to the Folder”.
Type:
swift
CopyEdit
~/Library/Containers/com.microsoft.Word/Data/Library/Preferences/AutoRecovery
Press Return.
In this folder, look for files with names starting with “AutoRecovery save of…” followed by your document name.
What to Do Next:
If you find an AutoRecovery file, open it in Microsoft Word.
Save it with a new name using “Save As” to avoid overwriting it again.
Note: AutoRecovery files are deleted when you close Word normally. This works best if the crash or replacement happened unexpectedly or recently.
2. Check Time Machine Backup
If you use Time Machine, Mac’s built-in backup system, you can easily restore a previous version of the file—even one that was overwritten.
Steps to Use Time Machine:
Open the folder where the file was originally saved.
Click the Time Machine icon in the menu bar and select Enter Time Machine.
Use the timeline on the right side to scroll back to a time before the document was replaced.
Select the original version of the file.
Click Restore.
This will recover the older version of the Word document and place it in the original folder. Time Machine is one of the most reliable ways to retrieve replaced files, provided you had backups enabled.
3. Use Word’s Version History (OneDrive/SharePoint)
If your Word document was stored on OneDrive or SharePoint, Microsoft Word keeps version history, allowing you to restore previous iterations of the file.
Steps to Access Version History:
Open the Word file from OneDrive or SharePoint.
Go to File > Browse Version History.
A list of available versions will appear in a panel on the right.
Click any version to preview it.
Click Restore if it’s the one you need.
This feature is only available if the document was synced with OneDrive or SharePoint. It’s an excellent reason to save documents in the cloud to protect against data loss.
4. Check “Recently Opened” Documents
Sometimes, a previously opened file may still be available through Word’s Recent list—even if you accidentally saved over it.
Steps:
Open Microsoft Word.
Go to File > Open Recent.
Look for your original document.
If it opens in a different state than the replaced version, save it using File > Save As.
This method won’t always help if the document was properly saved and overwritten, but in rare cases, unsaved content may still be accessible through this route.
5. Use “Revert To” from macOS Versions
macOS supports a feature called Versions, which lets you roll back to earlier iterations of a file—similar to Time Machine but limited to individual documents.
Steps to Revert to an Earlier Version:
Open the overwritten Word document.
Go to File > Revert To > Browse All Versions.
A Time Machine-style interface will appear, showing past versions of the file.
Browse through the timeline on the right.
Click Restore on the version you want.
Works Best When: You’ve been using the same file for a while, and Word has been saving versions on your Mac. This feature is highly useful when working with long-term projects.
6. Search for Temporary or Cache Files in Finder
macOS and Microsoft Word sometimes leave behind temporary or cached files even if a document has been replaced.
Steps to Search Temporary Files:
Open Finder.
Use the search bar and type:
mathematica
CopyEdit
.tmp or ~Word
Filter by This Mac and Last modified date.
Look for files that match your document’s date or title.
If you find a relevant file:
Right-click > Open With > Microsoft Word.
If it’s the correct version, Save As immediately.
This method is hit or miss but occasionally yields valuable results, especially for unsaved changes.
7. Use Data Recovery Software
Panda Assistant
Accidentally replacing a Word document can be incredibly frustrating, especially when the original file held important information that now seems lost. Fortunately, Panda Assistant provides a powerful and user-friendly solution to help you recover replaced Word documents on your Mac or Windows system with ease.
When a Word document is replaced either by saving over it or mistakenly using the same file name the original version typically becomes inaccessible through regular means. Panda Assistant is designed to dig deeper, scanning your system’s storage for hidden versions, remnants, and recoverable data that standard file explorers cannot detect.
Once installed, Panda Assistant begins by analyzing your drive for previously stored versions of the Word file. Even if the document was overwritten, fragments of the older file may still exist in unused sectors of the disk. Panda Assistant’s deep scan mode increases the chance of retrieving these fragments and reassembling them into a functional document.
8. Recover from Email Attachments or Shared Copies
If you previously shared the document with someone via email, cloud, or USB, you may still be able to retrieve an earlier version.
Steps:
Check your sent emails, especially if you attached the file.
Check downloads or synced folders (e.g., Dropbox, Google Drive).
Ask colleagues or collaborators if they still have the original copy.
9. Recover with Terminal (Advanced)
For users comfortable with Terminal, you can try locating previous versions of the file by using command-line tools.
Example: Search for File by Name
bash
CopyEdit
sudo find / -name “*.docx” 2>/dev/null
This command will search your entire Mac for .docx files. Be patient—this may take time and generate many results, but it can uncover hidden or obscure copies of the document.
10. Preventive Measures for the Future
Preventing future file replacement disasters involves adopting a few smart habits and tools:
1. Use “Save As” Instead of “Save”
Always duplicate the file before major changes.
2. Enable AutoSave in Word
Go to Word > Preferences > Save, and ensure AutoSave and AutoRecover are turned on.
3. Use Time Machine Regularly
Ensure Time Machine is backing up your Mac automatically.
4. Use Cloud Storage
Services like OneDrive, Dropbox, or Google Drive automatically save versions of files.
5. Create Manual Backups
Copy important documents to a different folder or external drive before editing.
6. Consider Versioning Tools
Apps like Git, iCloud Drive with version support, or ChronoSync can track file versions and changes.
About us and this blog
Panda Assistant is built on the latest data recovery algorithms, ensuring that no file is too damaged, too lost, or too corrupted to be recovered.
Request a free quote
We believe that data recovery shouldn’t be a daunting task. That’s why we’ve designed Panda Assistant to be as easy to use as it is powerful. With a few clicks, you can initiate a scan, preview recoverable files, and restore your data all within a matter of minutes.
Subscribe to our newsletter!
More from our blog
See all posts


