Creating a recovery USB for Windows 10 is an essential step for troubleshooting and repairing your system. It allows you to access recovery tools in case your computer experiences problems.
1. What is a Recovery USB?
A recovery USB is a removable drive that contains tools for diagnosing and repairing Windows issues. It can help you restore your system to a previous state, reset Windows, or even reinstall the operating system if necessary. Having a recovery USB on hand is a smart move for any Windows 10 user.
2. Requirements for Creating a Recovery USB
Before you begin, make sure you have the following:
USB Flash Drive: A USB drive with at least 8 GB of free space. All data on the drive will be erased, so back up any important files.
Windows 10 Computer: You’ll need access to a computer running Windows 10.
Administrative Privileges: You must have administrative rights to create a recovery USB.
3. Preparing the USB Drive
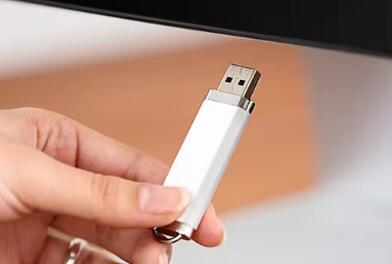
Step 1: Insert the USB Drive
Insert your USB drive into an available USB port on your Windows 10 computer.
Step 2: Format the USB Drive (Optional)
Formatting your USB drive before use can help avoid potential issues:
Open File Explorer.
Right-click on the USB drive and select Format.
Choose the File System as NTFS or FAT32.
Click Start and confirm the formatting.
Note: Formatting will erase all data on the drive. Make sure to back up any important files before proceeding.
4. Creating the Recovery USB Using Windows Settings
Step 1: Access the Recovery Media Creator
Click on the Start menu and open Settings (the gear icon).
Navigate to Update & Security.
Click on Recovery in the left sidebar.
Under the Advanced startup section, click Restart now. This will take you to the recovery options menu.
Step 2: Create Recovery Drive
In the recovery options menu, select Troubleshoot.
Choose Advanced options.
Click on Recovery Drive.
If prompted, enter your administrator password.
Step 3: Follow the Recovery Drive Wizard
The Recovery Drive Wizard will appear. Make sure the option Back up system files to the recovery drive is checked if you want to include system files. This option allows you to reinstall Windows if needed.
Click Next.
Select your USB drive from the list. Ensure you choose the correct one, as all data on the drive will be erased.
Click Next again, then Create.
The process may take some time. Once completed, you’ll receive a confirmation that the recovery drive is ready.
Step 4: Finalizing
Click Finish.
Safely eject your USB drive from the computer.
5. Creating the Recovery USB Using Command Prompt
If you prefer using the command line, you can create a recovery USB using Command Prompt.
Step 1: Open Command Prompt as Administrator
Type cmd in the Windows search bar.
Right-click on Command Prompt and select Run as administrator.
Step 2: Use Diskpart to Prepare the USB Drive
In the Command Prompt window, type the following command and press Enter:
diskpart
Type the command below to list all drives:
list disk
Identify your USB drive from the list. Make note of its disk number (e.g., Disk 1).
Type the following command to select the USB drive (replace X with the disk number):
bash
select disk X
Clean the USB drive by typing:
clean
Create a new primary partition:
sql
create partition primary
Format the partition:
lua
format fs=ntfs quick
Assign a letter to the USB drive:
objectivec
assign
Exit diskpart:
bash
exit
Step 3: Create Recovery Media
Use the recimg command to create a recovery image. This command requires an external utility, as Windows does not support this natively.
Alternatively, you can also copy the installation files from a Windows 10 ISO if you have one.
6. Using the Recovery USB
Once you have created the recovery USB, you can use it to troubleshoot or restore your Windows 10 system.
Step 1: Boot from the Recovery USB
Insert the recovery USB into the computer you want to troubleshoot.
Restart the computer.
During the boot process, press the key that opens the boot menu (usually F12. F2. or ESC, depending on your computer’s manufacturer).
Select the USB drive from the boot options.
Step 2: Access Recovery Options
Once booted from the USB, you’ll see the Windows Recovery Environment. Here, you can choose from various options:
Repair your computer: Access troubleshooting tools.
System Restore: Restore your computer to a previous state.
Reset this PC: Reinstall Windows, keeping or removing your files.
Command Prompt: Access a command-line interface for advanced troubleshooting.
Step 3: Follow On-Screen Instructions
Depending on the option you choose, follow the on-screen instructions to complete the repair or recovery process.
8. FAQs
Q1: Can I use a recovery USB created on one computer for another?
A1: Yes, but it’s best to create a recovery USB specifically for the computer you plan to use it on, as hardware differences may lead to complications.
Q2: What if I forget to back up my files before resetting Windows?
A2: If you reset Windows without backing up, you may lose your files. Always ensure to back up important data before proceeding with recovery actions.
Q3: Can I create a recovery USB without an internet connection?
A3: Yes, you can create a recovery USB without an internet connection, as long as you have the necessary tools and access to the Windows environment.
Q4: How often should I update my recovery USB?
A4: It’s a good practice to update your recovery USB whenever you make significant changes to your system, such as installing new software or performing major updates.
Q5: What should I do if my USB drive is not recognized?
A5: Ensure the USB drive is properly formatted and inserted. Try using a different USB port or testing the drive on another computer to check if it’s functioning correctly.
About us and this blog
Panda Assistant is built on the latest data recovery algorithms, ensuring that no file is too damaged, too lost, or too corrupted to be recovered.
Request a free quote
We believe that data recovery shouldn’t be a daunting task. That’s why we’ve designed Panda Assistant to be as easy to use as it is powerful. With a few clicks, you can initiate a scan, preview recoverable files, and restore your data all within a matter of minutes.
Subscribe to our newsletter!
More from our blog
See all postsRecent Posts
- How to recover accidentally deleted files 2025-07-01
- How do i recover a file i accidentally deleted 2025-07-01
- How to recover an accidentally deleted file 2025-07-01

 Try lt Free
 Recovery success rate of up to

