 Try lt Free
 Recovery success rate of up to
Here are several common methods to transfer photos from an SD card to a computer:
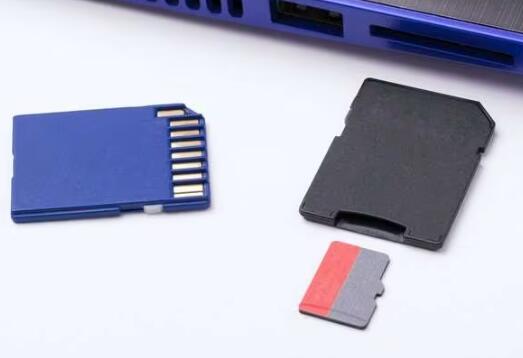
Using a Card Reader
Steps for Using an External Card Reader
Prepare the necessary equipment: You need to have an external card reader that is compatible with your SD card. There are various types of card readers available in the market, such as multi-card readers that can support different memory card formats like SD, microSD, CF, etc., and single-card readers that are specifically designed for SD cards. Most card readers connect to the computer via a USB interface.
Insert the SD card into the card reader: Gently insert the SD card into the corresponding slot of the card reader. Make sure to insert it correctly and firmly to ensure good contact. Some card readers have a locking mechanism to hold the SD card in place.
Connect the card reader to the computer: Plug the card reader into a USB port on your computer. The computer should automatically detect the card reader and the SD card inserted in it. In some cases, you may need to wait for a few seconds for the computer to install the necessary drivers if it’s the first time you’re using the card reader.
Access the SD card and transfer the photos: Once the SD card is detected, you can open the “Computer” or “This PC” folder on your computer. You should see a new drive icon representing the SD card. Double-click on this icon to open the SD card and access its contents. Navigate to the folder where your photos are stored. Usually, photos are stored in a folder named “DCIM” or something similar. Select the photos you want to transfer and copy or cut them to a location on your computer, such as the desktop or a specific folder you created for storing photos.
Steps for Using a Built-in Card Reader
Locate the card reader slot: Many laptops and some desktop computers come with a built-in SD card reader. On laptops, the card reader slot is usually located on the side or front of the device. On desktop computers, it may be on the front panel or sometimes on the side of the case. The slot is usually labeled with the SD card logo or something similar.
Insert the SD card: Just like with an external card reader, carefully insert the SD card into the built-in card reader slot. Ensure that it is inserted properly and fully.
Transfer the photos: After inserting the SD card, the computer should detect it automatically. You can then follow the same steps as above to access the SD card through the “Computer” or “This PC” folder and transfer the photos to your desired location on the computer.
Using a Camera with SD Card
Steps for Using a USB Cable to Connect the Camera to the Computer
Prepare the equipment: You need to have the USB cable that came with your camera. Make sure the cable is in good condition and is the correct type for your camera model.
Connect the camera to the computer: Turn off your camera first. Then, insert one end of the USB cable into the USB port on the camera. The location of the USB port on the camera may vary depending on the model. It is usually on the side or bottom of the camera. After that, plug the other end of the USB cable into a USB port on your computer.
Turn on the camera: Once the camera is connected to the computer, turn on the camera. The camera may display a message asking you to select a connection mode. Select the mode that allows you to transfer files or access the camera’s storage, such as “PC Connect” or “Mass Storage” mode.
Transfer the photos: On the computer, open the “Computer” or “This PC” folder. You should see an icon representing the camera. Double-click on it to access the camera’s storage, which includes the SD card inserted in the camera. Navigate to the folder where the photos are stored and copy or cut the photos to the desired location on your computer.
Steps for Using Wi-Fi to Connect the Camera to the Computer
Enable Wi-Fi on the camera: Turn on your camera and go to the camera’s settings menu. Look for the Wi-Fi option and enable it. Some cameras may require you to set up a Wi-Fi network name (SSID) and password.
Connect the computer to the camera’s Wi-Fi network: On your computer, turn on the Wi-Fi and search for available networks. You should see the Wi-Fi network name of your camera in the list. Select it and enter the password if required to connect to the camera’s Wi-Fi network.
Install the camera’s software or app: Most cameras that support Wi-Fi connectivity come with accompanying software or apps that allow you to transfer photos and control the camera from a computer. You need to install this software or app on your computer. You can usually find the software on the camera’s official website or on the CD that came with the camera.
Use the software or app to transfer the photos: After installing the software or app and connecting to the camera via Wi-Fi, open the software or app on your computer. It should detect the camera and provide options to transfer photos. You can usually select the photos you want to transfer and choose the destination folder on your computer to save the transferred photos.
Using a Smartphone with SD Card
Steps for Using a USB OTG Cable to Connect the Smartphone to the Computer
Prepare the necessary equipment: You will need a USB OTG (On-The-Go) cable. This cable allows you to connect a USB device, such as an SD card reader or a smartphone with an SD card slot, to another USB device like a computer. Make sure the OTG cable is compatible with your smartphone and computer.
Connect the smartphone to the computer via the OTG cable: Insert one end of the OTG cable into the USB port of the smartphone. Then, connect the other end of the OTG cable to a USB port on the computer. Some smartphones may prompt you to select a connection mode when you connect the OTG cable. Select the mode that allows for file transfer, such as “File Transfer” or “MTP” (Media Transfer Protocol).
Access the SD card and transfer the photos: On the computer, open the “Computer” or “This PC” folder. You should see an icon representing the smartphone. Double-click on it to access the smartphone’s storage, which includes the SD card if it is inserted in the smartphone. Navigate to the folder where the photos are stored on the SD card. The location of the photo folder may vary depending on the smartphone’s operating system and settings. Usually, it is in a folder like “DCIM” or “Pictures”. Select the photos you want to transfer and copy or cut them to the desired location on the computer.
Steps for Using Bluetooth to Connect the Smartphone to the Computer
Enable Bluetooth on the smartphone and the computer: On the smartphone, go to the settings and enable Bluetooth. On the computer, also enable Bluetooth. You can usually find the Bluetooth option in the computer’s settings or in the system tray.
Pair the smartphone and the computer: On the smartphone, search for nearby Bluetooth devices. On the computer, do the same. The smartphone should detect the computer, and the computer should detect the smartphone. Select the other device in the list and follow the prompts to pair them. This may involve entering a pairing code or confirming a connection request.
Transfer the photos: Once the two devices are paired, on the smartphone, go to the gallery or the app where your photos are stored. Select the photos you want to transfer and look for the option to share or send via Bluetooth. Select the paired computer as the recipient. On the computer, you will receive a notification asking you to accept the incoming file transfer. Click “Accept” to receive the photos and choose a location on the computer to save them.
Using Cloud Storage
Steps for Uploading Photos from SD Card to Cloud Storage
Insert the SD card into the device: Insert the SD card into a camera, smartphone, or other device that can read the SD card and has an internet connection.
Open the cloud storage app: If you’re using a smartphone, open the cloud storage app such as Google Photos, iCloud, or Dropbox. If it’s a camera with built-in Wi-Fi and cloud connectivity, open the relevant cloud storage option in the camera’s menu.
Select the photos to upload: Navigate to the folder on the SD card where the photos are stored and select the ones you want to upload to the cloud. Some apps may have an option to select all photos or to select photos in batches.
Initiate the upload: Look for the upload or sync button in the app and click or tap on it to start uploading the photos to the cloud storage. The upload process may take some time depending on the number of photos and the speed of your internet connection.
Steps for Downloading Photos from Cloud Storage to the Computer
Open the cloud storage website or app on the computer: On your computer, open a web browser and go to the website of the cloud storage service you’re using. Alternatively, you can install the cloud storage app on your computer and open it.
Log in to your account: Enter your username and password to log in to your cloud storage account.
Locate the photos: Navigate to the folder or album where the photos you uploaded from the SD card are stored. The cloud storage service may have a search function that you can use to find specific photos or albums.
Select the photos to download: Check the boxes next to the photos you want to download or use the option to select all photos in the folder.
Initiate the download: Click on the download button, which is usually represented by an arrow pointing downwards. Choose a location on your computer to save the downloaded photos, and the photos will be transferred from the cloud storage to your computer.
About us and this blog
Panda Assistant is built on the latest data recovery algorithms, ensuring that no file is too damaged, too lost, or too corrupted to be recovered.
Request a free quote
We believe that data recovery shouldn’t be a daunting task. That’s why we’ve designed Panda Assistant to be as easy to use as it is powerful. With a few clicks, you can initiate a scan, preview recoverable files, and restore your data all within a matter of minutes.
Subscribe to our newsletter!
More from our blog
See all posts


