Accidentally deleting important files can be stressful, but fortunately, there are several methods to recover lost data, depending on how and where the deletion occurred. This guide explores techniques and tools to help you restore accidentally deleted files, covering different operating systems, devices, and storage media.
1. Basics of File Deletion
When you delete a file from your computer, it usually doesn’t get erased immediately. Instead, the operating system marks the space occupied by the file as available for future use, meaning the file is still there until new data overwrites it. This provides an opportunity for recovery using different methods.
There are different ways to delete files:
Soft Delete: Moving files to a “Recycle Bin” or “Trash,” allowing easy recovery.
Hard Delete: Permanently deleting files (Shift + Delete on Windows or emptying the Trash on macOS) makes recovery more challenging but still possible.
2. Immediate Steps After Accidental Deletion
If you’ve accidentally deleted a file, the best action is to stop using the device immediately to prevent overwriting the deleted data. Then, follow these steps based on your system or device:
a) Check Recycle Bin or Trash (Windows/macOS/Linux)
If you haven’t permanently deleted the file, it will likely still be in the Recycle Bin (Windows) or Trash (macOS). Follow these steps:
Windows: Double-click the Recycle Bin, locate the file, right-click on it, and choose “Restore.”
macOS: Open the Trash from the Dock, find the file, right-click, and select “Put Back.”
Linux: Check the Trash folder in your file manager for the deleted file.
If the file isn’t in the Recycle Bin/Trash, move on to more advanced methods.
b) Undo Command
In some applications, you can recover deleted files by simply using the Undo command (Ctrl + Z on Windows or Command + Z on macOS). This works immediately after deletion in file explorer windows, editing software, or other programs.
3. Advanced Recovery Techniques
a) File Recovery Software
If you’ve hard-deleted a file or emptied the Recycle Bin/Trash, dedicated file recovery software can help. These programs can scan the storage drive and recover files that haven’t been overwritten yet. Here are some of the best options:
Recuva (Windows):
Free and easy-to-use.
Can recover files from external drives, memory cards, and USB sticks.
Supports deep scans to find long-deleted files.
Disk Drill (Windows/macOS):
Known for its user-friendly interface and high success rate.
Can recover files from a wide variety of devices.
Free trial allows limited recovery before purchase.
TestDisk and PhotoRec (Windows/macOS/Linux):
Open-source software suitable for more advanced users.
TestDisk helps with partition recovery, while PhotoRec specializes in file recovery.
Can recover files even from formatted drives.
EaseUS Data Recovery Wizard (Windows/macOS):
Popular for its simplicity and wide compatibility.
Allows free recovery of up to 2GB of data.
Offers deep scans for maximum file recovery.
Steps for Using Recovery Software:
Download and install the software on a different drive to avoid overwriting the deleted file.
Run the program and select the storage device where the file was deleted.
Perform a quick scan or a deep scan depending on the complexity of the deletion.
Preview and recover the files once they are found.
b) Restore from Backup
If you have a regular backup system in place (which is always recommended), you can restore the deleted file from your backup. Backup systems differ based on your OS or third-party tool:
Windows Backup:
If you use File History or another backup tool, navigate to Control Panel > System and Security > File History > Restore your files.
macOS Time Machine:
If Time Machine is set up, open Time Machine, navigate to the date and time the file existed, and restore it.
Cloud Storage Backups:
If you use cloud storage (Google Drive, OneDrive, Dropbox), check the cloud’s trash or recycle bin for the deleted file. Most cloud services allow file recovery for a limited time before permanent deletion.
Third-Party Backup Software:
If you use dedicated backup software (e.g., Acronis True Image, Backblaze), refer to its interface to restore lost files.
4. Recovering Deleted Files from External Drives
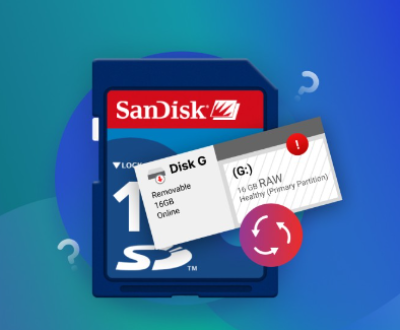
When dealing with external drives (USB drives, SD cards, external HDDs/SSDs), recovering deleted files can be slightly different. In these cases, file recovery software is the best bet, as external drives don’t have a Recycle Bin or Trash feature.
Use software like Recuva, Disk Drill, or PhotoRec to scan the external drive.
Follow the same steps as mentioned in the recovery software section above.
Ensure that the drive is not used further after deletion, as continued use can result in overwriting the data you’re trying to recover.
5. Recovery on Mobile Devices (Android/iOS)
For accidental file deletions on mobile devices, there are several recovery options depending on the device:
a) Android:
Google Photos Trash:
If you’ve deleted photos or videos, check Google Photos’ trash folder (available for 30 days before permanent deletion).
Android Recovery Software:
Software like Dr.Fone or DiskDigger can help recover deleted files.
Follow steps to connect your Android device to a computer and scan for recoverable files.
Cloud Storage:
Check any associated cloud storage (e.g., Google Drive, OneDrive) for backups.
b) iOS (iPhone/iPad):
Recently Deleted Folder:
Photos and videos are stored in the “Recently Deleted” album for 30 days.
Go to Photos > Albums > Recently Deleted to recover files.
iCloud Backup:
If you regularly back up your iPhone, go to Settings > General > Reset > Erase All Content and Settings, and then restore from an iCloud backup.
Third-Party iPhone Recovery Software:
Use tools like iMobie PhoneRescue or Dr.Fone to scan your iPhone for deleted files.
6. Professional Data Recovery Services
If all software methods fail or the device is severely damaged (e.g., corrupted hard drive, physical damage), you may need to seek help from professional data recovery services. These services are equipped with specialized tools to recover data from damaged or unresponsive devices. Here are some key steps:
Choose a trusted service provider with a good reputation (local or international).
Send the device to their lab for diagnosis and quote.
If agreed, they will recover the data and send it back to you.
Recovery services can be costly, so they are generally a last resort when software tools cannot retrieve the data.
7. Preventive Measures to Avoid Future Data Loss
Recovering lost files can be time-consuming and stressful, so it’s always best to take preventive steps. Here are some practices to help avoid accidental file deletions in the future:
a) Regular Backups:
Use tools like Time Machine, Windows Backup, or cloud storage solutions (Google Drive, Dropbox, OneDrive) to ensure that your important files are always backed up.
Consider investing in external hard drives or using online backup services like Backblaze or Carbonite for continuous backup.
b) Use File Versioning:
Some cloud storage services (e.g., Google Drive, OneDrive) offer version history for files, allowing you to restore previous versions even if the file was accidentally altered or deleted.
c) Be Cautious When Deleting Files:
Double-check before emptying the Recycle Bin or Trash.
Avoid using Shift + Delete unless necessary, as it bypasses the Recycle Bin.
d) Enable File Recovery Features:
Use file recovery features like Windows File History or macOS Time Machine to track file changes and retrieve previous versions.
e) Use Partitioning for Critical Files:
Store critical files on separate partitions or drives to minimize the risk of accidental deletion.
Accidentally deleting files is a common but recoverable mistake. Whether you use built-in OS tools like the Recycle Bin or Trash, third-party recovery software, or professional services, there are several ways to restore lost data. By following the steps outlined above, you should be able to recover your files effectively. Lastly, adopting regular backup routines and being cautious about file management will significantly reduce the risk of future data loss, saving you from the stress of accidental deletion.
About us and this blog
Panda Assistant is built on the latest data recovery algorithms, ensuring that no file is too damaged, too lost, or too corrupted to be recovered.
Request a free quote
We believe that data recovery shouldn’t be a daunting task. That’s why we’ve designed Panda Assistant to be as easy to use as it is powerful. With a few clicks, you can initiate a scan, preview recoverable files, and restore your data all within a matter of minutes.
Subscribe to our newsletter!
More from our blog
See all postsRecent Posts
- How to recover deleted files in sd memory card 2025-07-15
- How to recover lost photos from sd card 2025-07-15
- How do you recover deleted files from sd card 2025-07-15

 Try lt Free
 Recovery success rate of up to

