From photographers capturing high resolution images to smartphone users storing apps and multimedia, SD cards have revolutionized how we manage digital data. However, as users, we often find ourselves in situations where formatting an SD card is necessary. This might be due to corruption, the need to change the file system, or simply to prepare the card for a new device. While formatting an SD card typically leads to the loss of data, there are methods and precautions we can take to avoid this unfortunate consequence. This guide will explore how to format an SD card safely while retaining your data, along with tips and best practices for SD card maintenance.
SD Card Formatting
Before diving into the specifics of formatting without losing data, it’s essential to understand what formatting an SD card entails. Formatting is the process of preparing a storage device for use, which involves creating a new file system and deleting all existing data. This process is vital when:
Changing File Systems: Different devices require specific file systems, such as FAT32. exFAT, or NTFS.
Clearing Corruption: If your SD card has become corrupted, formatting may restore its functionality.
Preparing for New Use: When repurposing an SD card, formatting ensures a clean start.

Reasons to Format an SD Card
Compatibility: Certain devices, such as cameras and smartphones, may only support specific file systems. Formatting the card to a compatible format ensures proper functionality.
Performance Improvement: Over time, SD cards can become fragmented. Formatting can help optimize performance by reorganizing data.
Error Correction: If you encounter errors when accessing the SD card, formatting may resolve these issues.
Data Management: A fresh start can help in organizing data more effectively, especially for users who frequently transfer files to and from the card.
Steps to Format an SD Card Without Losing Data
1. Backup Your Data
The first and foremost step in formatting an SD card is to back up your data. Here are the methods to ensure your data is safe:
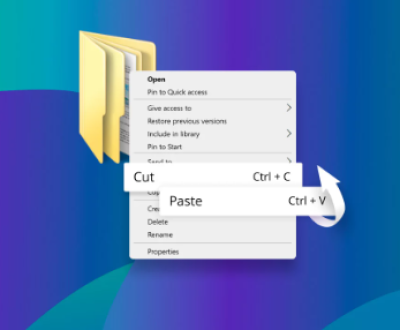
Copy to Computer: Connect your SD card to your computer using a card reader. Open the file explorer, select all files on the SD card, and copy them to a designated folder on your computer. This method provides a direct backup of all your data.
Cloud Storage: For those who prefer an online solution, uploading your files to a cloud storage service like Google Drive, Dropbox, or OneDrive is a secure way to keep your data safe.
Use Data Recovery Software: If your SD card is experiencing issues, consider using data recovery software before formatting. Programs like Recuva, EaseUS Data Recovery Wizard, or Disk Drill can help recover lost or corrupted files.
2. Check for Errors
Once your data is backed up, it’s wise to check for errors on the SD card before formatting:
Windows Error Checking Tool: Insert the SD card into your computer, right-click on it in File Explorer, and select “Properties.” Navigate to the “Tools” tab and click “Check” under Error checking. This tool will scan for and fix file system errors.
Disk Utility for Mac: On macOS, open Disk Utility, select your SD card, and click “First Aid.” This will check for and repair any issues with the card.
3. Format the SD Card
After ensuring that your data is backed up and the card is free of errors, you can proceed to format the SD card. Follow these steps:
For Windows:
Insert the SD card into your computer.
Open File Explorer and locate the SD card.
Right-click on the SD card and select “Format.”
Choose the desired file system (FAT32 for cards up to 32GB, exFAT for larger cards).
Ensure the “Quick Format” option is checked for a faster process.
Click “Start” to begin formatting.
For macOS:
Insert the SD card into your Mac.
Open Disk Utility from Applications > Utilities.
Select your SD card from the list on the left.
Click “Erase” at the top.
Choose the desired format (exFAT is suitable for larger SD cards).
Click “Erase” to format the card.
4. Restore Your Data
Once the formatting is complete, it’s time to restore your data:
From Computer Backup: Simply drag and drop the files you previously copied back onto the SD card.
From Cloud Storage: Download the files from your cloud service and place them back onto the SD card.
Best Practices for Maintaining Your SD Card
To prevent the need for frequent formatting and data loss, here are some best practices for SD card maintenance:
Safely Eject the Card: Always use the “Eject” option before removing the SD card from your device to prevent corruption.
Regular Backups: Periodically back up your data to a computer or cloud storage, especially if you frequently add or delete files.
Avoid Overfilling: Keep your SD card below 90% capacity to maintain performance and reduce the risk of corruption.
Use High-Quality Cards: Invest in reputable brands to ensure durability and reliability.
Keep it Dry and Cool: Avoid exposing the SD card to extreme temperatures and moisture to prolong its lifespan.
About us and this blog
Panda Assistant is built on the latest data recovery algorithms, ensuring that no file is too damaged, too lost, or too corrupted to be recovered.
Request a free quote
We believe that data recovery shouldn’t be a daunting task. That’s why we’ve designed Panda Assistant to be as easy to use as it is powerful. With a few clicks, you can initiate a scan, preview recoverable files, and restore your data all within a matter of minutes.
Subscribe to our newsletter!
More from our blog
See all postsRecent Posts
- Retrieve files from usb 2025-07-04
- How to retrieve overwritten excel file 2025-07-04
- How to retrieve lost files on sd card 2025-07-04

 Try lt Free
 Recovery success rate of up to

