 Try lt Free
 Recovery success rate of up to
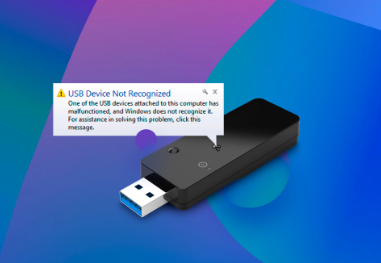
The “USB device not recognized” error is a common problem for users of Windows operating systems. It can occur when a USB device fails to connect properly to your computer, leaving you unable to access files or use the connected peripherals. This error can occur for a variety of reasons, including hardware issues, driver problems, and system malfunctions. Understanding the causes and potential fixes can help you address the issue quickly and get back to work.
1. Initial Checks: Inspect Hardware Connections
Before diving into software-based solutions, it’s crucial to ensure that all hardware connections are intact and functioning. Physical issues like damaged USB ports, faulty cables, or a malfunctioning USB device can often be the root cause of the problem.
A. Try a Different USB Port
The first step is to ensure the issue isn’t with the USB port itself. Sometimes, a specific port may not function properly due to hardware failure or a faulty connection. Try plugging the USB device into another port on the computer. Preferably, use a port directly on the computer instead of a USB hub, as hubs can sometimes introduce issues.
B. Check the USB Device
If the USB device is not recognized, test it on a different computer or device. This will help you determine whether the issue lies with the device itself. If it works on another system, the problem is likely related to your computer’s setup.
C. Examine the USB Cable
If you’re using a USB cable (especially with external drives or printers), check for visible damage, frays, or bent pins. A damaged cable can often cause connection failures, leading to the “device not recognized” error. Try using a different cable to rule out this issue.
2. Restart the Computer
It may seem basic, but restarting your computer is a simple way to clear temporary system issues that might be causing the problem. Sometimes, the operating system may not correctly detect new hardware until after a reboot.
Steps to Restart:
Save your work.
Close all open programs.
Click on the “Start” menu and select “Restart.”
Once the system reboots, check to see if the USB device is recognized.
3. Check for Windows Updates
Outdated or missing drivers can often be the cause of USB recognition errors. Windows frequently releases updates that include bug fixes and improved compatibility with hardware devices. Make sure your operating system is up to date to avoid potential conflicts.
How to Check for Updates:
Click on the “Start” menu and open Settings.
Navigate to Update & Security.
Click on Windows Update and then select Check for Updates.
If updates are available, allow them to install and restart the computer if necessary.
4. Update or Reinstall USB Drivers
Outdated or corrupted USB drivers are a frequent cause of the “USB device not recognized” error. The drivers are what allow the operating system to communicate with USB devices. If these drivers are not up to date or have become corrupt, the system may fail to recognize connected devices.
A. Using Device Manager to Update Drivers
Device Manager allows you to manage and update drivers directly on your system.
Press Win + X and select Device Manager.
Expand the Universal Serial Bus controllers section.
Right-click on each item listed under this section and select Update Driver.
Select Search automatically for updated driver software.
Windows will search for and install the latest drivers. If a driver is already up to date, you’ll receive a notification.
B. Reinstalling USB Drivers
If updating doesn’t work, you may need to reinstall the drivers entirely:
In Device Manager, right-click on each USB Root Hub and select Uninstall device.
Confirm the action and restart your computer. Upon reboot, Windows will automatically reinstall the default USB drivers.
C. Manually Download Drivers
If your USB device came with a driver disk or you know where to find the latest drivers on the manufacturer’s website, you can manually download and install the drivers. Follow the instructions provided by the manufacturer to ensure correct installation.
5. Run Windows Troubleshooter
Windows includes built-in troubleshooters to help diagnose and resolve common hardware and device-related issues.
Steps to Run the USB Troubleshooter:
Click on the Start menu and go to Settings.
Select Update & Security.
In the left pane, click on Troubleshoot.
Scroll down and select Hardware and Devices.
Click on Run the troubleshooter.
Follow the on-screen instructions to let Windows detect and attempt to resolve the issue.
6. Disable USB Selective Suspend Setting
USB Selective Suspend is a power-saving feature that might cause problems with USB devices, especially external drives. This setting allows Windows to suspend individual USB ports to save power, but sometimes it prevents devices from being recognized.
Steps to Disable Selective Suspend:
Press Win + X and select Power Options.
Click on Additional power settings on the right.
Click on Change plan settings for your selected power plan.
Select Change advanced power settings.
Scroll down to USB settings, expand it, and expand USB selective suspend setting.
Change the setting to Disabled for both battery and plugged-in modes.
Click Apply and then OK to save changes.
7. Check for System Conflicts in BIOS/UEFI Settings
In some cases, the BIOS/UEFI settings of your computer might be preventing USB devices from being recognized, especially if the system is set to limit USB functionality for power-saving or security purposes. Accessing and tweaking BIOS/UEFI settings can help resolve these conflicts.
Steps to Access BIOS/UEFI:
Restart your computer and press the key that corresponds to entering BIOS/UEFI (often F2, DEL, or ESC).
Look for settings related to USB configuration.
Ensure that the USB Legacy Support or similar options are enabled.
Save the changes and exit the BIOS/UEFI.
8. Check the Power Supply to USB Ports
Some USB devices, especially external hard drives, require more power than a single USB port can provide. If your USB device is not recognized, it may be due to insufficient power supply.
A. Use Powered USB Hubs
If your computer’s USB ports are not supplying enough power, consider using a powered USB hub. These hubs come with their own power supply, ensuring that your device receives sufficient power to operate correctly.
B. Disable USB Power Management
USB power management settings can sometimes cause USB ports to enter a low-power state, preventing devices from being recognized.
To disable USB power management:
Open Device Manager.
Expand Universal Serial Bus controllers.
Right-click on each USB Root Hub and choose Properties.
Go to the Power Management tab and uncheck Allow the computer to turn off this device to save power.
Click OK.
9. Perform a System Restore
If the USB device worked previously and stopped functioning suddenly, it may be due to a recent change in your system—such as a software update or a new driver installation—that has caused the problem. Performing a system restore to a point before the issue began can help resolve this.
Steps for System Restore:
Press Win + R and type rstrui to open the System Restore tool.
Follow the prompts and select a restore point when your USB device was working.
Click Next and allow the system to restore to the selected point.
After the process completes, check if the USB device is recognized.
10. Check for Malware or Corruption
Malware infections can sometimes cause hardware recognition issues. Running a full system scan with Windows Defender or a third-party antivirus program can help ensure that malicious software isn’t behind the problem.
Steps to Scan for Malware:
Open Windows Security via the Start menu.
Select Virus & Threat Protection.
Click on Quick Scan or Full Scan for a deeper check.
Follow the on-screen instructions to remove any detected threats.
About us and this blog
Panda Assistant is built on the latest data recovery algorithms, ensuring that no file is too damaged, too lost, or too corrupted to be recovered.
Request a free quote
We believe that data recovery shouldn’t be a daunting task. That’s why we’ve designed Panda Assistant to be as easy to use as it is powerful. With a few clicks, you can initiate a scan, preview recoverable files, and restore your data all within a matter of minutes.
Subscribe to our newsletter!
More from our blog
See all posts


