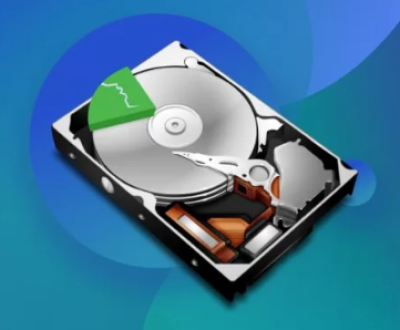
External hard drives are essential for storing data securely, but they can sometimes become corrupted. This corruption can manifest as inaccessible files, error messages, or even the drive not being recognized by your computer. The good news is that there are several methods to repair a corrupted external hard drive without resorting to formatting.
1. Corruption in External Hard Drives
Causes of Corruption
Corruption in external hard drives can arise from various factors, including:
Improper Ejection: Unplugging the drive without safely ejecting it can lead to file system corruption.
Power Failures: Sudden power cuts while the drive is in use can corrupt data.
Physical Damage: Dropping or mishandling the drive can cause internal issues.
Malware Attacks: Viruses can corrupt files or even the entire drive.
File System Errors: Issues with the file system can arise due to software bugs or hardware malfunctions.
Symptoms of Corruption
You may notice several signs that indicate your external hard drive is corrupted:
The drive is not recognized by your computer.
You receive error messages when trying to access files.
Files appear missing or inaccessible.
The drive is making unusual noises (in case of hardware failure).

2. Initial Checks and Preparations
Basic Troubleshooting
Before diving into more complex solutions, perform some basic troubleshooting:
Change USB Port: Try connecting the drive to a different USB port.
Use a Different Cable: A faulty cable can prevent the drive from connecting properly.
Test on Another Computer: Check if the drive is recognized on another device.
Backup Important Data (If Accessible)
If your drive is partially accessible, back up any important data immediately. Copy files to another drive or cloud storage to prevent loss during repairs.
3. Using Built-In Tools on Windows
Check Disk Utility
Windows includes a built-in utility that can fix some corruption issues:
Connect Your External Drive.
Open File Explorer: Right-click on the drive and select Properties.
Go to the Tools Tab: Click on Check under the Error Checking section.
Follow Prompts: Windows will scan and attempt to fix errors.
Windows Error Checking Tool
You can also use the Windows Error Checking Tool via Command Prompt:
Open Command Prompt as Administrator.
Type: chkdsk X: /f (replace X with your drive letter).
Press Enter: The system will scan and fix errors on the drive.
4. Using Command Prompt for Repair
Running CHKDSK Command
The CHKDSK command is a powerful tool that checks for file system errors:
Open Command Prompt as Administrator.
Enter the Command: chkdsk X: /r (replace X with your drive letter).
Wait for the Process to Complete: This may take some time, depending on the drive size and errors.
Fixing File System Errors
After running the CHKDSK command, it will display any errors found and attempt to fix them.
If errors persist, consider running a deeper scan or using third-party software.
5. Third-Party Software Solutions
Recommended Data Recovery Tools
Several third-party tools can assist in recovering data from corrupted drives:
Recuva: User-friendly tool that can recover deleted files.
EaseUS Data Recovery Wizard: Offers advanced recovery options and a trial version.
MiniTool Power Data Recovery: Good for various data loss scenarios.
Step-by-Step Recovery Process
Download and Install the Software.
Run the Program: Select your external drive for scanning.
Scan for Lost Files: Choose deep scan for better results.
Preview and Recover: Once the scan is complete, preview the files and select what to recover.
6. Manual Data Recovery Methods
Exploring with File Recovery Software
If you prefer manual methods, consider using software that allows you to explore and recover files:
Download File Recovery Software: Install on a different drive.
Connect Your External Drive: Ensure it’s connected.
Use the Software to Explore: Follow the instructions to locate and recover files.
Accessing Drive via Linux Live USB
If Windows cannot access the drive, try using a Linux Live USB:
Create a Linux Live USB: Use a tool like Rufus.
Boot from the USB: Restart your computer and boot from the USB drive.
Access the External Drive: Once in Linux, check if the drive is recognized and accessible.
7. Physical Inspection and Repair
Checking for Hardware Issues
Inspect the Drive for Damage: Look for cracks, dents, or loose connections.
Listen for Noises: Clicking or grinding noises can indicate mechanical failure.
DIY Repairs (With Caution)
Open the Drive Casing: Only if you are experienced; be aware that this can void warranties.
Check Connections: Ensure the internal connections are secure.
Replace the Enclosure: Sometimes, the enclosure may fail while the drive itself is fine.
8. Preventing Future Corruption
Best Practices for External Hard Drive Maintenance
Safely Eject Drives: Always use the “Eject” option before disconnecting.
Regular Backups: Schedule regular backups to prevent data loss.
Avoid Physical Shock: Handle drives carefully to prevent physical damage.
Regular Backups and Monitoring
Use cloud services or multiple physical drives for backups.
Regularly check the health of your drives using tools like CrystalDiskInfo.
Corruption in an external hard drive can be alarming, but it’s often fixable without formatting. By understanding the causes and symptoms, performing basic troubleshooting, utilizing built-in tools, and exploring third-party solutions, you can often recover your data and restore your drive’s functionality. Remember, regular maintenance and backups are key to preventing future issues.
About us and this blog
Panda Assistant is built on the latest data recovery algorithms, ensuring that no file is too damaged, too lost, or too corrupted to be recovered.
Request a free quote
We believe that data recovery shouldn’t be a daunting task. That’s why we’ve designed Panda Assistant to be as easy to use as it is powerful. With a few clicks, you can initiate a scan, preview recoverable files, and restore your data all within a matter of minutes.
Subscribe to our newsletter!
More from our blog
See all postsRecent Posts
- How to recover deleted files in sd memory card 2025-07-15
- How to recover lost photos from sd card 2025-07-15
- How do you recover deleted files from sd card 2025-07-15

 Try lt Free
 Recovery success rate of up to

