 Try lt Free
 Recovery success rate of up to
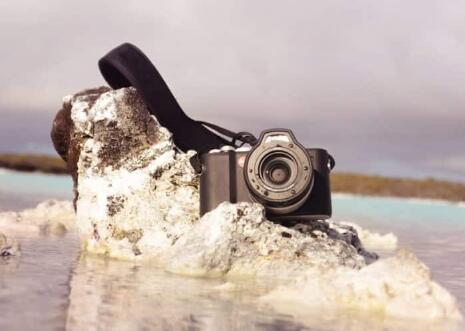
Water damage is one of the most common and frustrating issues that affect cameras. Whether it’s a digital camera, DSLR, mirrorless, or even a smartphone camera, water can seep into the delicate electronic components, causing short circuits, corrosion, and malfunction. If you’ve accidentally dropped your camera in water, it’s important to act quickly to minimize the damage and increase the chances of a successful repair.
Step 1: Assess the Situation
Before you begin the repair process, it’s essential to assess the level of damage and determine the best course of action. There are different factors that will influence whether your camera is recoverable:
Duration of Exposure: How long was the camera submerged in water?
Type of Water: Freshwater is generally less damaging than saltwater, which can cause more severe corrosion.
Camera Type: A compact camera might have different damage patterns compared to a DSLR or mirrorless camera.
If the camera was submerged for only a few seconds or was exposed to freshwater, there’s a higher chance of repair. However, cameras that have been in saltwater for a longer period may require professional attention due to the corrosive effects of salt.
Step 2: Power Off Immediately
If you’ve just realized that your camera is waterlogged, turn it off immediately. Do not attempt to use the camera or turn it back on. The last thing you want to do is power up a water-damaged camera, as this could cause a short circuit and lead to permanent damage.
Remove the Battery: Open the battery compartment and remove the battery right away. This step is crucial, as the battery can cause a short circuit if left inside.
Remove the Memory Card: If your camera has a memory card, take it out as well to prevent any further damage to your data.
Remove Any Other Detachables: If possible, remove the lens or any external attachments to reduce the risk of further water exposure to these components.
Step 3: Dry the Exterior
Once the camera is powered off, start drying the exterior immediately. Use a clean, dry towel or microfiber cloth to gently wipe away any visible water. Be sure to pay attention to the following areas:
Ports and Compartments: Check the memory card slot, battery compartment, and any other ports for moisture.
Lens and Glass: Wipe the lens and screen carefully to prevent moisture from building up, which could cause fogging or further damage.
If the camera was exposed to a large amount of water, it’s essential to inspect it for water ingress, particularly in the buttons and joints. Use a soft brush or cotton swab to remove any water that may have entered hard-to-reach places.
Step 4: Dry the Camera Internally
One of the most critical aspects of repairing a water-damaged camera is to dry the internal components. This process will help prevent the growth of mold and reduce the chances of corrosion.
Use Silica Gel: Silica gel packets are highly effective at absorbing moisture. Place the camera in a sealed bag or container with several silica gel packets, making sure the entire camera is surrounded by them. Leave it to dry for at least 48 hours, and preferably up to 72 hours, to ensure all internal moisture is absorbed.
Rice Method: If you don’t have silica gel, you can use uncooked rice as an alternative. Place the camera in a container filled with rice and seal it. The rice will help absorb moisture, though it may not be as effective as silica gel.
Drying in a Warm, Dry Area: If you don’t have silica gel or rice, place the camera in a warm, dry area with good airflow. Make sure the temperature isn’t too high, as excessive heat can damage the camera’s internal components. Do not place it in direct sunlight or near a heater.
Step 5: Check for Visible Corrosion
After drying your camera, check for any signs of visible corrosion on the internal components. Look for green or white residues around the battery compartment, memory card slot, and other metal contacts. Corrosion can severely affect the camera’s performance, so if you notice any signs of it, consider cleaning the affected areas carefully.
Use Isopropyl Alcohol: Take a cotton swab or a soft brush and dip it in isopropyl alcohol (at least 90% concentration). Gently scrub any corroded areas to remove residue. Be sure to avoid getting alcohol on non-metal parts like lenses or the display.
Contact Points: Pay extra attention to any electrical contact points, such as the pins in the battery compartment or the memory card slot. These areas are susceptible to corrosion, which can lead to poor connections or no power.
Step 6: Test the Camera
After drying the camera and cleaning off any corrosion, it’s time to test whether the camera works. Reinsert the battery (or use a fresh one) and power it on. If the camera turns on without any issues, check for the following:
LCD/Display: Ensure that the display is working properly and there’s no fogging or water spots on the screen.
Buttons and Functions: Test the buttons, zoom, focus, and other controls to make sure they are responsive.
Image Quality: Take a test shot to check if the image quality is still intact. If there are any strange artifacts or discolorations, there may still be underlying damage.
Step 7: Professional Help
If your camera doesn’t turn on, is showing signs of malfunction, or you notice extensive corrosion, it may be time to seek professional help. Taking your camera to a certified repair center will allow experienced technicians to diagnose and repair any damage that is beyond what can be fixed at home.
Warranty and Insurance: If your camera is still under warranty, contact the manufacturer to inquire about coverage for water damage. Some manufacturers offer limited protection against accidental damage, including water exposure.
Professional Cleaning: A professional repair service may be able to clean the internal components, replace damaged parts, and fix the camera. However, repairs for water damage can be expensive, and in some cases, the cost may exceed the value of the camera.
Step 8: Prevention Tips for Future Incidents
To avoid future water damage, consider the following preventative measures:
Waterproof Cases: Invest in a waterproof camera case or housing for any future underwater activities. These cases are designed to protect your camera from water exposure, allowing you to take photos or videos in wet environments safely.
Use a Camera with Water Resistance: If you frequently find yourself in situations where water exposure is likely, consider purchasing a camera with built-in water resistance. Many modern cameras, including certain point-and-shoots and mirrorless models, are designed to withstand rain, splashes, and light immersion.
Lens Covers and Protection: Use a lens cover or protective filter when shooting in damp or wet conditions to protect the lens from water droplets.
About us and this blog
Panda Assistant is built on the latest data recovery algorithms, ensuring that no file is too damaged, too lost, or too corrupted to be recovered.
Request a free quote
We believe that data recovery shouldn’t be a daunting task. That’s why we’ve designed Panda Assistant to be as easy to use as it is powerful. With a few clicks, you can initiate a scan, preview recoverable files, and restore your data all within a matter of minutes.


