 Try lt Free
 Recovery success rate of up to
Copying files from your iPhone to your computer can be essential for backing up precious photos, transferring important documents, or simply managing your data. Whether you are using Windows or macOS, there are multiple methods to move files efficiently from your iPhone to your PC or Mac.
1. Introduction
Your iPhone holds an enormous amount of data — photos, videos, contacts, notes, apps, and other files. Copying these files to your computer serves several purposes: freeing up space on your device, creating backups in case of data loss, or simply accessing files on a larger screen.
Since iOS is a closed ecosystem, transferring files is not always straightforward. Unlike Android phones, iPhones don’t expose their entire file system to computers. Instead, Apple provides specific ways to access and move files, depending on the file type and your operating system.
This guide covers how to effectively copy files from iPhone to computer across multiple methods, including wired, wireless, native Apple tools, third-party software, and cloud solutions.
2. IPhone File System and Transfer Limitations
iOS devices like iPhones do not allow users to browse the full file system through a simple USB connection like a USB drive. Instead, file transfer is limited mostly to:
Photos and videos stored in the Camera Roll
Files stored within apps that support file sharing (accessible via iTunes/Finder)
Files stored in iCloud Drive and other cloud services
This means you can’t just drag and drop every file like you would with a USB stick. You need to use the appropriate tools or methods for different file types.
3. Using a USB Cable to Transfer Files
Using a direct USB cable connection is one of the fastest and most reliable ways to transfer files from your iPhone to your computer. Here’s how you can do it depending on your OS.
a. Transfer Photos and Videos via File Explorer (Windows)
When you connect your iPhone to a Windows PC via a Lightning to USB cable, Windows treats the device as a digital camera, allowing you to access your photos and videos stored on the device.
Steps:
Connect your iPhone to your PC using the USB cable.
On your iPhone, you might see a prompt asking “Trust This Computer?” Tap Trust and enter your device passcode.
On your PC, open File Explorer.
You should see your iPhone listed as a device, usually under This PC with a name like “Apple iPhone.”
Open your iPhone device folder, then navigate to Internal Storage > DCIM.
Inside the DCIM folder, you’ll find several subfolders containing photos and videos.
Select the photos/videos you want to copy.
Right-click and select Copy, then paste them into a folder on your PC.
Notes:
Only photos and videos in your Camera Roll are accessible this way.
The file names might be cryptic, but the content is intact.
You can bulk copy many photos/videos this way.
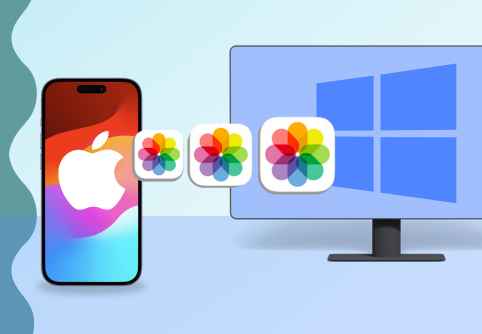
b. Transfer Photos and Videos via Photos App (Windows & Mac)
Both Windows 10/11 and macOS have dedicated Photos apps that allow importing photos directly from an iPhone.
For Windows:
Connect your iPhone to your PC via USB.
Unlock your iPhone and trust the computer if prompted.
Open the Photos app on Windows.
Click Import at the top right corner.
Select From a USB device.
The Photos app will scan your iPhone for new photos and videos.
Select the ones you want to import, or click Select all.
Choose an import destination folder.
Click Import.
For Mac:
Connect your iPhone to your Mac.
Unlock your iPhone and tap Trust.
The Photos app will automatically open.
In the Photos app sidebar, select your iPhone under Devices.
You will see all photos and videos available for import.
Click Import All New Items or select specific ones to import.
After import, photos will be available in your Mac’s Photos library.
c. Transfer Files Using iTunes (Windows)
iTunes allows you to transfer app documents and files that support file sharing.
Steps:
Connect your iPhone to your Windows PC.
Open iTunes (download and install it if you don’t have it).
Click the device icon near the top left corner.
In the sidebar, click File Sharing.
Select an app that supports file sharing (e.g., VLC, Pages).
You will see the documents stored in that app.
Select files and click Save to… to copy them to your PC.
Notes:
This method does not transfer photos or videos; it’s for app documents.
Not all apps support file sharing.
d. Transfer Files Using Finder (macOS Catalina and later)
On macOS Catalina (10.15) and later, iTunes is replaced by Finder for device management.
Steps:
Connect your iPhone to your Mac using a USB cable.
Open Finder.
Select your iPhone under Locations in the Finder sidebar.
Click the Files tab.
Select apps that support file sharing.
Drag files from the app list to your Mac desktop or a folder.
4. Using iCloud for Wireless Transfer
If you want to avoid cables or transfer files wirelessly, Apple’s iCloud is a great option.
iCloud Photos
Enable iCloud Photos on your iPhone to automatically sync photos and videos to iCloud.
Go to Settings > [Your Name] > iCloud > Photos.
Turn on iCloud Photos.
On your computer:
Windows: Download and install iCloud for Windows. Enable Photos syncing. Your photos will download automatically to your PC.
Mac: Open Photos app, which syncs with iCloud Photos automatically if enabled.
iCloud Drive
For documents and files:
Enable iCloud Drive on your iPhone: Settings > [Your Name] > iCloud > iCloud Drive.
Save documents to Files app > iCloud Drive.
On your computer, open iCloud Drive (via Finder on Mac or iCloud app on Windows) to access these files.
5. Using Third-Party Apps and Software
Several third-party applications offer more flexibility in transferring files, often overcoming some limitations of Apple’s ecosystem.
Examples:
AnyTrans – A powerful iPhone manager that supports transferring photos, music, messages, and more.
iMazing – Allows selective backup and transfer of many iPhone data types.
DearMob iPhone Manager – Provides fast file transfer and backup.
WALTR – Transfers media files to iPhone without iTunes.
These apps usually require a computer install and USB or Wi-Fi connection, and many offer free trial versions.
6. Using AirDrop (macOS)
If you have a Mac, AirDrop is the simplest wireless method to transfer files from iPhone to Mac.
Steps:
Ensure Wi-Fi and Bluetooth are turned on on both devices.
On your Mac, open Finder and click AirDrop in the sidebar.
Set Allow me to be discovered by to Everyone or Contacts Only.
On your iPhone, open the Photos app or Files app.
Select the files or photos you want to share.
Tap the Share icon and select your Mac under AirDrop.
Accept the files on your Mac when prompted.
7. Transferring Files via Email or Messaging Apps
For quick transfer of small files, emailing or using apps like WhatsApp, Telegram, or Slack can be handy.
Open the file or photo on your iPhone.
Tap Share and select Mail or your preferred messaging app.
Send the file to your email or chat.
Open your email or app on your computer and download the attachment.
8. Transferring Documents Using Files App and Cloud Services
Apple’s Files app aggregates files stored locally and in cloud services like iCloud, Google Drive, Dropbox, and OneDrive.
Steps:
Save or move files on your iPhone into the Files app.
Upload files to a cloud service (e.g., Google Drive).
On your computer, open the same cloud service website or app.
Download the files to your computer.
This method works for almost any file type.
9. Managing Different File Types
Photos and Videos
Use USB File Explorer, Photos App, or iCloud Photos for transfer.
For large video files, a wired connection is usually faster.
Music
Transfer music purchased from iTunes using iTunes/Finder.
For music stored in third-party apps, check if those apps support file sharing.
Streaming music apps usually don’t allow file transfers.
Documents
Use iTunes/Finder File Sharing or cloud services.
The Files app is essential for managing documents.
10. Troubleshooting Common Issues
iPhone not recognized by computer:
Check USB cable, try a different port, unlock iPhone, tap “Trust,” restart devices.
Photos not showing up in File Explorer:
Ensure photos are in Camera Roll, not only synced via iCloud. Turn off iCloud Photo Library temporarily if needed.
Transfer interrupted or slow:
Use a high-quality USB cable, close other apps, avoid wireless transfers for large files.
iTunes not detecting iPhone:
Update iTunes, restart PC and iPhone, update drivers on Windows.
Copying files from an iPhone to a computer can be simple or complex depending on the file types, operating system, and your preferences. Using a USB cable to access photos via File Explorer or Photos app is the fastest for pictures and videos on Windows. On Mac, the Photos app, Finder, and AirDrop provide seamless options.
For documents and other files, iTunes or Finder file sharing and cloud services like iCloud Drive, Google Drive, and Dropbox are your friends. Third-party apps offer extra power and flexibility if you need more control.
About us and this blog
Panda Assistant is built on the latest data recovery algorithms, ensuring that no file is too damaged, too lost, or too corrupted to be recovered.
Request a free quote
We believe that data recovery shouldn’t be a daunting task. That’s why we’ve designed Panda Assistant to be as easy to use as it is powerful. With a few clicks, you can initiate a scan, preview recoverable files, and restore your data all within a matter of minutes.
Subscribe to our newsletter!
More from our blog
See all posts


