Combining two disk partitions can be a powerful solution for managing disk space, optimizing performance, and simplifying storage organization on your computer. When you combine partitions, you merge two separate sections of a hard drive (or SSD) into one unified storage space. This process is often referred to as partition merging, and it helps in freeing up disk space, improving system management, and avoiding the fragmentation of your data across multiple partitions.
Disk Partitions: A Brief Overview
What Is a Disk Partition?
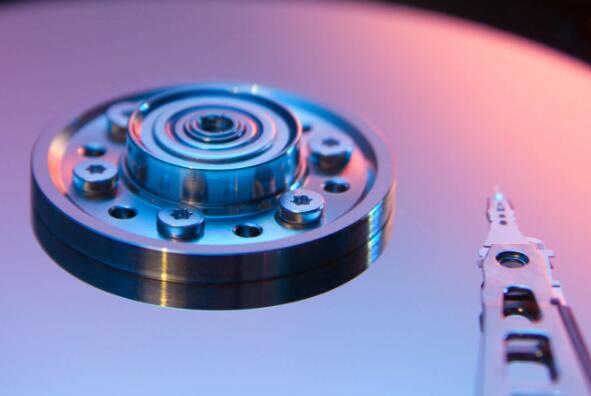
A disk partition is a logical division of a hard disk drive (HDD) or solid-state drive (SSD). When you purchase a new storage drive, it comes as a single entity. However, partitioning the drive allows you to segment it into multiple distinct areas, each functioning as a separate “drive” with its own file system. These partitions can be formatted with different file systems, have different roles (e.g., system files vs. personal data), and even have separate operating systems installed on them in some cases.
There are various types of partitions:
Primary Partition: This is the main partition where your operating system is typically installed. Only a limited number of primary partitions can exist on a single drive (four on a traditional MBR disk).
Extended Partition: If you need more partitions, an extended partition can act as a container for multiple logical partitions.
Logical Partition: These are partitions within an extended partition, offering the flexibility to create more than the four partitions allowed by the primary partition limit on MBR disks.
Modern computers with GUID Partition Table (GPT) schemes have more flexibility than traditional MBR (Master Boot Record) disks and support many more partitions, enabling advanced use cases.
Why Are Disk Partitions Useful?
Disk partitions serve multiple purposes:
Data Organization: By splitting your drive into multiple partitions, you can separate system files from personal data, making it easier to manage and back up critical information.
Multiple Operating Systems: Some users partition their hard drives to run multiple operating systems, such as Windows and Linux, on the same machine.
Improved Performance: Having system files on one partition and data on another can lead to improved read/write performance and minimize fragmentation.
Data Recovery: If one partition becomes corrupted, the data on the other partition is often still intact, simplifying the recovery process.
Why Combine Disk Partitions?
Despite the benefits of partitioning, there are several reasons you might want to merge two or more partitions into one:
1. Better Space Management
Over time, you might find that one partition is running out of space while another has surplus storage that is underutilized. Combining partitions can allow for more efficient use of disk space, especially if one partition’s space allocation was too small initially.
2. System Simplification
Maintaining multiple partitions can become cumbersome, particularly if you’re juggling many logical drives for different purposes. Combining them can simplify drive management by reducing the number of partitions you need to monitor.
3. Eliminate Redundancies
You may have created unnecessary partitions when installing a new operating system or making an upgrade. These redundant partitions serve no real purpose, and combining them into a single partition can eliminate confusion and clutter.
4. Prevent Fragmentation
On modern SSDs, fragmentation isn’t as big of an issue as it was with traditional HDDs. However, for users running legacy systems with HDDs, partition fragmentation can lead to performance degradation over time. Combining partitions can mitigate this issue by creating a more contiguous space for storing files.
5. Improve System Performance
In some cases, having your system files and data scattered across multiple partitions can lead to slower access times or inefficiencies in how the system manages data. Merging partitions may improve performance by allowing the file system to more efficiently access all available storage.
Risks of Combining Disk Partitions
Before combining disk partitions, it’s essential to consider the potential risks involved:
1. Data Loss
If the process isn’t carried out carefully, there is a risk of data loss when combining partitions. It’s crucial to back up your important files before proceeding. Some partitioning tools provide data-preserving options, but these aren’t foolproof.
2. Unintended System Changes
If you mistakenly combine the system partition (where your operating system is installed) with another partition, this can cause your system to become unstable or unbootable.
3. Incompatibility
Not all partitioning tools support all types of file systems. Ensure that the tool you’re using supports both partitions’ file systems, or you might run into formatting or corruption issues.
4. Backup is Mandatory
Always make sure to back up important data before you proceed with partition merging. Even with data-safe options, having a backup ensures you won’t lose files in case of unexpected errors or failures.
Step-by-Step Guide to Combine Two Disk Partitions
For Windows Users
Step 1: Backup Your Data
As mentioned earlier, it’s important to back up your data before making any changes to the disk partitions. Use an external drive or cloud service to save important files.
Step 2: Access Disk Management
Windows has a built-in Disk Management utility that allows users to manage their partitions. To open it:
Press Windows Key + X and select Disk Management.
Step 3: Delete the Partition You Want to Combine
In Disk Management, right-click the partition you want to combine (merge into the other partition), and select Delete Volume. This step removes the partition, freeing up its space as “Unallocated Space.”
Note: Deleting the volume will remove all data on that partition. Ensure you’ve backed up important files.
Step 4: Extend the Remaining Partition
Now, right-click the partition you want to keep, and choose Extend Volume. Follow the on-screen wizard to extend the partition into the unallocated space, effectively merging the two partitions.
Step 5: Confirm the Changes
Once the process is complete, confirm that the partitions have been combined and check that all your data is accessible.
For Mac Users
Step 1: Backup Your Data
As with Windows, make sure to back up your data before modifying partitions on macOS.
Step 2: Access Disk Utility
Mac users can manage partitions using the Disk Utility tool:
Open Disk Utility by navigating to Applications > Utilities > Disk Utility.
Step 3: Select the Partition to Delete
Within Disk Utility, select the partition you want to delete and click Erase. This will free up space, which you can then merge into another partition.
Step 4: Resize the Remaining Partition
After erasing the partition, go to the partition you want to keep and select the Partition tab. Use the drag function or manually input the size to expand it into the free space.
Step 5: Apply Changes
Once the partition resizing is complete, ensure that the changes have been applied correctly, and all data is intact.
For Linux Users
Step 1: Backup Your Data
As with other operating systems, a full data backup is recommended before proceeding.
Step 2: Use GParted (GUI Method)
GParted is a powerful tool for managing partitions on Linux systems. You can install it via your distribution’s package manager.
Launch GParted and select your drive.
Delete the partition you no longer need, turning it into unallocated space.
Right-click the partition you want to keep and select Resize/Move.
Expand the partition into the newly unallocated space and apply the changes.
Step 3: Terminal (CLI Method)
Alternatively, for more advanced users, you can use command-line tools such as fdisk or parted. This method offers more granular control but requires a strong understanding of Linux disk management.
About us and this blog
Panda Assistant is built on the latest data recovery algorithms, ensuring that no file is too damaged, too lost, or too corrupted to be recovered.
Request a free quote
We believe that data recovery shouldn’t be a daunting task. That’s why we’ve designed Panda Assistant to be as easy to use as it is powerful. With a few clicks, you can initiate a scan, preview recoverable files, and restore your data all within a matter of minutes.
Subscribe to our newsletter!
More from our blog
See all postsRecent Posts
- How to restore deleted images 2025-06-30
- How to restore a deleted file on windows 2025-06-30
- is there any way to restore deleted photos 2025-06-30

 Try lt Free
 Recovery success rate of up to


