 Try lt Free
 Recovery success rate of up to
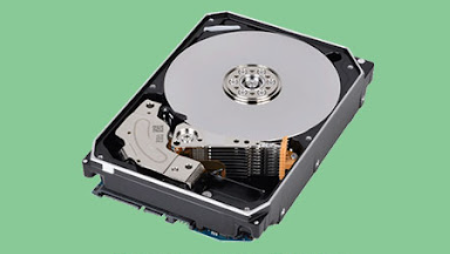
So, when a hard drive becomes damaged, the feeling of panic and urgency is understandable. Whether you dropped your laptop, encountered a virus, or your system simply won’t boot anymore, knowing how to recover data from a damaged hard drive can make the difference between devastation and relief.
A “damaged” hard drive doesn’t always mean a total loss. There are different categories of damage:
1. Logical Damage
This refers to file system corruption or software-level errors. The hard drive is physically functional but the data is inaccessible due to:
Corrupted file system
Partition errors
Malware attacks
Accidental deletion
Formatting
2. Mechanical Damage
This involves issues with the drive’s internal components:
Failed read/write heads
Spindle motor issues
Actuator arm misalignment
Stuck platters
3. Electronic Damage
The Printed Circuit Board (PCB) or internal controller may be burned or shorted due to:
Power surges
Faulty power supply
Improper handling
4. Environmental Damage
Caused by external elements such as:
Water damage
Excessive heat
Physical shock or drop
Each type of damage requires a unique approach to data recovery.
Signs of a Damaged Hard Drive
Here are common indicators your hard drive is damaged:
Computer won’t boot or shows “Operating System Not Found”
Files or folders are missing
Slow performance or freezing
Clicking, grinding, or beeping noises
Blue screen errors (BSOD)
Drive not recognized by BIOS
Disk shows as “RAW” or “Unallocated”
Recognizing the symptoms early improves your chances of successful recovery.
Step 1: Stop Using the Drive Immediately
The most important step is to stop using the drive at the first sign of damage. Every second of use can further corrupt or overwrite lost data. If the drive is clicking or making unusual sounds, power it down immediately to prevent permanent damage.
Do not attempt to install software, copy files, or format the drive. If the drive is physically failing, trying to force it into action may destroy any remaining recoverable data.
Step 2: Assess the Type of Damage
Understanding the root cause helps determine whether DIY recovery is appropriate or if professional help is necessary.
DIY-friendly Issues:
Accidental deletion
Formatted drive
File system corruption
Missing partition
Professional Help Recommended:
Drive not spinning or recognized
Strange noises (clicking, grinding)
PCB visibly damaged
Water/fire damage
Previous failed recovery attempts
Step 3: Prepare for Recovery (Create a Clone or Disk Image)
Before you begin recovery, it’s best to clone the damaged drive or create a disk image. This protects the original data and allows recovery attempts to be made from a backup.
Tools for Cloning:
ddrescue (Linux)
Clonezilla
HDClone
Macrium Reflect
R-Studio Technician
Create a 1:1 copy of the damaged drive onto a new healthy drive of equal or larger size. Recovery should always be performed on the cloned image, not the original disk.
Step 4: Use Data Recovery Software (for Logical Damage)
Panda Assistant
Panda Assistant supports a wide range of file systems including NTFS, FAT32. exFAT, and HFS+, making it compatible with most Windows and macOS setups. Whether your drive shows up as RAW, unallocated, or unreadable, Panda Assistant can perform a deep scan to reconstruct and retrieve files such as photos, videos, documents, emails, and system files.
Getting started is easy. Once your damaged drive is connected to a healthy computer, launch Panda Assistant and select the drive. The software will then offer a quick scan for recently deleted files or a deep scan for locating files in more severely corrupted or formatted areas. Even in cases where partitions are missing or the operating system fails to detect the drive properly, Panda Assistant can often identify hidden or lost data structures.
One of its standout features is the file preview option, which lets you see recoverable files before initiating recovery ensuring you restore only what you need. All recovered files are saved to a separate storage location to avoid overwriting remaining data on the damaged drive.
Step 5: Try Manual Recovery (Advanced Users)
For those with technical knowledge, Linux offers powerful terminal tools:
Mount Drive in Read-Only Mode:
bash
CopyEdit
sudo mount -o ro /dev/sdX1 /mnt/recovery
Check File System Consistency:
bash
CopyEdit
sudo fsck /dev/sdX1
Use ddrescue to Copy Drive with Errors:
bash
CopyEdit
sudo ddrescue /dev/sdX /dev/sdY rescue.log
These tools require caution but offer flexibility in handling complex recovery tasks.
Step 6: Seek Professional Data Recovery (for Physical Damage)
If your drive has mechanical, electronic, or severe physical damage, don’t attempt further DIY recovery. Contact a certified data recovery service.
What Professionals Do:
Use cleanroom environments to disassemble drives
Replace damaged components (read/write heads, PCB)
Read data directly from platters
Repair firmware and bypass security locks
Use advanced imaging tools
Common Professional Recovery Providers:
DriveSavers
Secure Data Recovery
Ontrack
Gillware
Cost Estimate:
Logical recovery: $300–$600
Physical recovery: $700–$2000+
Rush services: Additional fees
Request an evaluation—many labs offer free diagnostics before quoting.
Step 7: Recovering Data from External or USB Hard Drives
Many people use external drives for backups or additional storage. Recovery steps are similar but include:
Try different USB ports and cables
Check disk management to see if the drive appears
Use TestDisk to repair partition tables
Use software like Panda Assistant or Disk Drill for scanning
External drives can fail due to bad enclosures—try removing the drive from the casing and connecting it internally or with a SATA-to-USB adapter.
Step 8: Prevent Future Data Loss
While no method guarantees perfect protection, following best practices reduces the risk:
1. Regular Backups
Follow the 3-2-1 Rule: 3 copies of your data, on 2 different media, with 1 stored offsite.
2. Use SMART Monitoring Tools
Tools like CrystalDiskInfo or Hard Disk Sentinel monitor temperature, reallocated sectors, and read/write errors.
3. Power Protection
Use UPS (Uninterruptible Power Supply) to prevent damage during power loss or surges.
4. Handle Drives Carefully
Avoid moving external hard drives while in use. Sudden motion can damage internal parts.
5. Replace Aging Drives
HDDs have a limited lifespan. If your drive is 5+ years old, consider replacing it proactively.
Recovering data from a damaged hard drive can be stressful, but it’s far from hopeless. Whether the issue is logical, mechanical, or electronic, there are clear steps you can follow to retrieve your data. For logical failures, data recovery software like Panda Assistant, EaseUS, or TestDisk can work wonders. For physical damage, only professional recovery services can safely extract your files without risking further loss.
What matters most is acting quickly, using the right tools, and knowing when to stop and call in experts. Remember: the more you tamper with a failing drive, the lower your chances of recovery. Preserve your data by prioritizing backups and maintaining your drives carefully.
About us and this blog
Panda Assistant is built on the latest data recovery algorithms, ensuring that no file is too damaged, too lost, or too corrupted to be recovered.
Request a free quote
We believe that data recovery shouldn’t be a daunting task. That’s why we’ve designed Panda Assistant to be as easy to use as it is powerful. With a few clicks, you can initiate a scan, preview recoverable files, and restore your data all within a matter of minutes.
Subscribe to our newsletter!
More from our blog
See all posts


