 Try lt Free
 Recovery success rate of up to
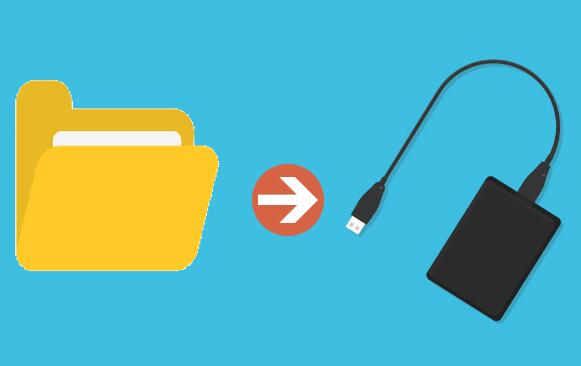
Backing up files to an external hard drive is a crucial step in safeguarding your important data.
For Windows Users
Using File Explorer
Connect the External Hard Drive: Plug in your external hard drive to a USB port on your Windows computer. Wait for the system to recognize it. It may take a few moments for the drive to be detected and ready to use.
Open File Explorer: You can do this by clicking the File Explorer icon in the taskbar, which usually looks like a folder. Alternatively, you can press the Windows key + E on your keyboard.
Locate the Files and Folders to Backup: Navigate through the File Explorer to find the files and folders you want to backup. They could be in your Documents, Pictures, Music, or other directories. You can also use the search bar in File Explorer to quickly find specific files or folders.
Copy the Files and Folders: Select the files and folders you want to backup. You can do this by clicking on the first item, then holding down the Ctrl key and clicking on each additional item you want to include. To select all files in a folder, you can press Ctrl + A. Once selected, right-click on the highlighted items and choose “Copy” from the context menu. Alternatively, you can use the keyboard shortcut Ctrl + C.
Paste the Files and Folders to the External Hard Drive: In File Explorer, locate the external hard drive. It will usually be listed under “This PC” or “Devices and drives”. Open the external hard drive by double-clicking on its icon. Then, right-click inside the external hard drive folder and choose “Paste” from the context menu. You can also use the keyboard shortcut Ctrl + V. The files and folders will now be copied to the external hard drive.
Using Windows Backup and Restore:
Open Backup and Restore: Press the Windows key + S and type “Backup and Restore” in the search bar. Select “Backup and Restore (Windows 7)” from the search results.
Set Up Backup: In the Backup and Restore window, click “Set up backup” on the left side.
Select the External Hard Drive: Choose the external hard drive as the backup destination. You can also choose to let Windows select what to backup or customize the backup settings to include specific files, folders, and drives.
Configure Backup Options: You can choose how often you want the backup to run (daily, weekly, monthly), what time to start the backup, and other settings.
Start the Backup: Click “Save settings and run backup” to start the backup process. Windows will now backup your selected files and folders to the external hard drive according to the schedule you set.
For Mac Users
Using Finder
Connect the External Hard Drive: Insert your external hard drive into a USB port on your Mac. Wait for the Mac to recognize the drive. It should appear on the desktop and in the Finder sidebar.
Open Finder: Click on the Finder icon in the Dock, which usually looks like a blue face.
Locate the Files and Folders to Backup: Navigate through the Finder to find the files and folders you want to backup. They might be in your Documents, Pictures, Music, or other folders. You can use the search bar in the Finder to find specific items.
Copy the Files and Folders: Select the files and folders you wish to backup. You can click on the first item and then hold down the Command key while clicking on other items to add them to the selection. To select all, use Command + A. Right-click on the selected items and choose “Copy” from the context menu. You can also use the keyboard shortcut Command + C.
Paste the Files and Folders to the External Hard Drive: In the Finder sidebar, click on the external hard drive. Open the drive by double-clicking on its icon. Then, right-click inside the external hard drive folder and choose “Paste” from the context menu. The keyboard shortcut is Command + V. The files and folders will be copied to the external hard drive.
Using Time Machine
Connect the External Hard Drive: Plug in your external hard drive to your Mac.
Open Time Machine Preferences: Click on the Apple menu in the top-left corner of the screen and select “System Preferences”. In the System Preferences window, click on “Time Machine”.
Select the External Hard Drive: Click “Select Backup Disk” in the Time Machine preferences. Choose your external hard drive from the list of available drives.
Configure Time Machine: You can choose to encrypt your backups for added security by checking the “Encrypt backups” option. You can also exclude specific files or folders from the backup by clicking “Options” and adding the items you want to exclude.
Start Time Machine: Click “Turn On” to start the backup process. Time Machine will automatically backup your Mac’s data to the external hard drive on a regular basis.
For Linux Users
Using the Command Line (cp Command)
Connect the External Hard Drive: Plug in your external hard drive to a USB port on your Linux computer. Wait for the system to detect and mount the drive. You can check if the drive is mounted by using the lsblk command in the terminal. This command will list all the block devices on your system, including the external hard drive.
Open the Terminal: You can usually find the terminal in the applications menu. It may be called “Terminal” or “Konsole” depending on your Linux distribution.
Locate the Files and Folders to Backup: Use the cd command to navigate to the directory containing the files and folders you want to backup. For example, if you want to backup the files in your home directory, you can use the command cd ~.
Copy the Files and Folders: Use the cp command to copy the files and folders to the external hard drive. The basic syntax of the cp command is cp -r source destination, where “source” is the path to the file or folder you want to copy, and “destination” is the path to the external hard drive. For example, if you want to copy the entire “Documents” folder to the external hard drive, and the external hard drive is mounted at /media/user/ExternalDrive, you can use the command cp -r ~/Documents /media/user/ExternalDrive. The -r option is used to copy directories and their contents recursively.
Using a Graphical File Manager
Connect the External Hard Drive: Insert your external hard drive into a USB port. Wait for the system to recognize and mount the drive. It should appear in the file manager.
Open the File Manager: Different Linux distributions have different file managers. For example, GNOME uses Nautilus, KDE uses Dolphin, and Xfce uses Thunar. Open the file manager from the applications menu.
Locate the Files and Folders to Backup: Navigate through the file manager to find the files and folders you want to backup. They may be in your home directory or other locations.
Copy the Files and Folders: Select the files and folders you want to backup. You can usually do this by clicking on the first item and then holding down the Ctrl key while clicking on other items. To select all, use Ctrl + A. Right-click on the selected items and choose “Copy” from the context menu.
Paste the Files and Folders to the External Hard Drive: In the file manager, locate the external hard drive. It will be listed in the sidebar or in the file manager window. Open the external hard drive by double-clicking on its icon. Then, right-click inside the external hard drive folder and choose “Paste” from the context menu. The files and folders will be copied to the external hard drive.
Additional Considerations
File Format Compatibility: Make sure that the file formats of the files you are backing up are compatible with the operating system and software on the computer you will be using to access the backups. Some file formats may not be supported on certain systems.
Backup Frequency: Decide how often you need to backup your files. If you are working on important projects and making frequent changes, you may want to backup daily or even more often. For less frequently updated files, a weekly or monthly backup may be sufficient.
Verify Backups: After completing a backup, it’s a good idea to verify that the files have been successfully copied to the external hard drive. You can do this by opening some of the files from the backup and checking if they are intact and can be opened without errors.
Keep the External Hard Drive in a Safe Place: Store the external hard drive in a safe location, away from heat, moisture, and magnetic fields. Consider using a protective case to prevent physical damage.
About us and this blog
Panda Assistant is built on the latest data recovery algorithms, ensuring that no file is too damaged, too lost, or too corrupted to be recovered.
Request a free quote
We believe that data recovery shouldn’t be a daunting task. That’s why we’ve designed Panda Assistant to be as easy to use as it is powerful. With a few clicks, you can initiate a scan, preview recoverable files, and restore your data all within a matter of minutes.


