Hard drives, whether internal or external, serve as the storage backbone for most of our computers. When they stop showing up in File Explorer, it can disrupt workflows, halt projects, and create a sense of panic if the data isn’t backed up. This issue, though frustrating, is not uncommon and can happen for various reasons. The key to resolving this issue lies in systematically diagnosing and troubleshooting the root cause.
Chapter 1: Basic Checks Before Troubleshooting
Before diving into complex solutions, it’s essential to confirm that everything is connected properly and functioning as it should. Sometimes, the simplest explanation is the right one.

Check the Physical Connections:
For external hard drives, ensure that the USB cable is securely plugged into both the hard drive and the computer. Try using a different USB port or a different cable to rule out any connection issues.
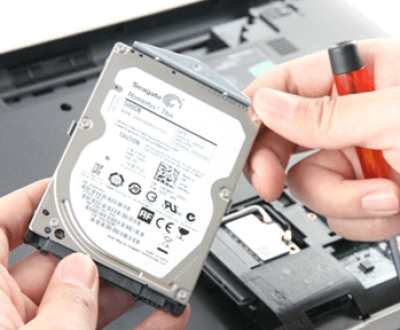
For internal hard drives, make sure the SATA or power cables are properly connected to the motherboard and power supply. If you’re comfortable doing so, reseating the cables can sometimes solve connection problems.
Try Another Computer:
If you’re dealing with an external hard drive, plug it into a different computer. If the drive shows up on the new system, the issue may lie with your computer rather than the drive itself.
Check the Power Supply (External Drives):
If your external hard drive requires an additional power supply (for larger drives or desktop models), make sure the power adapter is plugged in and functioning.
Chapter 2: Is the Drive Recognized in Disk Management?
If your drive isn’t showing up in File Explorer, but you’re unsure whether the drive is even recognized by your computer, you can use Windows’ Disk Management tool to check.
Access Disk Management:
Right-click on the Start menu and select Disk Management.
Alternatively, press Windows + X and choose Disk Management from the list.
Look for the Drive:
In the Disk Management window, check if your drive is listed. If it appears but doesn’t have a letter assigned to it, right-click on the unallocated or unassigned space and choose Change Drive Letter and Paths. Then, click Add and assign a drive letter.
Check for Unallocated Space:
If the drive shows as Unallocated, this could mean the drive is present, but the partitions are missing or corrupted. In this case, you may need to reformat the drive or attempt data recovery before proceeding.
Check for Errors:
If the drive shows as Healthy but isn’t showing up in File Explorer, there may be file system errors preventing proper access. Right-click the drive in Disk Management and choose Properties. Go to the Tools tab, and under Error Checking, click Check to scan and repair the drive.
Chapter 3: Update or Reinstall Drivers
Sometimes the issue lies with outdated or corrupt drivers, which can cause your hard drive to fail to show up in File Explorer.
Update Drivers:
Open Device Manager (press Windows + X and select Device Manager).
Expand the Disk Drives section and locate your hard drive.
Right-click on the drive and choose Update Driver.
Select Search automatically for updated driver software and allow Windows to search for and install any available updates.
Reinstall Drivers:
If updating doesn’t work, you can try uninstalling the device. Right-click on the drive in Device Manager, select Uninstall device, and then reboot your computer. When Windows starts again, it should attempt to reinstall the correct drivers for the drive.
Chapter 4: Check for Windows Updates
An outdated version of Windows could sometimes cause hardware-related issues. Ensuring that Windows is fully updated can fix compatibility problems that might be preventing your hard drive from being recognized.
Check for Updates:
Open Settings (press Windows + I).
Go to Update & Security and select Windows Update.
Click Check for updates and allow the system to install any pending updates.
Chapter 5: Test the Hard Drive on Another Operating System
If your drive is still not showing up in Windows, try connecting it to a system running a different operating system. If you have access to a Linux system, this can be an excellent way to verify whether the issue lies with the drive itself or your Windows setup.
Boot from a Linux Live CD/USB:
Boot into a Linux Live session from a USB or CD/DVD.
Open GParted or the Disks utility to see if the drive is recognized. If the drive shows up in Linux but not Windows, this could suggest a Windows-specific issue.
Use a Mac:
If you have a Mac, connect the drive and check whether it appears in Finder or Disk Utility. A Mac may also help identify if the drive is corrupted at a hardware level.
Chapter 6: Run the Hardware and Devices Troubleshooter
Windows offers a built-in troubleshooter designed to detect and resolve hardware-related problems.
Run the Troubleshooter:
Open Settings (press Windows + I).
Go to Update & Security > Troubleshoot > Additional troubleshooters.
Select Hardware and Devices, then click Run the troubleshooter.
Follow the on-screen instructions and allow Windows to diagnose and fix any problems.
Chapter 7: Check the BIOS/UEFI Settings
If your internal hard drive isn’t showing up at all, the issue might be related to BIOS/UEFI settings, which control the system’s hardware configurations.
Access BIOS/UEFI:
Restart your computer and enter BIOS/UEFI settings by pressing the Delete or F2 key (depending on your manufacturer) during boot.
Check for Drive Detection:
Look for your hard drive under the Boot or Storage section. Ensure that the drive is enabled in BIOS.
Reset BIOS/UEFI to Defaults:
If the settings are misconfigured, you can reset BIOS/UEFI to default settings. This might resolve any issues with drive detection.
Chapter 8: Repair or Format the Drive
If your hard drive is recognized but still not showing up in File Explorer, there may be file system corruption or a partition issue. In such cases, you may need to repair or format the drive. Keep in mind that formatting the drive will erase all data, so ensure you have a backup or attempt recovery before proceeding.
Repair the Drive:
Open Command Prompt as Administrator (right-click the Start button and choose Command Prompt (Admin)).
Type chkdsk X: /f (replace X with the drive letter of your hard drive) and press Enter. This command will attempt to fix any file system errors.
Format the Drive:
If repairs don’t work, you may need to format the drive. In Disk Management, right-click the drive and select Format. Follow the on-screen instructions to format the drive in a file system such as NTFS or exFAT.
Chapter 9: Data Recovery Options
If the drive is failing, or you need to recover lost data, there are several software tools available for attempting data recovery.
Use Data Recovery Software:
Panda Assistant is a comprehensive data recovery tool designed to help users recover lost or deleted files from a variety of storage devices, including hard drives, USB drives, SD cards, and more. Whether files were lost due to accidental deletion, corruption, formatting, or system crashes, Panda Assistant offers an intuitive solution for restoring them.
The tool is compatible with various file systems such as NTFS, FAT32, and exFAT, and supports both Windows and macOS platforms. Whether you’re facing a minor data loss or a more complex recovery situation, Panda Assistant maximizes the chances of successful file retrieval. Its reliable and efficient recovery process ensures users can quickly restore valuable data with minimal effort and without compromising system performance.
Professional Data Recovery Services:
If the drive is physically damaged or the data recovery software doesn’t work, it may be time to consult professional data recovery services. These services use advanced techniques to recover data from damaged hard drives, though they can be costly.
About us and this blog
Panda Assistant is built on the latest data recovery algorithms, ensuring that no file is too damaged, too lost, or too corrupted to be recovered.
Request a free quote
We believe that data recovery shouldn’t be a daunting task. That’s why we’ve designed Panda Assistant to be as easy to use as it is powerful. With a few clicks, you can initiate a scan, preview recoverable files, and restore your data all within a matter of minutes.
Subscribe to our newsletter!
More from our blog
See all postsRecent Posts
- How to recover data from formatted hard disk 2025-07-14
- How to recover files from hard disk 2025-07-14
- How to recover data from portable hard disk 2025-07-14

 Try lt Free
 Recovery success rate of up to

