Accidental deletions are a common occurrence in shared folders, especially in collaborative environments where multiple users have access to the same files. Losing important documents can lead to frustration and disruptions in workflow.
Shared Folders
Shared folders are directories accessible by multiple users on a network. They are commonly used in businesses and educational institutions for collaboration. When a file is deleted from a shared folder, it may still be recoverable through different means depending on the operating system and the environment.
1. Check the Recycle Bin or Trash
The first step in recovering a deleted file is to check the Recycle Bin (Windows) or Trash (macOS). Files deleted from shared folders typically go to these locations first.
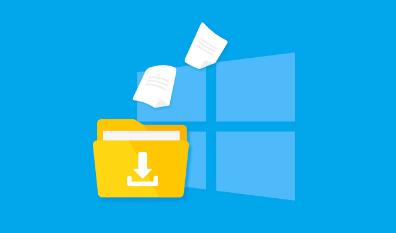
Windows Recycle Bin
Open Recycle Bin: Double-click on the Recycle Bin icon on your desktop.
Search for the File: Look for the deleted file. You can use the search bar if you have many items.
Restore the File: Right-click on the file and select “Restore.” The file will return to its original location in the shared folder.
macOS Trash
Open Trash: Click on the Trash icon in the Dock.
Find the File: Browse or search for the deleted file.
Restore the File: Right-click on the file and select “Put Back.” It will return to its original location.
2. File Version History
If your organization uses version history or file history features, you may be able to restore a previous version of the file.
Windows File History
Access the Folder: Navigate to the shared folder where the file was located.
Right-click the Folder: Select “Restore previous versions.”
Choose a Version: From the list, select a version before the file was deleted.
Restore: Click “Restore” to recover the folder’s state, which includes the deleted file.
macOS Time Machine
Connect Time Machine Drive: If you have a Time Machine backup, connect the drive.
Open the Folder: Navigate to the shared folder.
Launch Time Machine: Click on the Time Machine icon in the menu bar and select “Enter Time Machine.”
Browse Versions: Use the timeline to find the date when the file existed.
Restore the File: Select the file and click “Restore.”
3. Check Network Storage Solutions
If your shared folder is hosted on a network-attached storage (NAS) device or a cloud service, check the recovery options provided by that service.
NAS Devices
Many NAS systems have built-in snapshot or backup features that allow users to recover deleted files.
Access the NAS Interface: Log in to the NAS management interface.
Find the Shared Folder: Navigate to the shared folder where the file was deleted.
Look for Snapshots: Check for any available snapshots or backups.
Restore the File: Follow the prompts to restore the deleted file from the snapshot.
Cloud Storage Solutions
If the shared folder is on a cloud platform (like Google Drive, Dropbox, or OneDrive), you can recover deleted files from their respective recovery features.
Google Drive: Go to the Trash, find the file, right-click, and select “Restore.”
Dropbox: Go to the “Deleted files” section, select the file, and click “Restore.”
OneDrive: Go to the Recycle Bin, find the file, select it, and click “Restore.”
4. Data Recovery Software
If the file is not found in the Recycle Bin or through version history, you may need to use data recovery software. These tools can scan your drives for deleted files that are no longer visible through regular means.
Recommended Data Recovery Software
Panda Assistant is a powerful data recovery software designed to help users effortlessly recover lost or deleted files from a variety of storage devices, including hard drives, USB drives, and SD cards. Its intuitive interface makes it accessible for both beginners and experienced users, ensuring a smooth recovery process.
With advanced scanning algorithms, Panda Assistant can effectively retrieve files lost due to accidental deletion, formatting, or corruption. It supports a wide range of file formats, allowing users to recover documents, photos, videos, and more. The software also features a preview function, enabling users to view recoverable files before completing the recovery process.
Compatible with both Windows and Mac operating systems, Panda Assistant offers versatility for all users. Regular updates and dedicated customer support ensure a reliable experience, helping you recover your valuable data with confidence. Whether you’re a professional or a casual user, Panda Assistant provides the tools you need to safeguard your important files. Choose Panda Assistant and take control of your data recovery needs today!
Using Data Recovery Software
Download and Install: Choose a reliable recovery tool and install it on your computer (avoid installing it on the same drive where the deleted file was located).
Run the Software: Launch the program and select the drive where the shared folder was located.
Scan for Deleted Files: Start a quick scan, and if the file isn’t found, proceed to a deep scan.
Preview and Recover: Once the scan is complete, preview the files found. Select the deleted file and choose to recover it.
5. Contact IT Support
If you work in an organization with an IT department, it’s a good idea to reach out for assistance. They may have backups or systems in place to recover lost files, especially if the deletion occurred recently.
6. Preventing Future Data Loss
Once you’ve recovered the deleted file, it’s essential to implement measures to prevent future losses.
Best Practices
Regular Backups: Ensure that all critical data is backed up regularly. Use external drives, cloud services, or both.
Educate Users: Train team members on best practices for file management, including how to avoid accidental deletions.
Use Access Controls: Limit access to shared folders based on necessity to reduce the risk of accidental deletions.
Version Control Systems: Implement a version control system for documents, especially in collaborative environments.
About us and this blog
Panda Assistant is built on the latest data recovery algorithms, ensuring that no file is too damaged, too lost, or too corrupted to be recovered.
Request a free quote
We believe that data recovery shouldn’t be a daunting task. That’s why we’ve designed Panda Assistant to be as easy to use as it is powerful. With a few clicks, you can initiate a scan, preview recoverable files, and restore your data all within a matter of minutes.
Subscribe to our newsletter!
More from our blog
See all postsRecent Posts
- Recover deleted files windows 2025-07-02
- How to recover previous excel file 2025-07-02
- How to recover files that are permanently deleted 2025-07-02

 Try lt Free
 Recovery success rate of up to

