Creating a Windows 11 recovery disk from another computer can be a crucial task when you need to troubleshoot or recover your operating system due to software corruption, hardware failure, or other unforeseen issues.
Why You Need a Windows 11 Recovery Disk
A recovery disk acts as a lifeline for your computer. If your system becomes unbootable due to software corruption, viruses, or hardware malfunctions, having a recovery disk allows you to repair Windows or reinstall the operating system without losing all your data.
Here are several key reasons to create a recovery disk:
System Repair: A recovery disk provides a way to fix boot problems, recover from system crashes, or troubleshoot common issues without reinstalling Windows.
System Restore: You can restore your system to an earlier working state.
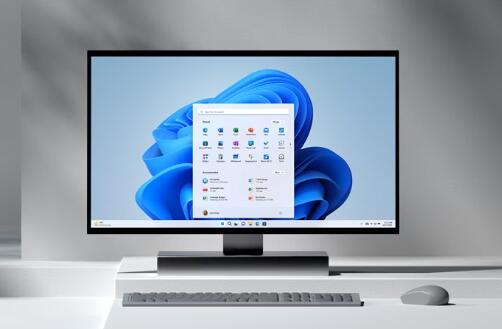
Reinstallation of Windows: If all else fails, you can reinstall Windows 11 using a recovery disk without needing to download the OS again.
Access to Advanced Troubleshooting Tools: You can access Windows tools like System Restore, Startup Repair, Command Prompt, etc., which can help fix more complex issues.
Requirements for Creating a Recovery Disk
Before you proceed, you’ll need the following:
A working computer with Windows 11.
A USB flash drive with at least 16 GB of storage space. The drive will be formatted during the process, so ensure you back up any important data on it.
An internet connection (optional but recommended for downloading the latest updates).
Your Windows 11 product key or activation status. This might not be needed in some cases as Windows 11 can automatically detect activation through your hardware.
Step-by-Step Guide to Creating a Windows 11 Recovery Disk
Step 1: Prepare the USB Flash Drive
Ensure that the USB flash drive you use is empty or has no important data, as the creation process will erase everything on it.
Insert the USB drive into a working Windows 11 computer.
Backup any data from the USB if necessary.
Step 2: Use the Windows 11 Recovery Drive Tool
Windows has a built-in tool that allows you to create a recovery drive, and it’s one of the simplest methods to create a recovery disk.
Open the Recovery Drive Tool:
In the search bar, type “Create a recovery drive” and select the top result.
You’ll be prompted with a User Account Control (UAC) message; click Yes to allow the tool to run.
Recovery Drive Setup:
The tool will ask if you want to back up system files to the recovery drive. Check the box to include system files, as this option will enable you to reinstall Windows later if necessary.
Click Next to proceed.
Select the USB Drive:
Windows will now scan for available drives. Select the USB drive you want to use for the recovery disk.
Click Next to continue.
Start the Recovery Drive Creation:
A warning will appear, notifying you that everything on the drive will be deleted. Confirm this by clicking Create.
The process of creating the recovery drive will begin. This can take some time, depending on your system and the size of the data being transferred.
Completion:
Once the process is complete, you’ll see a message indicating that the recovery drive is ready. Click Finish to exit.
Now you have a recovery disk that you can use to boot into your computer and troubleshoot or reinstall Windows 11.
Step 3: Use the Media Creation Tool (Alternate Method)
If you encounter any issues using the built-in recovery tool, or if you prefer a more versatile option, you can use the Media Creation Tool from Microsoft’s website. This tool allows you to create a bootable USB drive that can install or repair Windows 11 on any compatible system.
Download the Media Creation Tool:
Go to Microsoft’s official website and download the Windows 11 Media Creation Tool.
Launch the Tool:
Run the executable file after downloading. Accept the license terms and conditions.
Choose to Create Installation Media:
On the next screen, choose the option to create installation media (USB flash drive, DVD, or ISO file).
Click Next.
Select Language, Edition, and Architecture:
Windows will automatically detect the best settings for your PC. You can adjust these settings if needed.
Click Next.
Select USB Drive:
Choose “USB flash drive” as the media type.
Select the USB drive from the list and click Next.
Download and Installation:
The tool will now download the Windows 11 files and create the bootable USB drive. This process may take some time depending on your internet connection.
Completion:
Once the creation process finishes, you’ll have a fully functional recovery disk capable of installing or repairing Windows 11 on any compatible system.
Step 4: Verify the Recovery Disk
Once you’ve created the recovery disk, it’s a good idea to verify that it works correctly before you actually need it.
Boot from the Recovery Disk:
Restart your computer and enter the BIOS or UEFI settings (usually by pressing a key like F2. F12. Delete, or Esc during startup).
Change the boot order to prioritize the USB drive, then restart again.
Test the Disk:
If your recovery disk is working properly, you’ll see the Windows Setup screen or the recovery environment, depending on the type of disk you created.
You can exit the process at this point if everything is in order.
How to Use the Recovery Disk in Case of Emergency
When your Windows 11 system encounters serious problems, your recovery disk can save the day. Here’s how to use it for different recovery scenarios:
1. Boot from the Recovery Disk
If your computer won’t boot into Windows, you can use the recovery disk to troubleshoot the issue.
Insert the USB recovery disk into your computer.
Restart the computer and enter the BIOS or UEFI firmware settings (refer to the manufacturer’s documentation for the specific key).
Set the USB drive as the primary boot device and restart the computer.
The system will boot into the Windows Recovery Environment.
2. Use the Recovery Environment
Once booted into the recovery environment, you can access various tools:
Startup Repair: This tool automatically diagnoses and fixes common boot problems.
System Restore: If you created a restore point earlier, you can roll your system back to that point, effectively undoing recent changes that may have caused issues.
Command Prompt: Advanced users can use the command line to run diagnostic tools or execute commands to fix issues.
System Image Recovery: If you’ve created a system image backup, this option allows you to restore the entire system to its previous state.
3. Reinstall Windows 11
If your system is beyond repair, the recovery disk can be used to reinstall Windows 11.
Boot from the recovery disk and select “Install Now.”
Follow the on-screen instructions to reinstall Windows. Be sure to choose the option to keep your files if you don’t want to lose personal data.
Best Practices for Maintaining a Recovery Disk
To ensure your recovery disk is always ready when you need it, follow these best practices:
Keep It Updated: Create a new recovery disk periodically, especially after major Windows updates.
Store It Safely: Keep the USB drive in a safe location where it won’t get lost or damaged.
Label the Disk: Clearly label the recovery disk so that you can easily identify it in an emergency.
About us and this blog
Panda Assistant is built on the latest data recovery algorithms, ensuring that no file is too damaged, too lost, or too corrupted to be recovered.
Request a free quote
We believe that data recovery shouldn’t be a daunting task. That’s why we’ve designed Panda Assistant to be as easy to use as it is powerful. With a few clicks, you can initiate a scan, preview recoverable files, and restore your data all within a matter of minutes.
Subscribe to our newsletter!
More from our blog
See all postsRecent Posts
- How to recover deleted files in sd memory card 2025-07-15
- How to recover lost photos from sd card 2025-07-15
- How do you recover deleted files from sd card 2025-07-15

 Try lt Free
 Recovery success rate of up to

