To convert a ZIP file to an ISO image, you will need to understand both formats, their purposes, and the step-by-step process involved in the conversion.
1. ZIP and ISO
1.1 What is a ZIP file?
A ZIP file is a compressed archive that can contain one or more files or folders. ZIP files are commonly used for reducing file sizes and grouping files together for easier sharing or storage. They are widely supported by many operating systems and can be opened with built-in tools or third-party applications.
Key Features of ZIP Files:
Compression: ZIP uses lossless data compression, meaning the files within the archive can be decompressed to their original state without loss of quality.
Archiving: ZIP files can hold multiple files and directories.
Password Protection: ZIP archives can be encrypted for security.
Cross-Platform Compatibility: ZIP files can be used across different operating systems like Windows, macOS, and Linux.
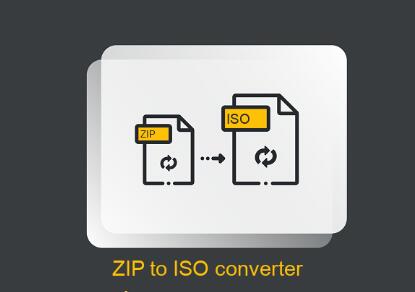
1.2 What is an ISO image?
An ISO image is a complete sector-by-sector copy of a file system from a CD, DVD, or other optical storage media. ISO files contain everything on the original disc, including its file structure and boot sectors. They are typically used for creating exact copies of discs or for storing software distributions and operating system installations.
Key Features of ISO Images:
Exact Copy: An ISO file is an exact replica of a disc, preserving file structure, boot sectors, and metadata.
Mountable: ISO files can be mounted as virtual drives, allowing users to access their contents without burning them to physical media.
Commonly Used for Software Distribution: Operating systems, large software packages, and video game installations are often distributed as ISO images.
2. Reasons to Convert a ZIP File to ISO
There could be several reasons why you might want to convert a ZIP file to an ISO image:
Creating a Bootable Image: You may want to create a bootable ISO image for software that was initially downloaded as a ZIP file.
For Optical Media Use: If you’re planning to burn the contents of the ZIP file to a CD or DVD, converting it to ISO could streamline the process.
Better Organization: Some users prefer ISO files for storing backups or archives because they preserve file structures better.
Compatibility: Some devices or systems only support ISO files for installation purposes (such as virtual machines or certain gaming consoles).
3. How to Convert a ZIP File to an ISO Image
3.1 Preparation
Before you begin, make sure you have the necessary tools and your system is ready for the conversion process.
Tools You Will Need:
Unzipping Tool (e.g., WinRAR, 7-Zip): To extract the ZIP file contents.
ISO Creation Software (e.g., ImgBurn, PowerISO, UltraISO): For converting the extracted contents to an ISO image.
Space Requirements: Ensure that you have sufficient disk space to store both the uncompressed files from the ZIP archive and the resulting ISO file.
3.2 Steps to Extract the ZIP File
The first step in the conversion process is to extract the contents of the ZIP file.
For Windows:
Step 1: Right-click on the ZIP file.
Step 2: Select “Extract All” from the context menu.
Step 3: Choose the destination folder where you want to extract the files.
Step 4: Wait for the extraction to complete.
For macOS:
Step 1: Double-click the ZIP file.
Step 2: The contents will automatically be extracted to the same folder.
For Linux:
Step 1: Open a terminal.
Step 2: Use the command unzip filename.zip to extract the contents.
Once the extraction is complete, you should have a folder containing all the files that were inside the ZIP archive. These files are now ready to be included in your ISO image.
3.3 Steps to Create the ISO Image
After extracting the contents, follow these steps to create the ISO image using software like ImgBurn or PowerISO.
Using ImgBurn:
Download and Install ImgBurn: If you don’t have ImgBurn installed, download it from the official website and install it.
Launch ImgBurn: Once installed, open the software.
Choose “Create image file from files/folders”: This option allows you to create an ISO from a directory of files.
Add the Extracted Files: In the source section, add the folder that contains the files extracted from the ZIP archive.
Set Destination: Choose the location where you want the ISO file to be saved.
Configure ISO Settings:
If creating a bootable ISO, make sure to specify the appropriate boot loader (you can find bootloaders in some operating system installation ZIPs).
Make sure to label your ISO properly.
Start the Process: Click the “Build” button to start creating the ISO image. This might take a few minutes, depending on the size of the extracted files.
Completion: Once the process is complete, your ISO file will be ready to use.
Using PowerISO:
Download and Install PowerISO: Like ImgBurn, download and install PowerISO if you haven’t already.
Launch PowerISO: After installation, open the program.
Create a New ISO Image: Click on “New” and select “Data CD / DVD Image.”
Add Files: Drag and drop the extracted files into the interface or use the “Add” button to include files manually.
Choose Output Format: Make sure the output format is set to ISO.
Save the ISO File: Click “Save” and specify the output location for the ISO image.
Finish the Process: Once the saving process is complete, you will have an ISO file ready for use.
4. Additional Considerations
4.1 Bootable ISO Image
If you are creating a bootable ISO image, you will need to ensure that you have the correct boot files included. Some ZIP files that contain operating systems or installation software may have a bootable configuration, but others will require you to manually add boot sectors.
To add boot files:
Step 1: Find a bootable sector file (e.g., .img or .bin file) that matches the operating system or software you’re working with.
Step 2: In ImgBurn, you can add this file by going to “Advanced” -> “Bootable Disc” and selecting the appropriate boot image.
4.2 Compression Differences
It’s important to understand that while ZIP files are compressed archives, ISO files typically are not. This means the resulting ISO file might be larger in size than the original ZIP archive. If you’re concerned about storage space, you can compress the ISO afterward using compression tools like 7-Zip, but this will create a compressed archive, not a standard ISO image.
4.3 File System Limitations
ISO images often use the ISO 9660 or UDF file systems, which have limitations on file names and directory depth. If the files extracted from the ZIP exceed these limits, you may encounter errors during the ISO creation process. In such cases, you can either:
Rename the files or shorten directory paths.
Use a file system that supports longer file names and deeper directory structures (e.g., UDF for DVDs).
5. Testing the ISO File
After creating the ISO file, it’s always a good idea to test it to ensure everything is working as expected.
For Virtual Machines:
You can mount the ISO file in a virtual machine (e.g., VirtualBox or VMware) to verify that it’s bootable and functional.
For Mounting Locally:
Most operating systems allow you to mount ISO files as virtual drives. For example:
Windows: Right-click the ISO file and select “Mount.”
macOS: Double-click the ISO file, and it will mount automatically.
Converting a ZIP file to an ISO image is a straightforward process if you have the right tools and understand the requirements for both file formats. By following the step-by-step guide provided above, you can easily extract the contents of your ZIP archive and create a functional ISO image for storage, distribution, or installation purposes.
About us and this blog
Panda Assistant is built on the latest data recovery algorithms, ensuring that no file is too damaged, too lost, or too corrupted to be recovered.
Request a free quote
We believe that data recovery shouldn’t be a daunting task. That’s why we’ve designed Panda Assistant to be as easy to use as it is powerful. With a few clicks, you can initiate a scan, preview recoverable files, and restore your data all within a matter of minutes.
Subscribe to our newsletter!
More from our blog
See all postsRecent Posts
- Recover deleted files windows 2025-07-02
- How to recover previous excel file 2025-07-02
- How to recover files that are permanently deleted 2025-07-02

 Try lt Free
 Recovery success rate of up to

