SD cards are a staple for expanding storage on devices such as cameras, smartphones, and gaming consoles. However, users sometimes encounter difficulties when attempting to format an SD card to the FAT32 file system. FAT32 is widely compatible across devices due to its simplicity and broad support, but modern operating systems and certain SD cards can present challenges when trying to apply this format.
FAT32 (File Allocation Table 32) is a file system introduced by Microsoft in 1996. It is known for its universal compatibility across different operating systems and devices. Despite its age, it remains a popular choice due to its simplicity and broad support. FAT32 supports storage devices up to 2TB in size but has a file size limit of 4GB per individual file, which can be a limitation for modern users handling larger media files.

Common Reasons You Can’t Format an SD Card to FAT32
Size Limitation: Many modern operating systems restrict FAT32 formatting for drives larger than 32GB.
Write Protection: Physical or software-based write protection can prevent formatting.
Corrupted SD Card: File system errors or physical damage can block formatting attempts.
Incompatible Tools: Default formatting utilities may not support FAT32 for larger SD cards.
Bad Sectors: Damaged areas on the SD card can hinder the formatting process.
Method 1: Checking for Write Protection
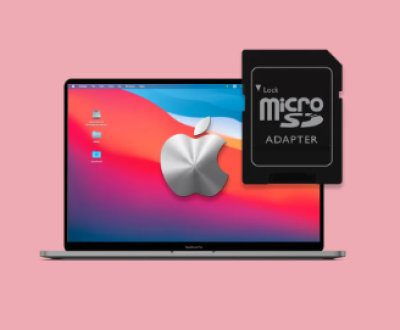
Physical Write Protection Switch: Many SD cards come with a small lock switch on the side. Ensure this switch is in the unlocked position.
Software Write Protection:
On Windows:
Open Command Prompt as Administrator.
Type diskpart and press Enter.
Enter list disk to find your SD card.
Type select disk X (replace X with your SD card’s number).
Input attributes disk clear readonly to remove software-level write protection.
Exit diskpart using exit.
Method 2: Using Windows Command Prompt
Insert your SD card into the computer.
Open Command Prompt as Administrator.
Type the following commands:
diskpart
list disk
select disk X (replace X with your SD card’s number)
clean
create partition primary
format fs=fat32 quick
exit
This method bypasses many limitations imposed by graphical formatting utilities.
Method 3: Using Third-Party Formatting Tools
If the built-in utilities do not work, third-party tools can offer a solution. Some recommended options include:
Rufus: Ideal for creating bootable drives and formatting SD cards to FAT32.
HP USB Disk Storage Format Tool: Specialized in handling stubborn USB drives and SD cards.
GUIFormat: Designed explicitly for large drives requiring FAT32 formatting.
Steps Using GUIFormat:
Download and install GUIFormat.
Insert your SD card and run the tool.
Select your SD card drive letter.
Choose FAT32 as the file system.
Click Start and confirm the process.
Method 4: Formatting on macOS
Insert the SD card.
Open Disk Utility (Applications > Utilities > Disk Utility).
Select your SD card from the sidebar.
Click Erase and choose MS-DOS (FAT), which is equivalent to FAT32.
Confirm and proceed with the formatting.
Method 5: Using Linux Terminal
Insert the SD card.
Open the terminal and identify your SD card with:
lsblk
Unmount the SD card:
sudo umount /dev/sdX1
Format to FAT32:
sudo mkfs.vfat -F 32 /dev/sdX
Method 6: Repairing Corrupted SD Cards
If your SD card is corrupted, repair it before attempting to format:
On Windows:
Open Command Prompt as Administrator.
Run:
chkdsk X: /f
(Replace X with the SD card letter.)
On macOS:
Use First Aid in Disk Utility to repair the card.
Method 7: Low-Level Formatting
For severely corrupted SD cards, low-level formatting can restore functionality:
Download a tool like HDD Low Level Format Tool.
Perform a low-level format to reset the SD card entirely.
After completion, format to FAT32 using your operating system.
Preventing Future Formatting Issues
Safely Eject SD Cards: Always use the eject option before removing the SD card.
Use Quality SD Cards: Purchase from reputable brands like SanDisk, Samsung, and Kingston.
Backup Regularly: Maintain backups of essential data to prevent loss.
About us and this blog
Panda Assistant is built on the latest data recovery algorithms, ensuring that no file is too damaged, too lost, or too corrupted to be recovered.
Request a free quote
We believe that data recovery shouldn’t be a daunting task. That’s why we’ve designed Panda Assistant to be as easy to use as it is powerful. With a few clicks, you can initiate a scan, preview recoverable files, and restore your data all within a matter of minutes.
Subscribe to our newsletter!
More from our blog
See all postsRecent Posts
- Retrieve files from usb 2025-07-04
- How to retrieve overwritten excel file 2025-07-04
- How to retrieve lost files on sd card 2025-07-04

 Try lt Free
 Recovery success rate of up to

