 Try lt Free
 Recovery success rate of up to
Creating a RAID (Redundant Array of Independent Disks) array is a common solution for improving performance, increasing storage capacity, or enhancing fault tolerance in computing environments. RAID is widely used in both enterprise and home setups to manage multiple hard drives or solid-state drives as a single logical unit.
RAID combines multiple physical drives into one logical unit for purposes such as redundancy (data protection), performance improvements, or both. There are several levels of RAID, each offering different configurations:
RAID 0: Striping without redundancy, high performance.
RAID 1: Mirroring for redundancy.
RAID 5: Striping with parity for balance between performance and redundancy.
RAID 6: Similar to RAID 5 but with double parity.
RAID 10: Combination of RAID 1 and RAID 0.
The creation of any RAID array typically involves a process called initialization, which involves setting up the array structure and synchronizing data across the disks.
The Role of Formatting in RAID Creation
When people talk about “formatting,” they are usually referring to preparing a disk with a specific file system so that it can be used to store files. This formatting is different from low-level formatting or sector-level operations, which are typically handled by the drive manufacturer.
Now, onto the central question:
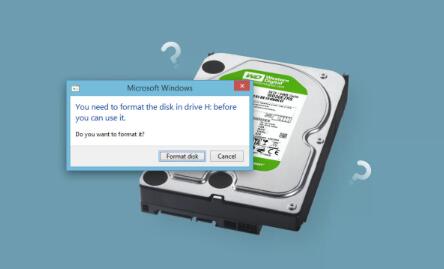
Do you need to format disks before adding them to a RAID array?
The short answer is no—formatting the drives before creating a RAID array is not required and is usually unnecessary. In fact, most RAID controllers or software RAID systems will erase or overwrite any existing data on the disks as part of the array creation process.
Let’s explore why this is the case.
What Happens to Drives During RAID Configuration?
When you set up a RAID array, the following typically occurs:
Metadata Initialization: The RAID system writes metadata to each disk to define the array configuration. This metadata is critical for identifying each disk’s role within the RAID structure.
Data Overwrite: In many cases, the RAID setup process involves wiping existing data or creating a new disk structure, which will erase any previous file system on the disks.
Synchronization: Especially in RAID levels with redundancy (e.g., RAID 1. 5. or 6), the system may perform a full synchronization or initialization cycle to establish parity or mirrored data. This process can further overwrite sectors on the drives.
Because of these steps, pre-formatting the drives is redundant and any existing formatting will be lost during the RAID setup process.
Manufacturer and RAID Controller Behavior
The behavior can vary slightly depending on the RAID controller or software solution you are using. Let’s look at a few common examples:
Hardware RAID Controllers
Dell PERC, HP Smart Array, LSI/Avago: These controllers usually offer configuration utilities during boot (e.g., Ctrl+R or Ctrl+A). When you configure a new array, the system warns that existing data will be erased.
Formatting the disks before RAID creation has no benefit, as the controller will initialize the array, destroying any previous file systems or partition tables.
Software RAID (e.g., Windows Storage Spaces, Linux MDADM)
Linux (MDADM): When creating an array with MDADM, the tool overwrites the beginning of each disk to store array metadata. If you format the drives beforehand, that formatting will be wiped during this step.
Windows Storage Spaces: Automatically formats the new storage pool once the RAID structure is created. Pre-formatting is overwritten.
In all these cases, the initial array setup process handles formatting and partitioning, so there is no need to do it in advance.
When Might You Format Disks Before RAID Creation?
There are a few edge cases where formatting before creating a RAID array might make sense or be helpful:
Testing for Bad Sectors or Drive Health
Formatting a disk using a full format (not a quick format) can help detect bad sectors. If you want to ensure the drives are healthy before using them in a RAID, running a surface scan or full format can be part of your preparation process.
Data Sanitization or Security Compliance
If the drives were previously used and contained sensitive data, formatting (or better yet, secure erasing) before creating the RAID can be part of a data sanitization procedure, especially in corporate or government settings.
Drive Benchmarking or Uniformity Checks
Pre-formatting or zeroing out drives may be used when performing performance benchmarks or ensuring that all disks are blank and uniform before array creation.
However, even in these cases, the actual RAID setup process will overwrite any formatting, so it’s mostly done as a preparation step rather than a requirement.
Common Misconceptions
Let’s address some common misunderstandings that lead people to believe formatting is necessary:
Misconception 1: “If I format my drives first, they’ll perform better in RAID.”
This is incorrect. RAID controllers or software RAID utilities handle drive initialization and structure setup. Formatting beforehand does not impact performance or integrity in the final RAID array.
Misconception 2: “Formatting ensures the RAID array starts clean.”
Not true. RAID initialization inherently wipes out any existing file systems and metadata. Starting with formatted disks adds no extra cleanliness or benefit.
Misconception 3: “My RAID won’t work unless all disks are formatted the same way.”
Again, the RAID system treats disks at the block level. File systems come into play after the array is built. Matching file systems beforehand has no effect and will be wiped out anyway.
Data Recovery and RAID Considerations
If you’re planning to create a RAID array using disks that already contain data, you should be extremely cautious. Creating a new RAID array on disks with existing data will typically destroy all existing data.
For example:
Configuring RAID 0 on two drives with data will wipe both.
Creating a RAID 1 array will mirror one disk to another, erasing the second drive.
Even so-called “non-destructive” RAID creation tools are risky and should only be used by professionals.
If you want to retain data from old disks:
Back it up elsewhere first.
Do not attempt to create a RAID array on active disks.
After creating the array, you can then move your data back onto the RAID volume.
Post-RAID Creation: When Do You Format?
Now here’s where formatting actually does come into play:
Once the RAID array is created and recognized by your operating system as a single volume, you will need to format the array with a file system (e.g., NTFS, ext4. XFS) before you can use it to store files.
This formatting applies to the logical RAID volume, not to the individual physical disks. For example:
In Windows: You use Disk Management to create a new volume and format it.
In Linux: You can use mkfs.ext4. mkfs.xfs, etc., on the RAID device like /dev/md0.
Only at this point is the array ready for use.
RAID Creation Best Practices
If you’re setting up a new RAID array, consider the following best practices to ensure smooth deployment:
Backup All Existing Data: Always back up any data on drives you plan to include in a RAID, even if you’re unsure if it will be erased.
Check Drive Health: Use tools like CrystalDiskInfo, smartctl, or manufacturer utilities to verify each drive is healthy.
Use Identical Drives: For best performance and reliability, use drives of the same size, model, and speed.
Label Drives: Physically label each drive if possible to identify them easily during troubleshooting.
Initialize from BIOS/UEFI or RAID Utility: Follow the proper procedure depending on your RAID system.
Monitor After Creation: Use RAID monitoring tools to watch for drive failures, degraded arrays, or other issues.
About us and this blog
Panda Assistant is built on the latest data recovery algorithms, ensuring that no file is too damaged, too lost, or too corrupted to be recovered.
Request a free quote
We believe that data recovery shouldn’t be a daunting task. That’s why we’ve designed Panda Assistant to be as easy to use as it is powerful. With a few clicks, you can initiate a scan, preview recoverable files, and restore your data all within a matter of minutes.
Subscribe to our newsletter!
More from our blog
See all posts


