 Try lt Free
 Recovery success rate of up to
Mic)rosoft Word has several built-in mechanisms for recovering unsaved or lost documents. These features are designed to help users retrieve their work in the event of a crash, power failure, or accidental closure. The primary recovery mechanisms are AutoRecover, the Document Recovery pane, and temporary files.
AutoRecover: This feature periodically saves backup copies of open documents, allowing Word to restore a previous version if the application crashes or if the file was never saved. AutoRecover is typically set to save backups every 10 minutes by default.
Temporary Files: Word creates temporary files to store work-in-progress documents. If Word crashes unexpectedly, these temporary files may still exist on your system and can be used to recover unsaved documents.
Document Recovery Pane: After a crash, Word may automatically open the Document Recovery pane, which will display a list of any documents that were open at the time of the crash. This allows you to quickly recover your unsaved work.
Cloud Backup: If you use Microsoft OneDrive, Word may automatically save your documents to the cloud, providing an additional layer of backup. You can recover documents directly from OneDrive if your local copy is lost.
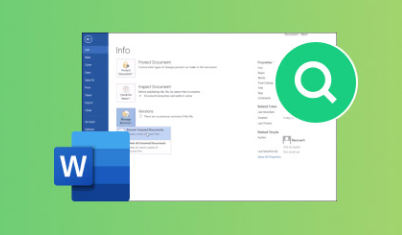
Method 1: Using the Document Recovery Pane
If Microsoft Word crashes unexpectedly, it typically displays a Document Recovery pane the next time the program is opened. This pane lists any unsaved documents that Word has auto-saved for recovery. Here’s how to use the Document Recovery pane:
Reopen Word: When you launch Microsoft Word after a crash, the Document Recovery pane should automatically appear on the left side of the screen. This pane shows the available recovery files, which are usually saved with a name like “Recovered [Document Name]”.
Review Available Documents: In the Document Recovery pane, you’ll see a list of files that were being worked on at the time of the crash. These files are often saved in a temporary format, allowing you to recover them.
Select and Open: Click on any document in the pane to open it. If the document contains your lost work, save it immediately under a new name by clicking “File” > “Save As” and selecting a safe location.
Check for Multiple Versions: If multiple versions of the same document are available, review each version to find the one with the most recent content. Once you find the right version, save it to prevent losing your work.
Note: If the Document Recovery pane doesn’t appear after reopening Word, you can manually look for the recovered files in the AutoRecover file location (covered in Method 2).
Method 2: Manually Finding AutoRecover Files
If the Document Recovery pane doesn’t show your lost document, or if you closed Word without checking the recovery options, you can manually search for AutoRecover files. Word automatically saves backup copies of documents at specified intervals, and these files can often be used to recover unsaved work.
Here’s how to locate AutoRecover files:
Open Word: Launch Microsoft Word and navigate to the “File” tab in the ribbon.
Go to Options: In the “File” menu, select “Options” at the bottom.
Navigate to Save Settings: In the Word Options window, click on “Save” from the list on the left. Here, you can see the location of AutoRecover files under the “AutoRecover file location” section.
Copy the File Path: Copy the path listed in the AutoRecover file location field.
Access File Explorer: Open File Explorer and paste the copied path into the address bar. This will take you directly to the folder where AutoRecover files are stored.
Look for AutoRecovered Files: In this folder, you’ll find files with the .asd extension. These are AutoRecovered documents that Word saved automatically. They might not have a recognizable name, but you can identify them by the most recent modification date.
Open the File: Double-click the AutoRecover file to open it in Word. If it contains your lost work, be sure to save it to a new location immediately.
Tip: You can also search your entire computer for files with the .asd extension if you’re unsure of the specific location.
Method 3: Searching for Temporary Files
In addition to AutoRecover files, Word sometimes creates temporary files that can be used for recovery. These temporary files are stored in specific directories on your computer and can be helpful if AutoRecover doesn’t provide the needed results.
Follow these steps to find temporary files:
Open File Explorer: Press Win + E to open File Explorer.
Search for Temporary Files: Temporary files in Word typically have a .tmp or .wbk extension. You can search for these extensions by typing .tmp or .wbk into the search bar.
Navigate to Temporary File Locations:
For .tmp files: Look in the following directories:
C:\Users\[Your Username]\AppData\Local\Temp
C:\Windows\Temp
For .wbk files: Check the folder where your original document was saved, as Word may create a backup copy with the .wbk extension.
Check the File Timestamps: Sort the files by date to identify the ones created around the time of your document’s loss.
Open and Review: Once you find the temporary file, try opening it in Word. If it contains your lost content, save it immediately.
Note: Temporary files may not always be available if the system was restarted or if Word has already cleared them from your system.
Method 4: Recovering from Cloud Backups (OneDrive or SharePoint)
If you’ve been saving your Word documents to a cloud service like Microsoft OneDrive or SharePoint, you may be able to recover your lost document from the cloud. OneDrive automatically saves changes to documents as you work, and it keeps a version history of your files.
To recover a document from OneDrive:
Log in to OneDrive: Go to the OneDrive website and sign in with your Microsoft account.
Navigate to the Document Folder: Browse the folders on OneDrive to find the document you were working on. If the document was saved there before it was lost, you should see it listed.
Check Version History: Right-click the document and select “Version History” from the context menu. This will display a list of previous versions of the document.
Restore the Previous Version: Choose the version that was closest to your last saved content and click “Restore” to recover it.
Tip: If you’re using Microsoft 365. you may also be able to recover documents from SharePoint or Teams, which integrates with OneDrive’s version history.
Method 5: Using Data Recovery Software
Panda Assistant
Panda Assistant is a smart data recovery tool designed to help you retrieve lost, unsaved, or accidentally deleted Word documents quickly and efficiently. Whether you experienced a sudden system crash, application freeze, or mistakenly closed Word without saving, Panda Assistant can locate and restore your work using intelligent scanning technology.
When you launch Panda Assistant, simply choose the “Document Recovery” option. The software will begin scanning key areas of your computer where Microsoft Word stores temporary files, AutoRecover data, and backups. These include the default AutoRecover file locations, temporary folders, and hidden cache directories that Word uses in the background.
Once the scan is complete, Panda Assistant presents a list of recoverable Word files. You can preview each file to ensure it’s the correct version before initiating the recovery. After confirming the document, click “Recover” to save it securely to your desired folder.
One of Panda Assistant’s key advantages is its ability to recover documents that Word’s built-in tools may not detect, especially if the files were unsaved or lost due to system errors. The tool also supports recovery of multiple document versions, giving you flexibility in restoring the most recent or most complete version.
Method 6: Prevent Future Document Loss
While recovering lost documents is possible, it’s always better to take preventative measures. Here are some tips to avoid future data loss in Word:
Enable AutoSave: If you use OneDrive or SharePoint, enable the AutoSave feature in Word. This will save your work automatically in real time.
Increase AutoRecover Frequency: In Word’s settings, set AutoRecover to save your work every 5 or 10 minutes. This reduces the risk of losing significant progress in case of a crash.
Use Cloud Storage: Regularly save your documents to cloud storage services like OneDrive, Dropbox, or Google Drive. This ensures that you always have an accessible backup.
Save Often: Make it a habit to save your document manually every few minutes, especially if you’re working on something critical.
Create Backup Copies: Consider using Word’s “Save As” feature to create backup copies of your important documents periodically.
About us and this blog
Panda Assistant is built on the latest data recovery algorithms, ensuring that no file is too damaged, too lost, or too corrupted to be recovered.
Request a free quote
We believe that data recovery shouldn’t be a daunting task. That’s why we’ve designed Panda Assistant to be as easy to use as it is powerful. With a few clicks, you can initiate a scan, preview recoverable files, and restore your data all within a matter of minutes.


