 Try lt Free
 Recovery success rate of up to
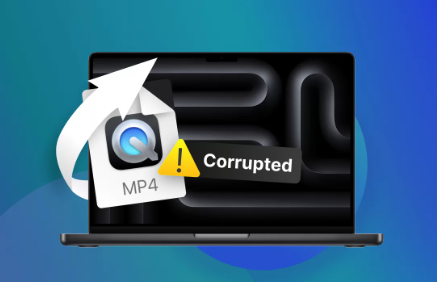
Corrupted video files are a frustrating issue faced by users across devices, platforms, and professions. Whether you’re an aspiring content creator, a professional videographer, a student recording a project, or simply a casual user trying to relive vacation memories, a corrupted video file can feel like a devastating loss. Often, the video may not play at all, may freeze partway, show a black screen, display distorted visuals, or have missing audio.
A corrupted video file refers to a media file that cannot be accessed, played, or edited properly because some of its internal data has been damaged, altered, or lost. A video is a complex digital file composed of a container format (like MP4. AVI, or MOV), codecs for audio and video compression, and metadata describing how the file should be decoded and played.
When any part of this structure becomes damaged—whether the header, frame data, or index playback can be disrupted or become impossible. Some common signs of a corrupted video include:
Video won’t open or shows error messages like “file format not supported.”
Media player crashes when attempting to play the file.
The video plays without audio, or audio without video.
Black or green screen during playback.
Pixelation, stuttering, or frozen frames.
Partial playback, where the video stops before finishing.
What Causes Video File Corruption?
Understanding why video files become corrupted helps you better avoid future incidents and determine the appropriate repair method. Common causes include:
1. Sudden Power Loss or System Crash:
If your device shuts down or crashes while recording, rendering, or transferring video files, the incomplete process can lead to corruption.
2. Improper File Transfer:
Unplugging a camera, smartphone, or external drive before a transfer is complete may result in a partial or corrupted video file.
3. Bad Sectors on Storage Devices:
Faulty hard drives, SD cards, or USB flash drives with bad sectors can corrupt the files stored on them.
4. Malware or Virus Infection:
Malicious software may target media files, causing irreversible changes or deletions in video data.
5. Unsupported Codecs or Software Glitches:
Using outdated media players or editing tools may not properly support certain codecs or container formats, leading to file damage.
6. Incomplete Downloads:
Downloading videos over unstable networks can result in incomplete files that won’t play.
7. Recording Device Malfunctions:
Hardware failures in cameras or smartphones—such as overheating or software bugs—may save videos incorrectly.
Initial Troubleshooting Steps
Before diving into advanced fixes, perform some basic troubleshooting to determine whether the video file is truly corrupted or if the issue lies elsewhere.
Try Opening the File with a Different Media Player
Your media player may not support the file’s format or codec. Try one of the following:
VLC Media Player: Supports a wide range of formats and is known for playing damaged files.
KMPlayer, PotPlayer, or Media Player Classic: Additional options with advanced decoding features.
If the video opens in a different player, the file may not be corrupted, or the issue may be fixable through conversion or playback adjustments.
Check File Extension and Rename
Sometimes, a video file may have an incorrect or missing extension. Rename the file with the appropriate extension based on its original format (e.g., .mp4. .avi, .mov).
Copy to a Local Drive
If you’re attempting to play the video from a USB stick, SD card, or cloud location, first copy it to your computer’s local storage. Corruption may be related to unstable connections or bad sectors in the external device.
Method 1: Repair Video Files Using VLC Media Player
VLC Media Player isn’t just a playback tool—it also contains a built-in video repair feature for AVI files. You can use VLC to fix minor video file corruption.
Steps to Repair Video in VLC:
Rename the video file extension to .avi.
Even if the file was originally MP4 or MOV, rename it to .avi (e.g., video.mp4 → video.avi).
Open VLC Media Player.
Go to Tools > Preferences > Input/Codecs.
Under “Damaged or incomplete AVI file,” choose “Always fix.”
Click Save and try playing the file again.
If the video plays successfully, you can convert it back to its original format using VLC’s Convert/Save function.
Note: This method works best for AVI files or files that can be temporarily renamed as AVI. It does not support native repair for MP4 or MOV corruption.
Method 2: Convert the Video Format
Converting the corrupted file to another format may bypass minor corruption or rebuild the file’s index.
Steps in VLC:
Open VLC and go to Media > Convert/Save.
Click Add and select your video file.
Click Convert/Save.
Choose a new format like MP4 or MKV.
Click Start.
If the conversion completes successfully, the new file may play without errors. This is especially useful for files that seem to freeze or crash your media player.
Method 3: Use Dedicated Video Repair Software
For more complex or severely corrupted files, free and paid third-party software offers advanced repair capabilities. These tools reconstruct the file by analyzing its structure, re-aligning headers, repairing keyframes, and restoring audio/video synchronization.
Popular Video Repair Tools:
Panda Assistant
How to Use Stellar Repair for Video (as an example):
Download and install Stellar Repair for Video.
Launch the program and click “Add File.”
Select the corrupted video.
Click “Repair.”
Once complete, preview the repaired video.
Click “Save Repaired Files.”
Most of these tools support popular formats like MP4. MOV, AVI, MKV, FLV, 3GP, and M4V. Some also offer batch repair, helpful if multiple videos were damaged under similar circumstances.
Method 4: Hex Editor Repair (Advanced)
For users comfortable with binary data and file structure, hex editors can be used to manually repair corrupted video files. This method is useful if:
You have a similar working video file (shot with the same device, settings, and format).
You need to replace a corrupted header in a damaged file.
Steps:
Download a hex editor like HxD.
Open a working file and a corrupted file in the hex editor.
Identify the header (usually the first few hundred bytes).
Copy the header from the working file and paste it into the damaged file.
Save the new file with a different name.
Try playing the file using VLC.
This method is risky and recommended only for advanced users who understand video file structures. Incorrect modifications may make the file worse.
Method 5: Restore from Backups or Cloud Sync
If your video files were previously backed up to a cloud service or external storage device, restoring them from these sources may be the easiest fix.
Cloud Storage Platforms:
Google Drive
OneDrive
Dropbox
iCloud
Check version histories if available—some services allow you to restore earlier, uncorrupted versions of the same file.
Method 6: Recover Video Files from a Damaged Storage Device
If the file was corrupted due to a faulty SD card or hard drive, data recovery software might help extract an uncorrupted or partially recoverable copy of the video.
Recommended Data Recovery Tools:
Panda Assistant
Steps to Recover:
Install the recovery software.
Scan the damaged device or location where the video was stored.
Look for recognizable video files or files with missing extensions.
Preview if possible.
Recover the files to a separate drive.
Once recovered, run the repaired video through VLC or a dedicated video repair tool.
Preventing Future Video Corruption
While repair methods are helpful, prevention is the best strategy for avoiding the heartache of corrupted media. Below are proven tips to keep your video files safe.
1. Always Safely Eject Devices
Never remove SD cards, flash drives, or external hard drives without properly ejecting them. Removing devices during data transfer increases the chance of file corruption.
2. Use High-Quality Storage Media
Cheap SD cards and knockoff USB drives are more prone to failures. Invest in reputable brands like SanDisk, Samsung, or Kingston, and avoid reusing media that shows signs of wear.
3. Regularly Update Firmware and Software
Keep your camera, smartphone, and video editing software up to date. Manufacturers often release patches that improve stability and data handling.
4. Avoid Recording on Low Battery
Power loss during recording can prevent files from finalizing properly. Always charge your device before long shoots.
5. Save Videos in Multiple Locations
Maintain backups of important video files across devices: external hard drives, cloud storage, and physical media.
6. Monitor File Transfer Integrity
Use robust file transfer methods. Avoid wireless transfers over weak networks and always verify file sizes after copying.
7. Handle Media Files Carefully During Editing
While editing, avoid force-closing applications or turning off your computer abruptly. Crashes during rendering or exporting are a major cause of corruption.
When to Seek Professional Help
If none of the methods work and the video file is of significant importance—such as wedding footage, professional projects, or irreplaceable moments—consider using professional data recovery services. These experts may use advanced forensics and hardware-based techniques to retrieve and reconstruct damaged files from corrupted media.
Corrupted video files can cause stress and disappointment, especially when they contain irreplaceable memories or essential content. But don’t give up—most corrupted files can be repaired using free tools like VLC, specialized software, or manual techniques such as header replacement. The key lies in understanding the nature of the corruption and applying the right method for recovery.
Even if a file seems completely inaccessible now, data recovery and repair tools have made impressive advancements. Combine that with safe file handling habits, frequent backups, and robust storage practices, and you can minimize the likelihood of facing this issue again in the future.
About us and this blog
Panda Assistant is built on the latest data recovery algorithms, ensuring that no file is too damaged, too lost, or too corrupted to be recovered.
Request a free quote
We believe that data recovery shouldn’t be a daunting task. That’s why we’ve designed Panda Assistant to be as easy to use as it is powerful. With a few clicks, you can initiate a scan, preview recoverable files, and restore your data all within a matter of minutes.


