 Try lt Free
 Recovery success rate of up to
Losing important files on Windows 10 is a common problem. Whether due to accidental deletion, hardware failure, software crashes, or malware attacks, file loss can affect both personal and professional users. The good news is, Windows 10 provides several tools and methods for file recovery, from built-in features like File History and Backup to third-party recovery software and professional services.
Accidental Deletion: Files mistakenly sent to the Recycle Bin or permanently deleted using Shift + Delete.
Drive Formatting: Formatting a hard drive, USB flash drive, or SD card without backing up.
File System Errors: Disk corruption or operating system issues can make files inaccessible.
Malware or Virus Attacks: Certain viruses can delete or hide files.
Software Crashes: Word processors, photo editors, or other programs crashing while saving files.
Physical Drive Failures: Hard drive damage due to mechanical failure or power surges.
Understanding the cause can help choose the best recovery approach.
First Step: Check the Recycle Bin
When a file is deleted without using Shift + Delete, it usually moves to the Recycle Bin.
Open Recycle Bin: Double-click the Recycle Bin icon on your desktop.
Search for Your Files: Use the search bar if there are many files.
Restore Files: Right-click the file and select “Restore.” It will return to its original location.
Important Note:
Files deleted using Shift + Delete bypass the Recycle Bin, requiring other recovery methods.
Method 1: Use Windows 10’s File History
File History is a built-in backup tool that automatically saves versions of your files.
How to Set Up and Use File History:
Check if File History Is Enabled:
Go to Settings → Update & Security → Backup.
Click Add a drive under “Back up using File History” if it’s not yet configured.
Restore Files from File History:
Go to Control Panel → File History.
Click Restore personal files.
Browse through backups and select the file version you want to restore.
Click the green “Restore” button.
Limitations:
File History must be set up before file loss occurs. If it wasn’t enabled, other recovery methods are required.
Method 2: Restore Previous Versions Using Windows 10
Windows 10 automatically creates restore points, which sometimes include previous versions of files or folders.
How to Restore:
Right-click on the folder where your lost file was located.
Select Restore previous versions.
Browse through available versions.
Select and restore the appropriate version.
If the file was saved in a folder that is backed up by Windows Restore Points or File History, this method can be effective.
Method 3: Use Windows Backup and Restore (Windows 7)
Though labeled as a Windows 7 feature, this tool is still present in Windows 10.
How to Use:
Go to Control Panel → Backup and Restore (Windows 7).
If you have backups available, select Restore my files.
Follow the on-screen instructions.
If Windows Backup was configured, this can be a quick recovery method.
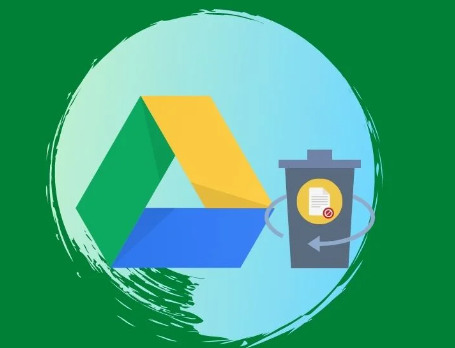
Method 4: Recover from OneDrive or Other Cloud Services
Many users store files in OneDrive, Dropbox, Google Drive, or other cloud storage solutions. Deleted cloud files often remain recoverable.
OneDrive:
Check OneDrive Recycle Bin:
Log into OneDrive in your browser.
Go to Recycle bin.
Restore files from there.
Check Version History:
Right-click the file in OneDrive.
Select Version history to restore an earlier version.
Other services like Dropbox and Google Drive have similar features, usually retaining deleted files for 30 days.
Method 5: Use Windows 10’s Command Prompt Recovery Tools
If files aren’t visible due to file system corruption or errors:
Using CHKDSK:
Open Command Prompt as Administrator.
Type:
bash
CopyEdit
chkdsk X: /f
Replace “X” with the drive letter of the affected drive.
This scans and fixes file system errors, possibly making hidden files reappear.
Using ATTRIB Command:
If files are hidden but not deleted:
Open Command Prompt.
Type:
bash
CopyEdit
attrib -h -r -s /s /d X:\*.*
Replace “X” with your drive letter.
This command unhides files that might have been hidden by malware or system errors.
Method 6: Third-Party File Recovery Software for Windows 10
Panda Assistant
Panda Assistant is a specialized data recovery software designed to help users recover lost files on Windows 10 easily and efficiently. Whether files have been accidentally deleted, lost due to system crashes, formatted drives, or corrupted storage devices, Panda Assistant provides a user-friendly solution compatible with various file types and storage devices.
To recover lost files on Windows 10 using Panda Assistant, start by downloading and installing the software. After launching it, select the drive or storage device where your files were lost. Panda Assistant offers two scan modes: Quick Scan for recently deleted files and Deep Scan for more complex situations, such as formatted or corrupted drives. Once the scan is complete, the software presents a list of recoverable files, allowing you to preview and select exactly which items you want to restore.
An additional benefit of using Panda Assistant is its focus on data safety. All recovery operations are performed in read-only mode, ensuring that the scanning process does not overwrite existing data on your drive. The software’s clear, guided interface makes it accessible even for beginners, while still offering advanced options for experienced users.
Method 7: Recover Files from a Formatted Drive on Windows 10
Formatted drives don’t erase data permanently — it simply marks the storage space as available for new data.
How to Recover Formatted Files:
Use Deep Scan mode in any of the tools mentioned above.
Ensure no new data has been written to the drive since formatting.
Tools like EaseUS and Disk Drill offer partition and formatted drive recovery specifically.
Method 8: Recover Lost Files from an External Drive or USB on Windows 10
If you lost files on an external device:
Connect the device to your PC.
Follow the same software recovery steps.
Scan the external drive or USB stick.
Make sure Windows recognizes the drive first. If not, you may need to update drivers or troubleshoot connection issues before scanning.
Method 9: Professional Data Recovery Services for Windows 10
When recovery software fails especially with physically damaged drives professional services are the last resort.
When to Consider:
Hard drive clicking noises.
External drive not recognized at all.
Critical business or legal files lost.
Leading Services:
Ontrack Data Recovery
DriveSavers
Gillware Data Recovery
Expect higher costs and longer turnaround times compared to DIY methods.
Preventative Measures: Protecting Your Files on Windows 10
Once recovery is complete, it’s important to adopt habits that minimize future data loss risks.
1. Regular Backups
Use File History, Backup and Restore, or third-party software.
Cloud backups with OneDrive, Google Drive, or Dropbox.
External drives or NAS systems.
2. Enable System Protection
Go to Control Panel → System → System Protection.
Configure restore points and volume shadow copies.
3. Use Antivirus Software
Keep antivirus software updated to protect against ransomware and malware.
4. Avoid Using Shift + Delete Carelessly
Deleting with Shift + Delete bypasses the Recycle Bin. Use it only when sure.
5. Avoid Writing to Drives After Data Loss
When files go missing, immediately stop writing new data to the drive. This prevents overwriting lost files.
Frequently Asked Questions (FAQ)
Can I recover permanently deleted files on Windows 10?
Yes, using third-party recovery software or professional services. The sooner you act, the higher the success rate.
Are free recovery tools as good as paid options?
Free tools work for simple recovery but may have limitations in scan depth, file type support, and customer support.
How long does file recovery take?
Quick Scans: 5–30 minutes depending on drive size.
Deep Scans: 1–6 hours or more.
Professional Services: Several days to a week.
Will recovered files be corrupted?
Recovered files are sometimes incomplete or corrupted, especially if overwritten. Good software previews file integrity before recovery.
About us and this blog
Panda Assistant is built on the latest data recovery algorithms, ensuring that no file is too damaged, too lost, or too corrupted to be recovered.
Request a free quote
We believe that data recovery shouldn’t be a daunting task. That’s why we’ve designed Panda Assistant to be as easy to use as it is powerful. With a few clicks, you can initiate a scan, preview recoverable files, and restore your data all within a matter of minutes.
Subscribe to our newsletter!
More from our blog
See all posts


