 Try lt Free
 Recovery success rate of up to
Imagine working on an important project, only to find that a crucial file has suddenly vanished. Whether it’s due to accidental deletion, an unexpected crash, a virus attack, or a corrupted system, losing files on your Windows 10 computer can feel overwhelming. Fortunately, Windows 10 offers a variety of built-in recovery tools and supports third-party software that makes restoring lost files more achievable than ever.
Chapter 1: File Loss in Windows 10
1.1 Common Causes of File Loss
Before jumping into recovery methods, it’s important to understand how file loss happens:
Accidental Deletion: Mistakenly deleting files using the Delete key or Shift + Delete.
Reformatting: Reformatting a drive erases all contents, making files inaccessible.
Corruption: Files can become corrupted due to improper shutdowns, software errors, or malware.
Hardware Failure: Hard drive malfunctions or bad sectors can render files unreadable.
Windows Update Errors: Some updates may reset system settings or move/delete user files.
Partition Loss: A drive partition may be deleted or become unrecognized.
1.2 Are Files Truly Gone?
When files are deleted in Windows, the space they occupy is marked as available—but the data remains until overwritten. This means recovery is often possible, especially if you act quickly.
Chapter 2: Initial Steps Before File Recovery
2.1 Stop Using the Affected Drive
If the file loss occurred on your main drive (e.g., C:), minimize usage. Every new file, even a small update, risks overwriting the deleted data.
2.2 Check All File Locations
Before assuming files are lost:
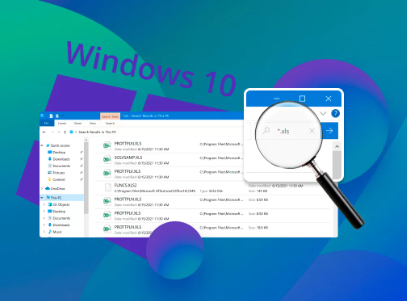
Search using Windows Search.
Look in the Downloads, Documents, Desktop, and Recent folders.
Verify OneDrive and cloud backups, if enabled.
2.3 Try System Restore (for system-related losses)
If files disappeared due to a Windows issue, a system restore might help:
Search for “Create a restore point”.
Click System Restore.
Choose a restore point before the data loss occurred.
Follow the prompts to revert your system.
Chapter 3: Using Built-In Windows 10 Tools
3.1 Recycle Bin Recovery
If the file was deleted with the Delete key (not Shift + Delete):
Open the Recycle Bin on your desktop.
Locate the file.
Right-click > Restore.
Restored files return to their original locations.
3.2 File History (If Previously Enabled)
File History lets you restore earlier versions of files or folders.
To enable/check File History:
Go to Settings > Update & Security > Backup.
Click More options > Restore files from a current backup.
To restore files:
Navigate to the original file location.
Right-click the folder > Restore previous versions.
Choose a version to restore.
3.3 Windows Backup and Restore (Windows 7)
Still available in Windows 10:
Open Control Panel > System and Security > Backup and Restore (Windows 7).
If you have a backup, click Restore my files.
Chapter 4: Using Third-Party Recovery Software
When Windows recovery tools aren’t enough, third-party software often fills the gap.
4.1 Choosing the Right Tool
Panda Assistant
Accidentally deleted a file on your Windows 10 PC? Lost important documents after a system crash or update? Panda Assistant is here to help you recover your lost files quickly, safely, and efficiently. Whether you’ve encountered accidental deletion, hard drive formatting, file corruption, or partition loss, Panda Assistant is a powerful solution designed to restore files with just a few simple clicks.
Panda Assistant uses advanced scanning algorithms to locate and recover lost files from your Windows 10 computer regardless of how they were lost. It supports recovery from internal drives, external hard disks, SSDs, USB drives, and memory cards. Whether you’re looking to recover documents, photos, videos, emails, or other file types, Panda Assistant makes the process smooth and reliable.
Getting started is easy. Just install Panda Assistant, select the drive where your files were lost, and run a Quick or Deep Scan. The tool will then display a list of recoverable files with the option to preview them before recovery. You can restore your files to a safe location without worrying about overwriting important data.
4.2 Generic Recovery Process
Here’s how to recover files using most recovery tools:
Download & Install the software—not on the drive where data was lost.
Launch the program and choose the affected drive.
Select a Quick Scan or Deep Scan.
Wait for the scan to complete—this may take a while.
Preview files, if available.
Select the files to restore and save them to a different location (not the same drive).
4.3 Tips for Better Recovery
Use Deep Scan if a quick scan fails.
Sort by file type or date to find what you need faster.
Don’t interrupt the scan.
Save restored files to an external drive.
Chapter 5: Recovering from Specific Situations
5.1 Recovering Shift + Deleted Files
Files deleted with Shift + Delete bypass the Recycle Bin. Use:
File History (if enabled)
Recovery software like Recuva or EaseUS
5.2 Recovering from a Formatted Drive
Even if you’ve formatted a partition, file data may still be recoverable:
Avoid writing new data.
Use tools like PhotoRec, Stellar, or Disk Drill with Deep Scan mode.
Recover files to another partition.
5.3 Recovering from a RAW or Corrupted Drive
If your drive says “RAW” or asks to be formatted:
Do not format it.
Use software that supports RAW recovery (e.g., Stellar, R-Studio).
Run CHKDSK only if you’re willing to risk file loss (use caution).
5.4 Recovering Files After Windows Update
If files are missing after a major update:
Look in C:\Windows.old\Users\[YourName]
Use File History or Backup & Restore if available.
Consider rolling back the update (Settings > Update & Security > Recovery).
Chapter 6: Command-Line Recovery (CMD Tools)
Windows Command Prompt offers recovery options for advanced users.
6.1 CHKDSK
c
CopyEdit
chkdsk D: /f /r
Scans and attempts to fix file system errors.
May recover lost file fragments.
6.2 Windows File Recovery Tool (Microsoft)
Free utility for Windows 10 version 2004 and later.
cmd
CopyEdit
winfr C: E: /regular /n \Users\YourName\Documents\
Recovers files from C: and saves them to E:
/regular for non-corrupted drives
/extensive for formatted/corrupted drives
Download from Microsoft Store: Windows File Recovery
Chapter 7: Cloud and OneDrive Recovery
If you’re using OneDrive:
7.1 Restore Deleted Files
Visit onedrive.live.com.
Click Recycle Bin.
Select files and click Restore.
7.2 Restore Previous Versions (Online)
Right-click a file in OneDrive > Version history.
7.3 Restore OneDrive Entire Library
Go to OneDrive settings > Restore your OneDrive.
Choose a date to roll back to (great after mass deletion or ransomware).
Chapter 8: Using Professional Recovery Services
When software fails or you’re dealing with hardware issues, professional help may be needed.
8.1 When to Seek Help
Clicking or beeping sounds from the hard drive
Drive isn’t detected in File Explorer or Disk Management
Physical damage (e.g., dropped laptop)
Corrupted master boot record (MBR)
8.2 What to Expect
Diagnostic phase: Identifying the issue.
Cleanroom recovery (for hardware failure).
Clone the drive and recover data.
Turnaround: 2–10 days.
Delivery: External drive, secure download, or cloud.
8.3 Trusted Recovery Services
DriveSavers
Secure Data Recovery
Gillware
Ontrack
8.4 Cost
Diagnostics: Often free
Recovery: $300–$3.000 depending on damage
Chapter 9: Best Practices for Prevention
Data recovery is useful, but data protection is essential.
9.1 Enable File History
Settings > Update & Security > Backup
Add a drive for File History
Set backup frequency
9.2 Use Cloud Storage
Enable auto-backup on OneDrive, Google Drive, or Dropbox.
Files are synchronized and version-controlled.
9.3 Use Backup Software
Acronis True Image
Macrium Reflect
Paragon Backup & Recovery
9.4 3-2-1 Backup Rule
3 copies of your data
2 different storage types (HDD, SSD, cloud)
1 off-site or cloud-based
9.5 Monitor Drive Health
Use CrystalDiskInfo or Hard Disk Sentinel to watch for early signs of failure.
About us and this blog
Panda Assistant is built on the latest data recovery algorithms, ensuring that no file is too damaged, too lost, or too corrupted to be recovered.
Request a free quote
We believe that data recovery shouldn’t be a daunting task. That’s why we’ve designed Panda Assistant to be as easy to use as it is powerful. With a few clicks, you can initiate a scan, preview recoverable files, and restore your data all within a matter of minutes.


