 Try lt Free
 Recovery success rate of up to
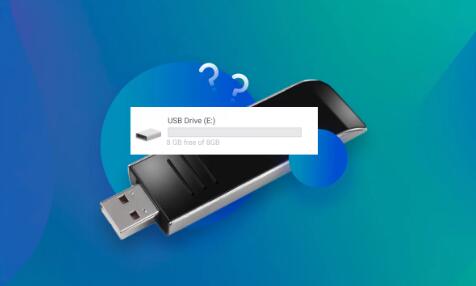
Flash drives, also known as USB drives or thumb drives, have become essential tools in everyday life. They are compact, portable, and easy to use, making them a preferred choice for transferring and storing files. From school projects and work presentations to personal photos and videos, people depend on flash drives to hold important data. But what happens when those files go missing?
1. Accidental Deletion
You may have deleted the wrong file without realizing it, or emptied the Recycle Bin after moving files off the USB. Deleting files directly from a flash drive often bypasses the Recycle Bin entirely.
2. Formatting
Sometimes users format the flash drive to fix an issue, or mistakenly click “Format” without backing up the contents. This action erases all data from the device, though the data may still be recoverable.
3. Corruption
If you remove your flash drive improperly or a virus infects it, it can become corrupted. Files may become inaccessible, appear as gibberish, or seem to disappear completely.
4. File System Errors
Your computer might prompt you to format the drive before use, indicating a file system error. This usually points to a logical problem rather than physical damage.
5. Physical Damage
Broken connectors, water damage, or severe drops can lead to physical failure. These cases often require professional recovery services.
Step-by-Step Recovery Process
Let’s break down the recovery process from easy solutions to more advanced techniques.
Step 1: Stop Using the Flash Drive Immediately
The moment you realize your files are gone, stop using the flash drive. Every time new data is saved, it may overwrite the space where your lost files still exist. Avoid adding, deleting, or moving files on the drive. This gives you the best chance of recovery.
Step 2: Check for Hidden Files
Sometimes files aren’t truly deleted—they’re just hidden by your operating system due to a virus or system error.
For Windows:
Insert your flash drive into your computer.
Open File Explorer and navigate to the flash drive.
Click on the View tab.
Check Hidden items to reveal any hidden files.
For macOS:
Open Terminal.
Type defaults write com.apple.finder AppleShowAllFiles YES and press Enter.
Type killall Finder and press Enter to refresh the view.
If your files appear, copy them to a safe location immediately.
Step 3: Try Recycle Bin (If Files Were Moved Locally Before Deletion)
If you copied the files to your computer before deletion, check the Recycle Bin or Trash on your system. You might get lucky and find them there.
If the files were deleted directly from the flash drive, they likely bypassed the Recycle Bin.
Step 4: Use Data Recovery Software
If your files were deleted, lost after formatting, or have disappeared due to corruption, data recovery software is your best friend. These tools scan the flash drive for remnants of files that have not yet been overwritten.
Here’s a general process using Panda Assistant or any reliable data recovery software:
Using Panda Data Recovery (or similar software):
Download and install the recovery tool (on your computer, not the flash drive).
Connect the flash drive to your computer.
Launch the software and select your flash drive from the list of detected devices.
Choose the type of scan:
Quick Scan for recent deletions.
Deep Scan for formatted drives or corrupted files.
Wait while the scan runs (this can take time depending on drive size).
Preview the files found.
Select the files you want to recover.
Click Recover and save the files to a different location (not the flash drive) to avoid overwriting other recoverable data.
Step 5: Try Command Prompt (Windows Users)
If your USB appears empty but is still taking up space, try restoring files using Command Prompt.
Steps:
Insert the USB.
Press Windows + R, type cmd, and hit Enter.
Type the following command:
bash
CopyEdit
attrib -h -r -s /s /d E:\*.*
Replace E: with your USB drive’s letter.
This command reveals hidden files and may restore visibility to lost documents.
Step 6: Check Previous Versions (Windows)
If File History or System Restore was enabled, you may be able to recover earlier versions of the files or folders.
To restore a previous version:
Right-click on the folder that contained the lost files.
Select Restore previous versions.
Choose the version you want and click Restore.
Note: This only works if you had set up File History or backups previously.
Step 7: Use Cloud Storage History
If your flash drive was used to transfer files that were later uploaded to cloud platforms (Google Drive, OneDrive, Dropbox), check those platforms. Many of them retain deleted files for up to 30 days or more in their “Trash” or “Recycle Bin.”
Also, explore their version history features. You might find a backup copy or previous version of your document.
Advanced Recovery Options
When standard methods fail, these more technical or professional approaches may help.
Try Linux Live Environment
Sometimes, a corrupted flash drive can be read using a Linux system, which handles file systems differently than Windows.
Create a bootable USB with a Linux distribution (e.g., Ubuntu).
Boot your PC from the USB.
Use Linux’s file manager to browse the corrupted flash drive.
Copy any visible files to another drive.
This method is useful when Windows shows the drive as unreadable.
Use a HEX Editor (For Experts)
Advanced users may use a HEX editor to scan the flash drive’s raw data for recognizable file headers and manually reconstruct lost files. This requires knowledge of file structure and binary data.
Physical Data Recovery Services
If your flash drive is physically damaged—broken connector, water damage, burnt circuitry—you’ll need a professional recovery service. These services open the drive in clean rooms, extract data using specialized equipment, and often offer no-data-no-fee guarantees.
This is the most expensive option but may be the only solution for irreplaceable data.
Preventing File Loss on Flash Drives
Once you’ve recovered your data, it’s time to focus on prevention. The best way to handle file loss is to not lose your files in the first place. Here’s how:
1. Eject Properly
Never remove a flash drive without clicking “Safely Remove Hardware”. Removing it while it’s in use can corrupt the file system.
2. Backup Regularly
Make it a habit to keep at least two copies of important files:
One on the flash drive.
One on your computer or a cloud service.
Set up automatic backups if possible.
3. Avoid Storing Critical Files on Only One Flash Drive
Flash drives are great for transport, but not ideal for long-term storage. Their small form factor makes them easy to lose, and their memory cells can wear out with time.
4. Use Antivirus Software
Always scan your flash drive before opening it—especially if it’s been used on multiple systems. Viruses and malware can corrupt or delete data.
Losing files on a flash drive is frustrating, but it doesn’t have to be permanent. By following the steps in this guide, you can often restore deleted, lost, or inaccessible files with minimal hassle. Whether you’re using simple methods like checking hidden files, or advanced recovery tools like Panda Data Recovery, the key is to act fast and avoid overwriting the flash drive.
Data loss is unpredictable, but it doesn’t have to be disastrous. With the right approach, tools, and a bit of patience, you can recover what was lost and take steps to prevent future incidents.
About us and this blog
Panda Assistant is built on the latest data recovery algorithms, ensuring that no file is too damaged, too lost, or too corrupted to be recovered.
Request a free quote
We believe that data recovery shouldn’t be a daunting task. That’s why we’ve designed Panda Assistant to be as easy to use as it is powerful. With a few clicks, you can initiate a scan, preview recoverable files, and restore your data all within a matter of minutes.
Subscribe to our newsletter!
More from our blog
See all posts


