 Try lt Free
 Recovery success rate of up to
Flash drives also known as USB drives, thumb drives, or pen drives are essential tools for storing and transporting data. Their portability, affordability, and ease of use have made them indispensable for students, professionals, photographers, IT technicians, and virtually anyone who needs to move data between computers. However, like all storage media, flash drives are susceptible to failure. A flash drive may suddenly become unreadable, display errors, or even fail to show up altogether on your device. When this happens, the priority is clear: repair the flash drive without losing any valuable data.
Flash drive issues can stem from a wide range of causes, including logical errors, corrupted filesystems, malware infections, physical damage, and power surges. The good news is that in many cases, the damage is logical rather than physical, and there are reliable techniques for repairing the drive and recovering your data.
The flash drive is not recognized by the computer.
The drive shows up but doesn’t open.
Files appear corrupted or have turned into unreadable characters.
You get error messages like “Please insert a disk,” “The file or directory is corrupted,” or “Access is denied.”
The flash drive requests formatting before use.
Data has disappeared or folders are empty.
Slow read/write speeds or freezing during data transfer.
These symptoms can be caused by logical errors, file system corruption, malware, or even a malfunctioning USB port. The severity ranges from simple software bugs to hardware failure. It’s crucial to identify whether the damage is logical (repairable via software) or physical (may need professional help).
Step 1: Basic Checks Before Repair
Sometimes the problem is surprisingly simple. Start with these basic troubleshooting steps before attempting deeper repairs.
Try Different USB Ports
Switch the flash drive to another USB port. Some ports might be damaged or lacking enough power, especially on older or underpowered systems. Prefer using USB ports directly on the motherboard rather than USB hubs or front ports.
Try Another Computer
Plug your flash drive into a different computer to see if it’s recognized there. If it works, the issue might be with your system’s drivers or operating system, not the drive itself.
Check Device Manager (Windows)
Right-click the Start button and choose Device Manager.
Look under Disk drives or Universal Serial Bus controllers.
If your flash drive has a yellow exclamation mark, it may have a driver issue.
Right-click and select Update driver or Uninstall device, then reconnect the drive.
Run Disk Management
Right-click Start and choose Disk Management.
Look for your flash drive in the list.
Check if it shows as unallocated, raw, or with no drive letter.
If no drive letter exists, right-click and assign one.
These quick checks often resolve simple connection issues and avoid unnecessary data recovery steps.
Step 2: Scan for Malware
Malware infections can corrupt the file system, hide files, or prevent access to your data. Use a reputable antivirus tool to scan both your system and the flash drive.
Run a full system scan and not just a quick scan.
If malware is detected, allow the antivirus to quarantine or remove it.
Once the malware is cleared, your data may become accessible again.
Some infections use attributes to hide your files. If your flash drive looks empty but still uses space, it may be hiding files.
Reveal Hidden Files (Windows)
Open Command Prompt as Administrator.
Type the following command:
bash
CopyEdit
attrib -h -r -s /s /d X:\*.*
Replace X: with your flash drive’s letter.
Press Enter. This will remove hidden, read-only, and system file attributes.
After running this command, check if your files are now visible.
Step 3: Use Windows Tools to Repair the Flash Drive
Windows comes with built-in utilities that can fix logical file system errors.
Method 1: CHKDSK Utility
CHKDSK (Check Disk) is a command-line tool that scans for file system errors and fixes them.
Open Command Prompt as Administrator.
Type:
bash
CopyEdit
chkdsk X: /f /r
Replace X: with the drive letter of your flash drive.
Press Enter. Allow it to complete the scan.
Explanation of options:
/f fixes errors.
/r locates bad sectors and recovers readable data.
If the drive is readable after this, your data should be intact.
Method 2: Error Checking Tool
Open File Explorer.
Right-click your flash drive > Properties.
Go to the Tools tab.
Under Error Checking, click Check.
Follow the prompts to scan and repair.
These tools are particularly helpful when the drive is recognized but inaccessible.
Step 4: Recover Data Using File Recovery Software
Panda Assistant
Panda Assistant is an intelligent data recovery tool designed to help users retrieve lost, deleted, or inaccessible files quickly and easily. Whether you’ve accidentally erased important documents, formatted a USB drive, or experienced data corruption due to software errors or malware, Panda Assistant offers a streamlined and user-friendly solution to get your files back without requiring technical expertise.
Built with powerful scanning algorithms, Panda Assistant can detect and recover a wide range of file types including photos, videos, documents, and audio files. It supports recovery from various storage devices such as hard drives, SSDs, USB flash drives, SD cards, and external storage media. The software is compatible with both Windows and macOS operating systems, making it a flexible choice for home users, students, professionals, and IT technicians.
One of the key strengths of Panda Assistant is its dual-scan approach: a quick scan to find recently deleted files and a deep scan for more thorough searches across damaged or formatted drives. Users can preview recoverable files before restoring them, helping ensure only necessary data is recovered. The clean and intuitive interface guides users step-by-step through the process, making complex recovery operations simple and efficient.
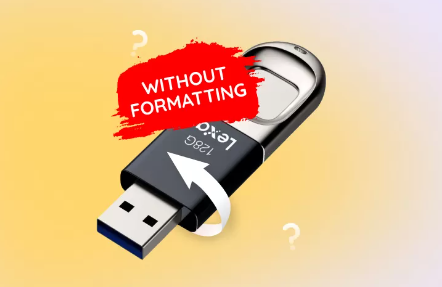
Step 5: Repair the Drive (Without Formatting If Possible)
Once your data is safe or recovered, you can attempt to fix the flash drive.
Assign or Change Drive Letter
Sometimes, your system won’t assign a letter to a connected flash drive.
Open Disk Management.
Right-click on the flash drive > Change Drive Letter and Paths.
Click Add or Change, then assign a new letter.
Rebuild the File System (Without Formatting)
If CHKDSK fails, rebuilding the partition table or file system using third-party tools can help.
MiniTool Partition Wizard or AOMEI Partition Assistant offer features to rebuild the Master Boot Record (MBR) or restore partitions.
These tools can detect lost partitions and file systems without formatting the drive.
Be cautious with these features—use the preview and export options before applying changes.
Step 6: Format (Only If All Else Fails)
If all recovery attempts fail and your flash drive is unusable, formatting it may restore functionality—but it erases all data. Only proceed with this after you’ve recovered your data.
Quick Format with File Explorer
Right-click the flash drive in File Explorer.
Choose Format.
Select file system: FAT32 (for general use), exFAT (for large files), or NTFS (for Windows use only).
Uncheck Quick Format for a thorough reformat (optional).
Click Start.
Format with Disk Management
Right-click Start > Disk Management.
Locate your flash drive.
Right-click and choose Format or Delete Volume > then create a new one.
Format with Command Line
If GUI methods fail:
Open Command Prompt as Administrator.
Type:
pgsql
CopyEdit
diskpart list disk select disk X clean create partition primary format fs=fat32 assign exit
Replace X with your disk number.
This method completely cleans and remaps the flash drive.
Prevention: How to Avoid Flash Drive Corruption
Once you’ve repaired your flash drive or replaced it, take measures to prevent future problems:
Eject Safely
Always use “Safely Remove Hardware” before unplugging the drive. Removing it during a write operation is a common cause of corruption.
Backup Regularly
Don’t rely on a flash drive as your only copy of important data. Use cloud services or external hard drives for redundancy.
Avoid Full Capacity
Leaving 10-20% of the drive free improves longevity and performance.
Scan Regularly
Use antivirus software to scan your flash drive whenever you connect it to a new computer.
Handle with Care
Don’t bend, drop, or expose the flash drive to water or high temperatures.
When to Seek Professional Help
Some situations require professional data recovery services:
The flash drive is physically broken or bent.
It heats up abnormally.
It makes clicking or buzzing noises (rare in flash drives).
BIOS or operating systems do not detect it at all.
The NAND memory chip is failing.
Professional services may offer chip-level data extraction, though they can be expensive.
Repairing a flash drive without losing data is often possible with the right approach and tools. Start by diagnosing the problem through basic checks. Use built-in Windows utilities like CHKDSK and Disk Management to repair logical issues. If these don’t work, rely on reliable recovery software to retrieve your data before proceeding to format or deeper repairs.
Understanding the warning signs and common causes of failure can help you take preventive measures, safeguarding both your flash drive and your data. With a combination of patience, the right tools, and careful handling, you can often bring a faulty flash drive back to life and protect your valuable information.
About us and this blog
Panda Assistant is built on the latest data recovery algorithms, ensuring that no file is too damaged, too lost, or too corrupted to be recovered.
Request a free quote
We believe that data recovery shouldn’t be a daunting task. That’s why we’ve designed Panda Assistant to be as easy to use as it is powerful. With a few clicks, you can initiate a scan, preview recoverable files, and restore your data all within a matter of minutes.


