 Try lt Free
 Recovery success rate of up to
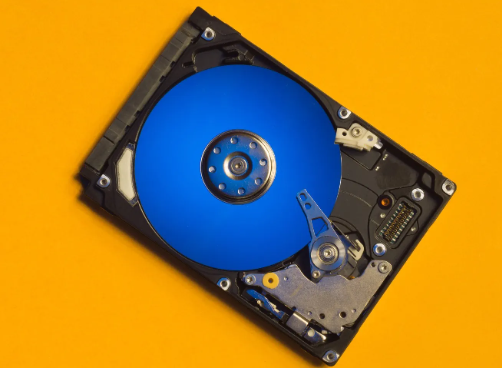
Over time, computers come and go, but hard drives especially those from old laptops, desktops, or external enclosures often contain memories, documents, and data you don’t want to lose. Whether you’re upgrading systems, reviving an abandoned machine, or trying to rescue data from a failing hard disk, recovering files from an old hard drive can feel like unlocking a digital time capsule. Fortunately, you don’t need to be an IT expert to do it. With the right steps and a bit of patience, you can access, transfer, and preserve your data securely.
Step 1: Identify the Drive Type
Before connecting the old hard drive to a new system, determine what kind of drive you’re working with.
IDE vs. SATA
SATA Drives are the most common for machines built after 2005. They use a slim connector with a distinctive L-shape.
IDE (PATA) Drives are older and use a wide ribbon cable with many pins. These were common in systems from the late 90s to early 2000s.
HDD vs. SSD
HDDs (Hard Disk Drives) use spinning platters and are more prone to mechanical failure.
SSDs (Solid State Drives) are faster and more durable, often found in newer machines.
Step 2: Physically Remove the Drive (If Necessary)
If your drive is still inside an old computer, you’ll need to remove it.
Tools You May Need:
Small Phillips-head screwdriver
Anti-static wrist strap (optional but recommended)
External enclosure or SATA/IDE to USB adapter
Desktop PCs:
Power off and unplug the PC.
Open the case using a screwdriver.
Identify the hard drive (usually located in a drive cage).
Disconnect the power and data cables.
Unscrew and remove the drive.
Laptops:
Power off and remove the battery (if removable).
Look for a dedicated hard drive bay on the back or side.
Unscrew the panel and gently remove the drive.
Step 3: Choose a Connection Method
Once the hard drive is out, you’ll need a way to connect it to your current computer.
Option 1: USB-to-SATA/IDE Adapter
Ideal for quick access.
Plug the drive into the adapter, then into your computer’s USB port.
Option 2: External Hard Drive Enclosure
Offers a more permanent and secure solution.
Insert the old drive into the enclosure, close it, and connect it via USB.
Option 3: Install It as a Secondary Drive
If you’re comfortable opening your new desktop PC, you can install the old drive directly inside.
Connect it using a SATA data cable and power connector, then boot your system.
Step 4: Access and Transfer Files
Once connected, power on your current computer and check if the drive is recognized.
On Windows:
Open File Explorer and look for the new drive under “This PC.”
If it appears, browse the folders (e.g., Documents, Pictures, Desktop) to locate files.
Copy and paste them to a new location on your primary drive.
On macOS:
Use Finder to locate the new drive on the sidebar.
Navigate through the user folders and transfer files as needed.
On Linux:
Mount the drive manually if it doesn’t auto-mount.
Use file manager or terminal commands to access and copy data.
Step 5: Handle Access Permission Issues
Sometimes, you may encounter “Access Denied” or other errors when trying to open user folders from the old system.
On Windows:
Right-click the folder > Properties > Security > Advanced.
Click Change Owner and enter your username.
Check Replace owner on subcontainers and objects.
Click OK and retry accessing the folder.
On macOS/Linux:
Use sudo commands to gain access via terminal.
Change folder permissions using chmod and chown.
Step 6: Recover Files from Non-Working Drives
If the drive doesn’t appear or makes clicking or grinding noises, you may be facing a more serious issue.
Symptoms of a Failing Drive:
Clicking or beeping sounds
Not spinning up at all
System doesn’t detect the drive
Very slow access or timeouts
Option 1: Try a Different USB Port or Adapter
Some drives don’t work with certain USB hubs.
Switch to a powered USB hub if your drive is power-hungry.
Option 2: Use Disk Management or Disk Utility
On Windows, open Disk Management to see if the drive is detected without a letter.
On macOS, use Disk Utility to mount or repair the drive.
Option 3: Data Recovery Software
Panda Assistant
Panda Assistant also emphasizes safety and data integrity. The recovery process is non-destructive, meaning it doesn’t overwrite existing data or further compromise the storage device. This is especially important when working with fragile or failing media. For more advanced users, the software includes features like session saving, custom file filtering, and raw recovery options.
Compatible with both Windows and macOS, Panda Assistant adapts to various recovery situations with reliability and speed. Whether you’re a student recovering class notes, a photographer salvaging lost shoots, or a business user restoring critical work files, Panda Assistant offers a dependable path to getting your data back.
Step 7: Recover Data from Dead Drives
If your old hard drive doesn’t spin up or isn’t recognized at all, you’re likely facing a hardware failure. Your options are more limited, but here’s what you can try:
Freezer Trick (Last Resort):
Seal the drive in a Ziploc bag.
Place it in the freezer for a few hours.
Reconnect quickly and attempt to retrieve files.
Note: This is not recommended for modern drives and is risky.
PCB Swap:
Advanced users can try swapping the logic board (PCB) from a matching donor drive.
Must match model number, firmware, and revision.
May require BIOS chip transfer.
Professional Data Recovery:
If the data is critical, send the drive to a professional recovery service.
These companies can open the drive in cleanroom environments and retrieve data using specialized equipment.
Costly, but often the only solution for dead drives.
Step 8: Organize and Backup Retrieved Files
After recovering your data:
Sort files into meaningful folders (Documents, Photos, Music, etc.).
Rename and date folders for easy reference.
Scan all recovered files for malware.
Back up to an external hard drive, cloud storage, or a second system.
Recommended Backup Options:
Cloud Storage: Google Drive, OneDrive, Dropbox
Local Backup: External hard drives with automated software (e.g., Acronis, Mac Time Machine)
NAS: Network-attached storage for continuous home backups
Special Cases and Additional Tips
Recovering Data from Old Operating Systems
If your drive used Windows XP, Vista, or older Mac OS formats, some systems may not read the file system easily.
Use Linux Live USB to boot and read unusual formats.
On Mac, use Paragon or Tuxera to read NTFS drives.
On Windows, use tools like HFSExplorer for old Mac drives.
Password-Protected Drives
If you used drive encryption (e.g., BitLocker, FileVault), you’ll need the recovery key or password. Without it, recovery is nearly impossible.
For BitLocker: Use the recovery key stored in your Microsoft account.
For FileVault: Use the password or recovery key generated during setup.
Dual-Boot or Linux Drives
If your old drive used a Linux file system (like ext4):
On Windows: Use Ext2Fsd or DiskInternals Linux Reader.
On Linux or dual-boot: Mount using mount command and browse normally.
Avoiding Future Data Loss
Once you’ve successfully retrieved your files, it’s wise to prevent this situation from happening again.
Set Up a Backup Schedule
Use built-in tools like File History (Windows), Time Machine (Mac), or rsync (Linux).
Automate cloud backups with scheduled syncs.
Monitor Drive Health
Tools like CrystalDiskInfo, SMARTReporter, and GSmartControl can monitor drive health in real-time.
Decommission Drives Safely
Once you’ve transferred data, consider securely wiping the old drive before recycling or repurposing it.
Use tools like DBAN (Darik’s Boot and Nuke) or Blancco Drive Eraser to ensure data can’t be recovered.
Getting files off an old hard drive may seem like a technical task, but with a structured approach, anyone can do it. Whether you’re transferring family photos from a decade-old laptop or salvaging important business documents from a forgotten desktop, the tools and methods are within reach.
Start by identifying your drive, connecting it with the right hardware, and using your operating system or recovery software to access and copy the files. If the drive is damaged or non-functional, advanced recovery techniques or professional services may be necessary.
About us and this blog
Panda Assistant is built on the latest data recovery algorithms, ensuring that no file is too damaged, too lost, or too corrupted to be recovered.
Request a free quote
We believe that data recovery shouldn’t be a daunting task. That’s why we’ve designed Panda Assistant to be as easy to use as it is powerful. With a few clicks, you can initiate a scan, preview recoverable files, and restore your data all within a matter of minutes.


